|
How to add embelisments, accents and pockets to your ring sling . This article was originally published by me as a pdf. You can find the pdf and other DIY patterns on my DIY page. Don't have time to sew? Custom orders are available. Please contact me for details. 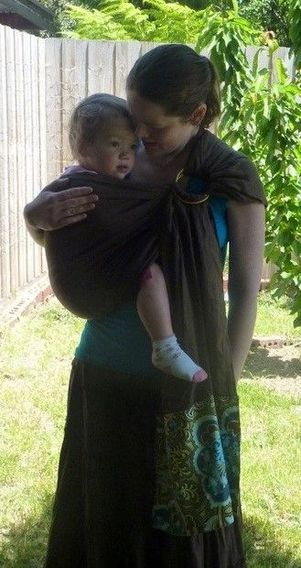 Your ring sling doesn't need to be boring. Adding bling to your ring sling is easy! Some of these ideas can be sewn straight on top of the tail or a plain ready made sling and others require you to sew the accent on before you sew in the rings. Ribbon TrimAdding ribbon, beaded trim, or braid is the simplest way to decorate your sling. You can create some great effects with ribbon or beaded trim. You can also sew a ribbon to the bottom or top of a fabric accent.
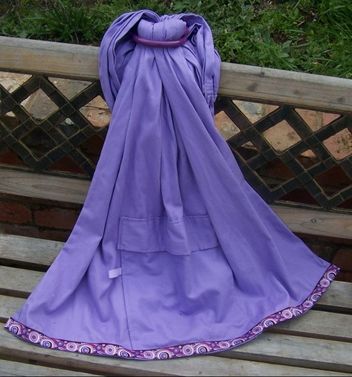
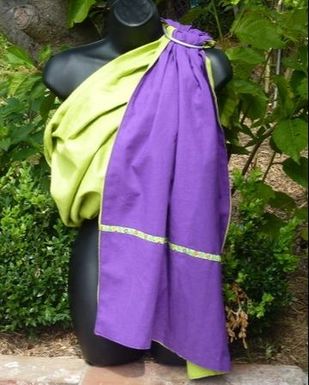
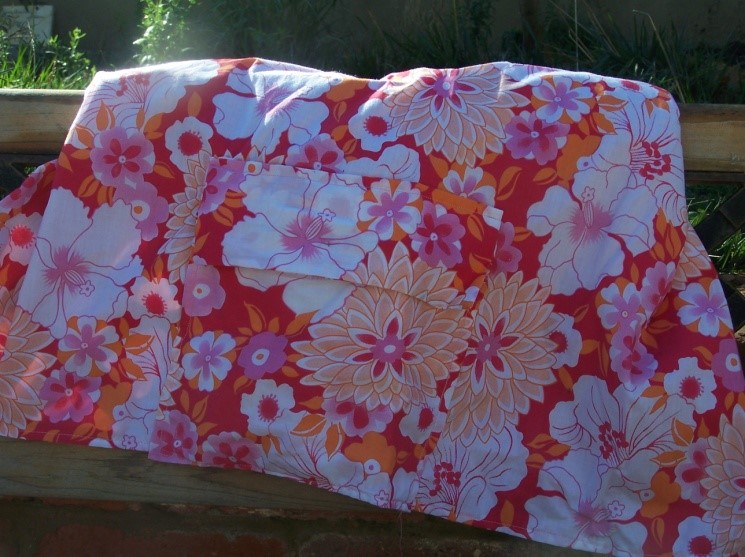
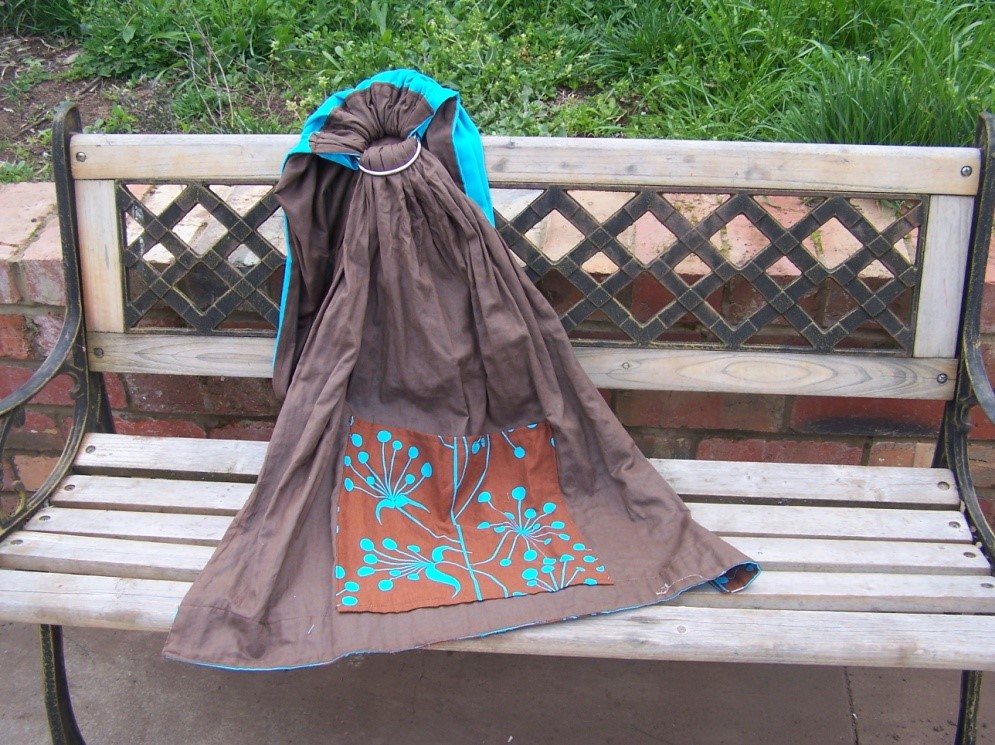
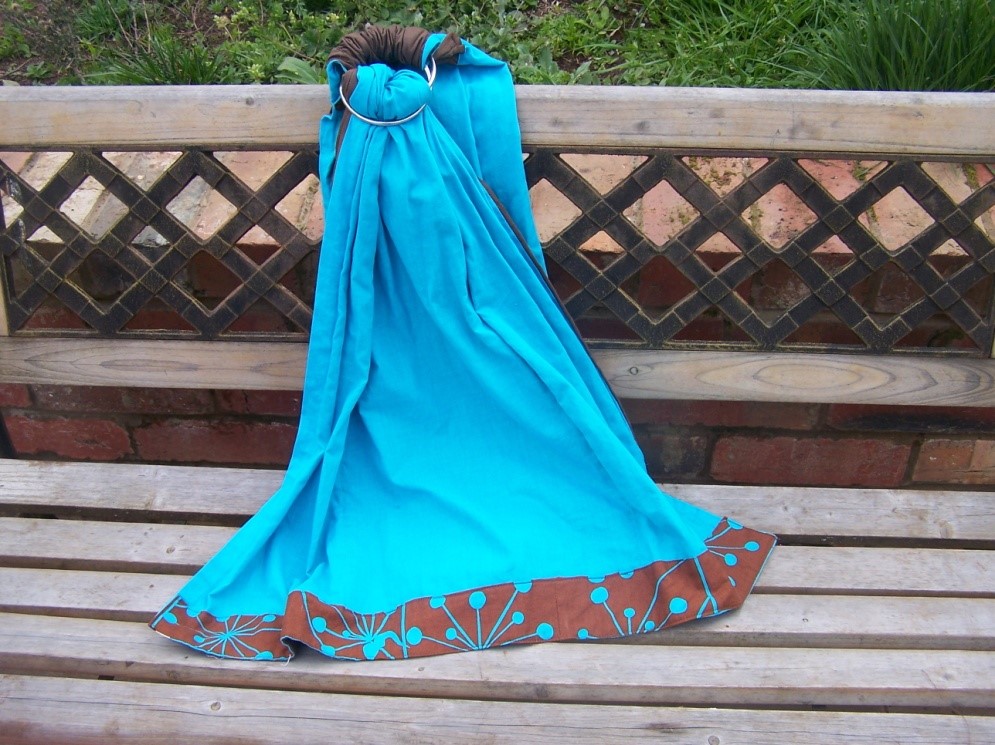
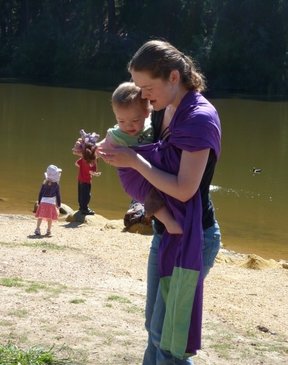
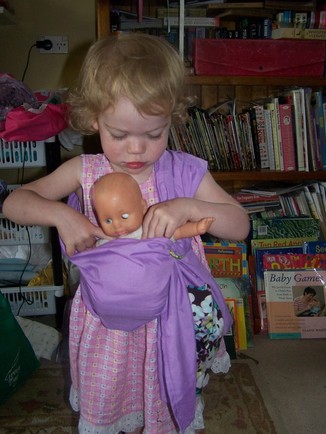
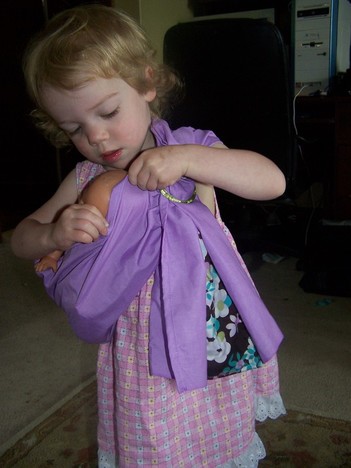
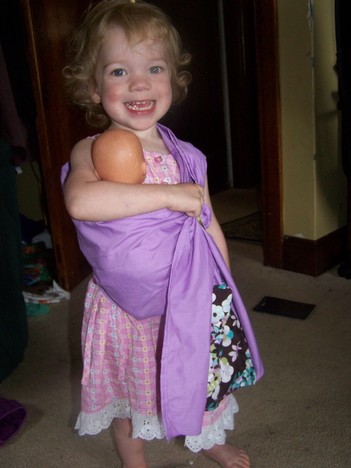
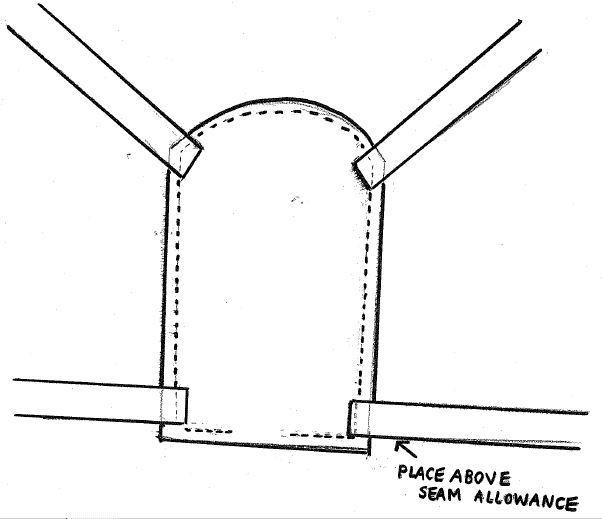
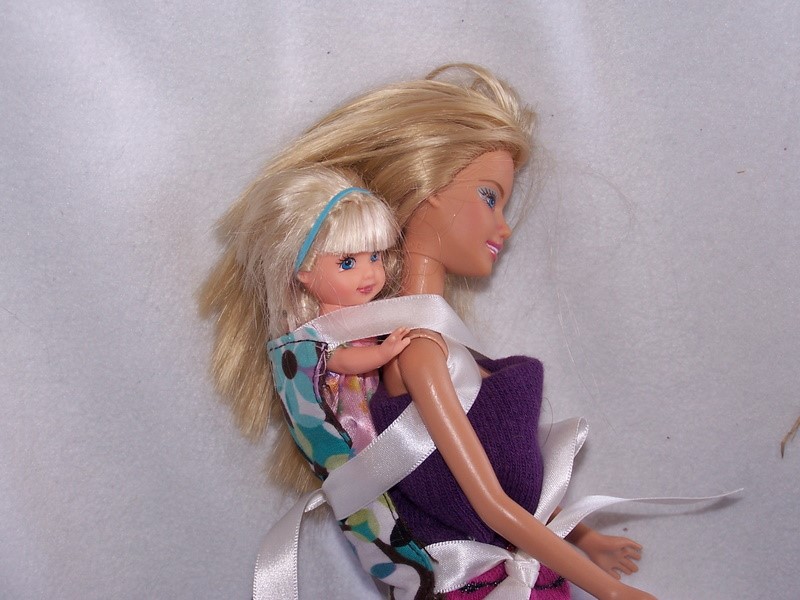
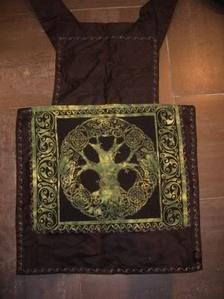
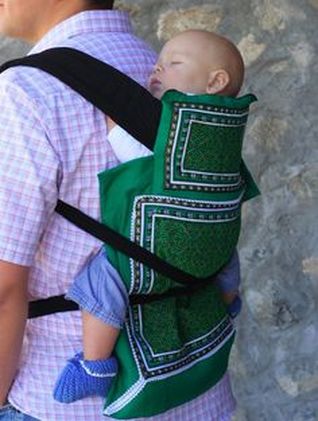
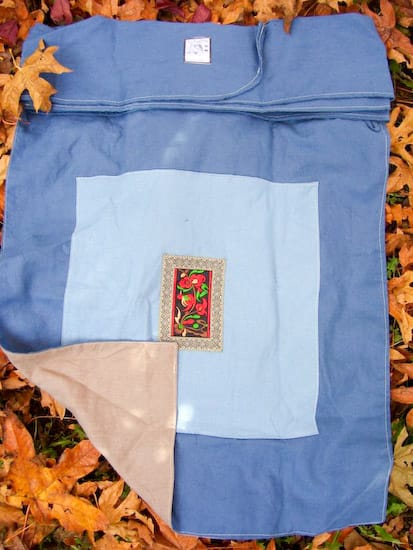
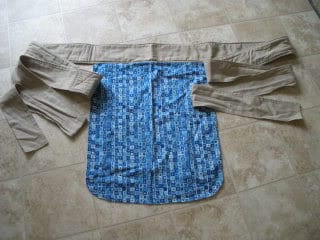
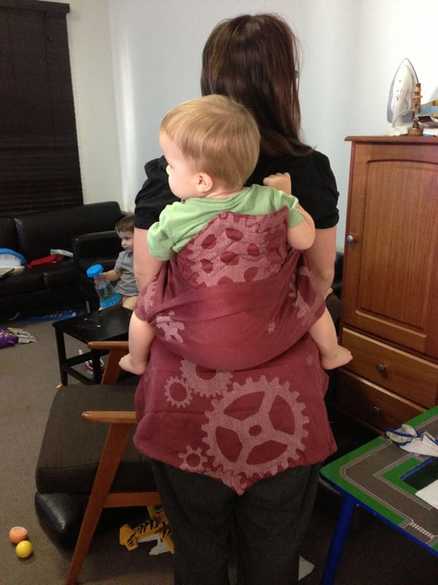
Fabric Accent With Optional Hidden Pocket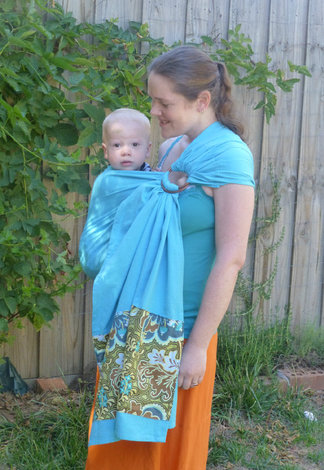 I generally don’t do accents longer than 42cm from the bottom edge of the tail so the accent won’t get caught in the rings if being shared by more than one wearer and the pocket (if you have one) is useable. The pocket will gape open if it is too close to the rings so take this into account when deciding what length of sling to make or the length of the accent. 30cm is a good accent height. You can leave a gap between the bottom of the accent and the bottom edge of the sling for a nice contrast or sew the accent right to the bottom edge. Fabric Needed: width of finished sling + 2.5cm x (length of accent + 4cm (for pressing and hemming). 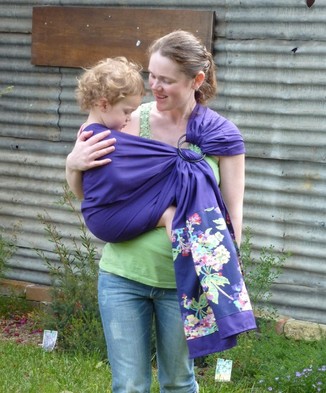 Sewing Instructions 1/ Hem the top edge of your accent then turn and press bottom edge under 12mm. The edge of the accent can be right on the bottom edge of the sling or you can place it 5-10cm from the edge. If you don’t want a pocket in your accent you don’t need to hem the top edge, simply press the top edge under by 12mm. 2/ Press the two short edges under by 12mm. 3/ Pin the accent on the wrong side of the sling (the side with the seam at the rings showing and the side of the tail with the neat side of the hem), so when the sling is threaded the accent will end up on the right side. Sew the sides and bottom edge of the accent to the sling. 4/ Sew the top closed to complete your accent or follow the directions below to make a hidden pocket. Adding a hidden pocket 5/ Divide the tail accent in three and mark with tailor’s chalk to the width of the accent. Sew three lines of stitching over your marks. 6/ With the right side of the tail (fashion fabric side) facing up, sew the top edges of two sections closed, leaving the middle section open to form a pocket. 7/ Cut one or two small pieces of Velcro about 3.5cm long. Sew one hook and one loop piece to the top of the pocket and the sling body to help keep it closed. Tip: When adding an accent to a reversible sling, when threading your machine, put your top colour of your sling through the needle and the bottom colour in the bobbin. The sewing lines will be hardly noticeable on the other side. Alternatively use the sewn in accent method. See the pocket section for some more examples of accent slings. 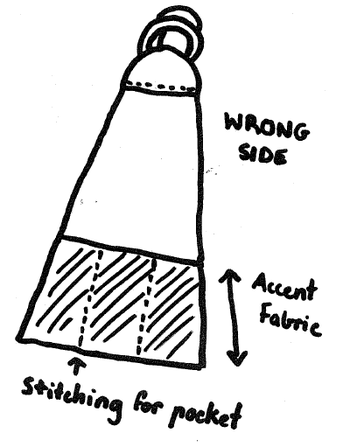 Adding an accent to lengthen a too short sling/Double sided accentLength of material needed 74cm x 84cm (or double the width of accent you want plus 2.5cm seam allowance added). Sewing Instructions 1/ Put your sling on and decide where you would like the top of the accent to fall. No higher than around 18cm from the rings is a good guide, to prevent the accent being caught in the rings when making adjustments. 2/ Fold one long edge of the accent under 12mm. Pin on the edge of the sling or further up covering some of the tail (it depends on the finished length you would like, how you want the accent to sit and if you want to cut off any of the tail before sewing). Sew this edge to the sling. 3/ Fold the accent in half wrong sides together and pin the short edge on the tail, following your previous stitching line. Carefully pin the short sides together, then sew the two short edges from top to bottom. You can also topstitch along the bottom of the accent for a neater finish. 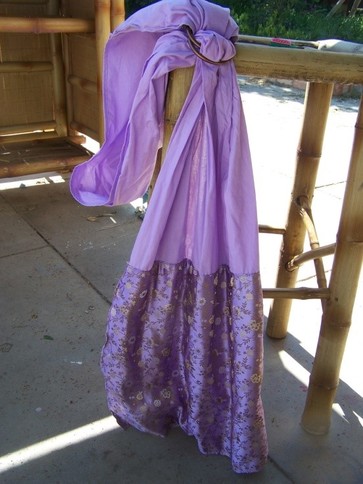 Overhanging Lace AccentI think a very long lace overlay looks great on the tail of a sling but you can use a shorter length for a less dramatic effect. See information about accents above to decide on the length, just add some extra length if you want a tail overhang. For the sling below which has a very long accent you will need about a metre of fabric which will overlap the end by about 25 – 35cm. After you have made up your sling, cut your lace to size and hem the end and sides, then iron the top edge over by 12mm or if it has a neat selvedge you can just leave it. Pin the lace in place and sew to the sling along the top and sides.. 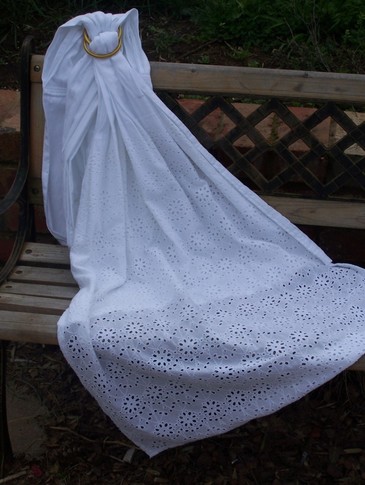 Sewn in AccentThis method gives a neat finish on a double layer sling. Decide how long you would like the accent to be then subtract the same amount of length from the side you want the accent to show on. Don’t forget to add 12mm seam allowance to your solid colour and accent fabric. Begin with two the long pieces of your sling fabric. Sew the accent to your short solid colour piece, right sides together, turn right side out and iron. Sew the two sides of the sling using the reversible sling directions found in the Hipababy Ring Sling Pattern (see my DIY page). Find the turning hole and iron the seam allowance inwards. Topstitch. You are now ready to sew in the rings. 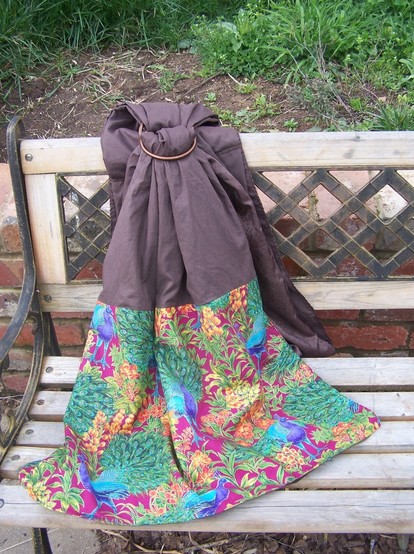 Patch pocket with optional flap and velcro clousre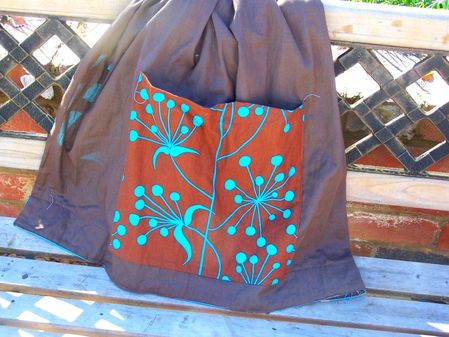 The flap of this pocket is handy to ensure nothing can fall out of your pocket and if you place the pocket on the sling edge you can fold the whole sling up and tuck it up into the pocket for handy storage. You can use these directions to make a simple patch pocket and it is easy to alter the size of the pocket to suit you. The dimensions given below are for a small pocket, with the finished size of 23cm x 23cm. I use a 6mm seam allowance for the pocket flap and 12mm for the rest of the pocket Cut your material to these dimensions – 25.5cm x 25.5cm Cut the pocket flap 25.5cm x 18cm 1/ Hem the top edge of the pocket and press the sides under. Sew a strip of Velcro to the top edge of the pocket (right side). You can sew Velcro along the whole top edge or put a small strip in the middle or two small strips on either side. For a pocket with no flap sew the Velcro to the wrong side of the pocket. Sew to pocket to the sling. Move the top of the pocket out of the way a little to sew the opposite strip of Velcro to the sling. 2/ Right sides together fold the flap in half and sew around all edges (6mm seam allowance), leaving a hole for turning. 3/ Turn the pocket flap right side out, press and then pin and sew three edges to the top of your patch pocket. The flap will overlap the top edge of the pocket - by how much is your choice.
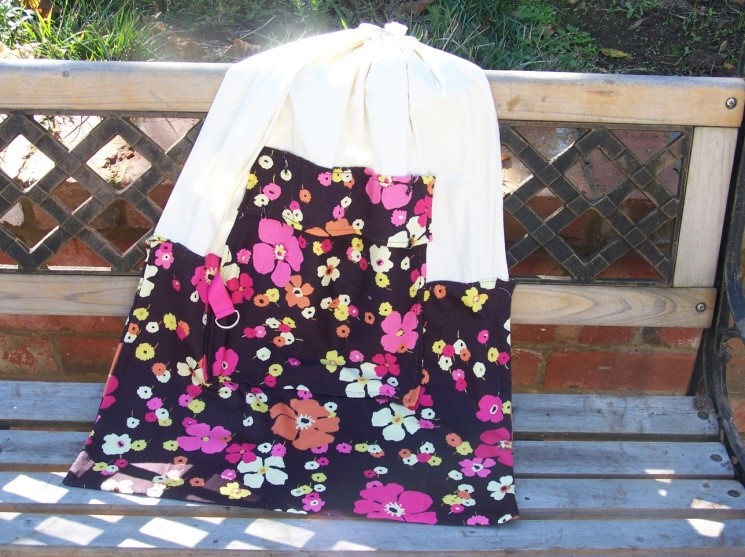
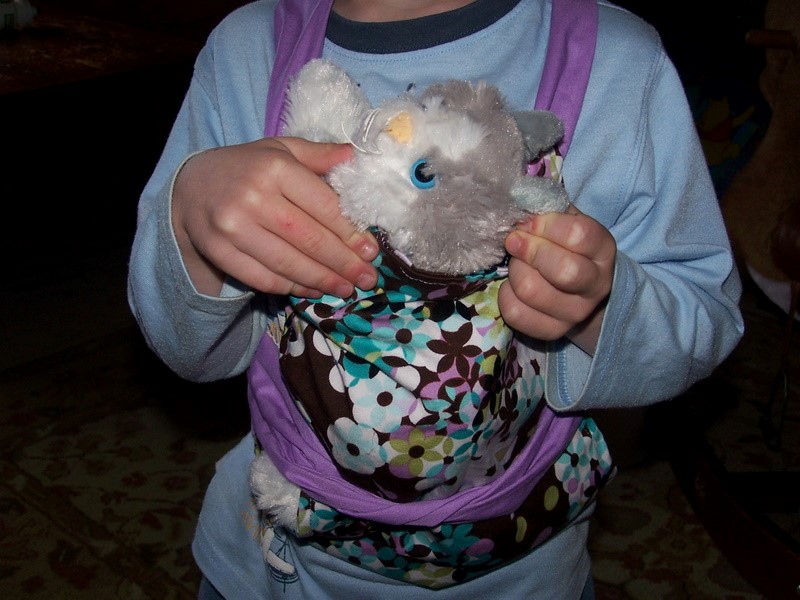
Patch pocket and border from a fat quarter
Using a fat quarter you can make a pocket and a border. You will need to piece the border together so choose a design which will lend itself to this. For the pocket you will need: 32.5cm x30cm (finished size 30cm (wide) by 27cm tall) For the border on the opposite side you will need: 7cm x width of sling, plus 2.5cm seam allowance. To make the pocket: 1/ Hem the top edge with a 12mm rolled hem. 2/ Press under 12mm on the remaining sides. 3/ Sew two pieces of Velcro to the pocket top (on the wrong side). 4/ Lay the pocket on the sling where you would like to place it. Note where the opposite pieces of Velcro should go. Sew these to the sling. 5/ Sew the pocket to the sling making sure the Velcro pieces match up. 6/ Sew two strips of fabric (right sides together) with a 12mm seam to form a long strip, matching the design. Press the strip and then press all edges under by 6mm. Sew to the bottom of the sling. 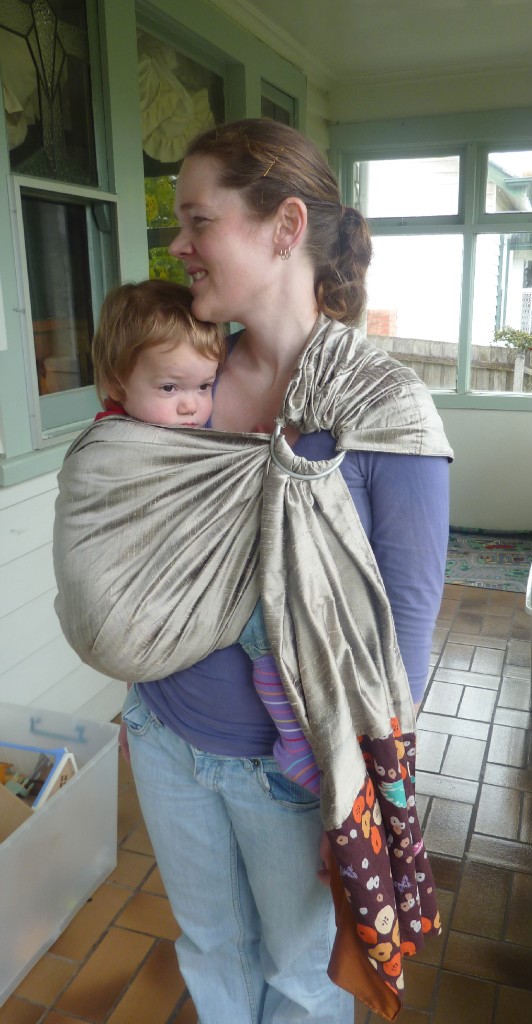
0 Comments
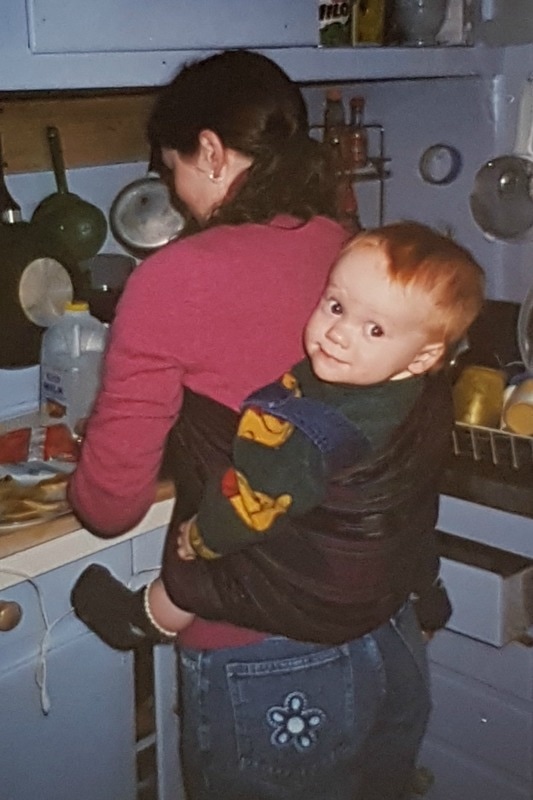
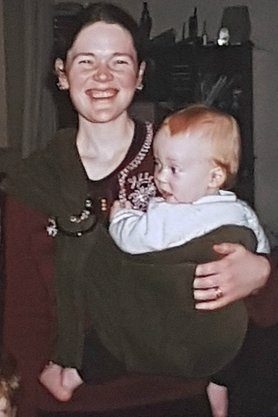
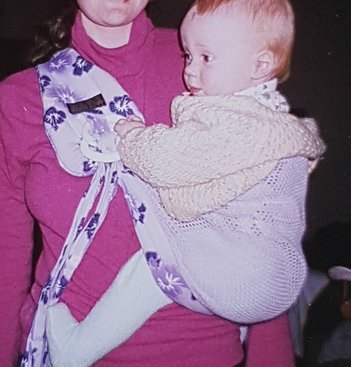
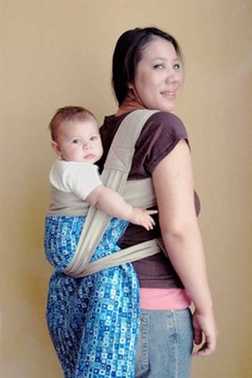
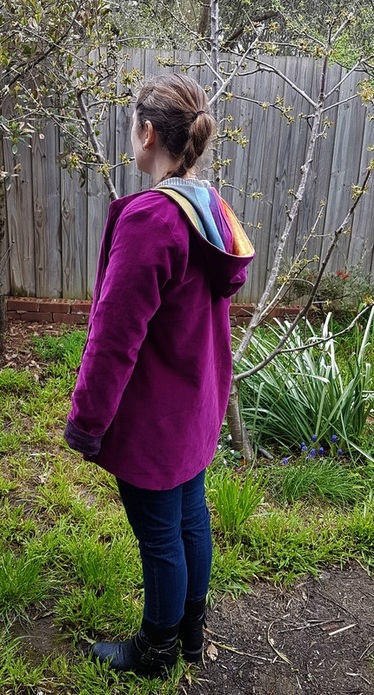
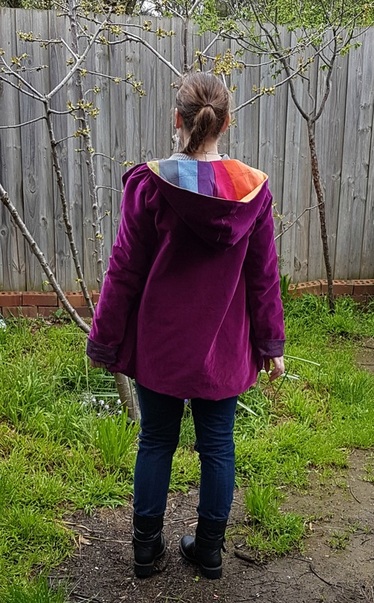
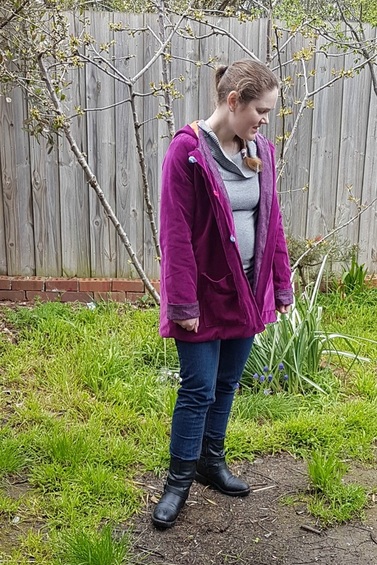
Winter jacket upcycled from a pure wool blanket and lined with wrap scrap (Didymos Colourgrown). I only used about 1.5m of scrap - as I used another fabric to line the parts of the jacket you can't see. The wool fabric is from an upcyled blanket. It's so warm! Thanks to Twig and Tale for the pattern. I still need to add buttons so I'll update when I have done that. This was so much fun to make . 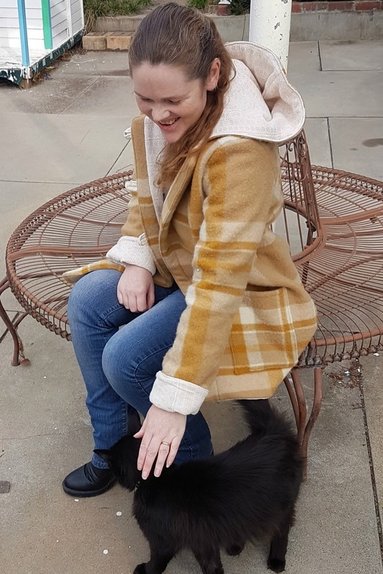 How did you discover babywearing? What was your first carrier? Did you learn from a babywearing group or a friend or did you learn on your own? I would love to hear your story! You are welcome to share in the comments section below. Here's my story. I only had a front pack with my first which I didn’t love so I only used it for a few months and I don't even have any photos (but it still counts right?). In 1999 there was no TheBabywearer.com and no Facebook so I didn’t have access to a lot of options. I wish I had have thought of making my own back then since my son would have loved being carried more! Unfortunately I didn't start making my own carriers until baby number three - I stopped sewing for a while as I found it frustrating to working in little pieces of time and being constantly interrupted (used to it now though!). Before my second son was born I saw an ad in the back of a parenting magazine for a Hug a Bub stretchy wrap and a corduroy padded closed tail ring sling. So I bought both - through mail order! I loved both, the rings sling especially for it's very handy pocket, though in hindsight the ring sling was probably unsafe (a single layer of corduroy is not a sufficient weight bearing fabric). I later added a Maya wrap (loved the fabric but it was the old unpadded style sized only for for the left shoulder so it was a bit tricky to switch shoulders when I wanted too). Also had a mesh ring sling which was almost impossible to get comfortable! Thebabywearer.com started up around then and it was so great to know I wasn't the only babywearer around - (the local babywearing group didn’t start up till years later when my fifth child was a toddler and I wasn't babywearing much anymore). I learned a lot from The Babywearer forums and found the photo tutorials really useful especially when I became interested in other styles of carriers . And for a long time my internet was too slow to load any videos! (Apologies for the quality of some of the photos which are from my photo album, some are before I got a digital camera and some I couldn't find the originals).
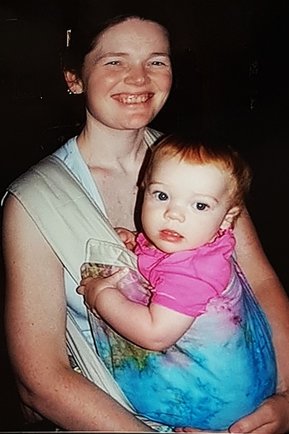
I wore him (mostly in the ring slings) until he was three or so. When I had my third child (11 years ago) a few small baby wearing businesses had started up (mostly overseas ) so I bought a few slings to try and soon after also started sewing again taking advantage of some of the free patterns available on the internet. So with my daughter I had a combination of bought and handmade carriers, mostly ring slings, but also some mei tai's (meh dai's) and an ellaroo podaegi. Although she preferred the ring sling out of all of them so that's what I mostly used! Once I discovered how comfortable unpadded ring slings were I never went back to my bulky commercially made padded ones. I experimented with a lot of different fabrics for ring slings. I made many but could not find one photo! A lot of them can be found in my ring sling patterns however. Check out my DIY page and the 'Bling for your Sling' pattern for pics.
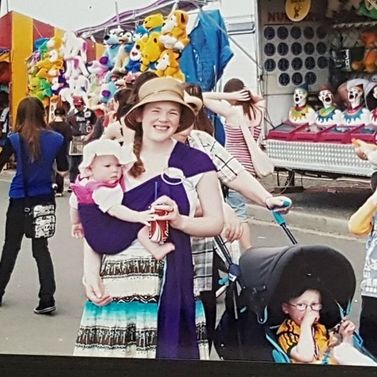
I wore babies four and five in all kinds of carriers and thoroughly enjoyed exploring babywearing with them. With my fourth child I also discovered woven wraps. My second daughter was quite happy being carried in a mei tai/meh dai so she is the one who helped me develop my meh dai and half buckle designs. I made my first wrap conversion for her (from a striped BB Slen wrap scrap and a Didymos colourgrown waves I had dyed a lovely woodland brown). Handmade carriers.
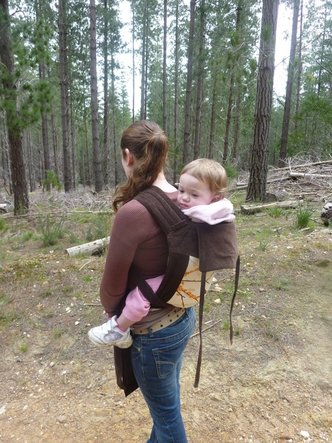
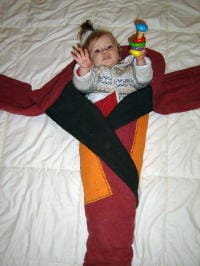
My youngest is five now and is most likely finished being worn. I haven't worn him in a few months. Below is a full buckle I made for him - he's four in the photo. At five he still fits, he just prefers other forms of comforting now. I will miss babywearing!  This pattern includes adjustable pouch with curved seam, non-adjustable pouch, ring sling with optional pocket in the tail and ideas for embellishments, and a mei tai/meh dai). Don't have time to make your own?Buckle doll carriers are available to purchase in my shop. Need any help or want to show off your creations? Join my Facebook chatter group here https://www.facebook.com/groups/1374361185941904/
Child Sized Pouch With Curved Seam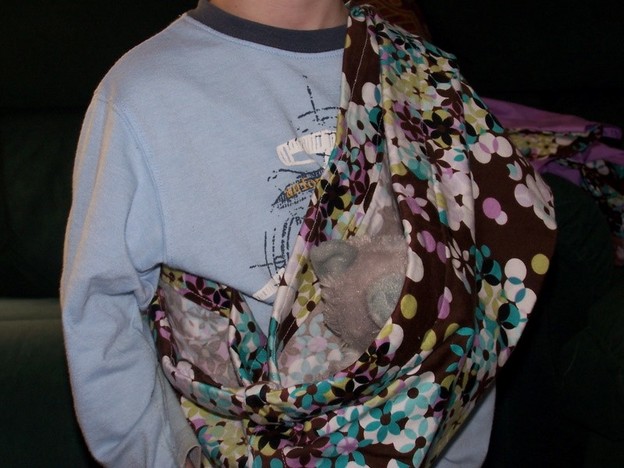 Non-adjustable Pouch Material needed –toddler 43cm x 89cm - preschooler 43cm x 101.5cm - primary schooler 43cm x 112cm For a narrower width pouch suitable for small dolls only - cut to a 35.5cm width For a pouch that will fit your child exactly, measure your child from the edge of their shoulder to the outside edge of their hip. Double this measurement and add 10cm. Add a few inches to this to allow for growth if desired. 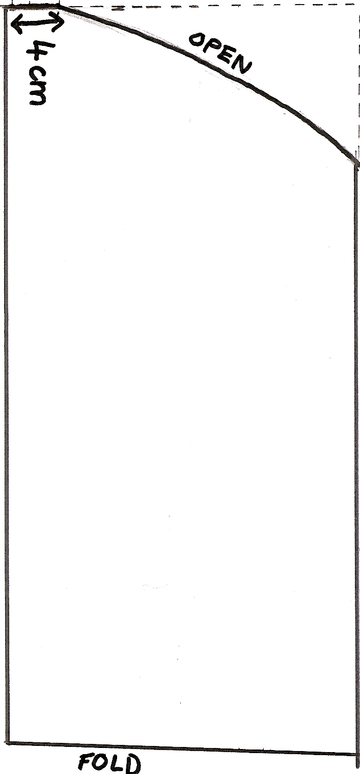 1/ Fold material in half widthwise and lengthwise. Measure 5cm from the top end, then measure 4cm along the short open end – draw a gentle cure between these points. 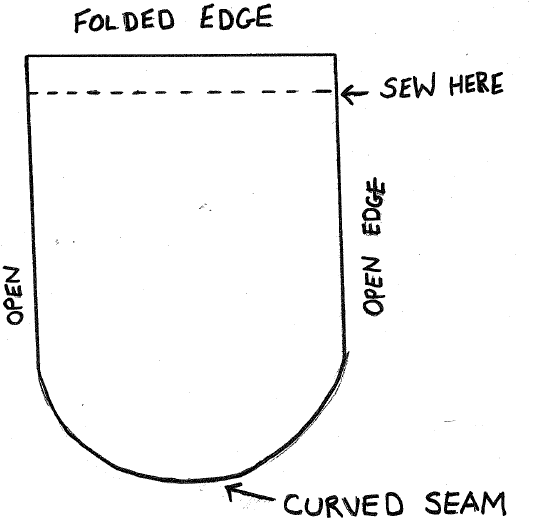 2/ Open out the material. There should be a gentle curve or ‘smile’, on both ends. Right sides together sew the ‘smiles’ together. You can finish your sling now or sew a French seam (an enclosed seam) for a neater finish but it is not necessary unless you are making a reversible pouch. 3/ To make a French seam. After sewing the ‘smiles’ together, fold the seam over so the raw edge is enclosed and sew. This will leave an enclosed flap of material sticking out, sew this down to the sling carefully. 4/ Fold pouch in half lengthwise, creating a loop of fabric with one open side, this is where the doll will sit. You’re done! Adjustable Pouch This pouch will fit a child across all the size ranges given so you don’t need to make a new pouch as your child grows. If you wish to make it longer (i.e. to fit an older primary schooler) add more to the length and add more strips of Velcro spacing them as per the instructions below. You will need 45cm of 15mm wide Velcro for the basic pouch. Cut material to 43cm x 122cm, then follow steps 1-4 above. 1/ Cut across the top of the pouch where it is folded, opposite the curved seam. 2/ Turn the sling inside out and right sides together sew across each open end. Turn right side out. Your sling will look like this: 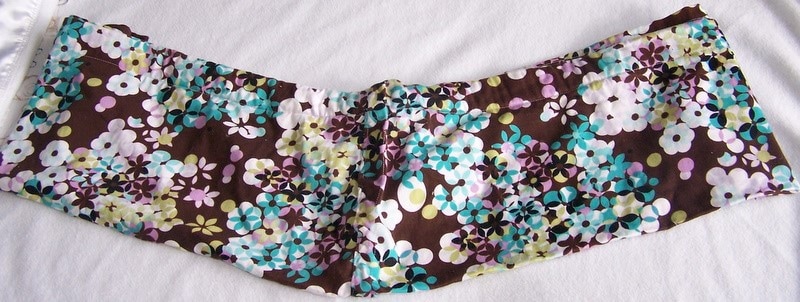 3/ You are now ready to add Velcro. Cut 3 strips, 15cm each. Sew the Velcro to the end of the sling 12mm from the top and 1.5 cm from the folded end. Sew the Velcro to one layer of the pouch only, open out the pouch as you sew. This will give you a neater finish. Sew the velcro strips to the sling 4cm apart. Repeat on the other edge of the sling making sure you sew on the correct side so the velcro will overlap when the sling is worn. Cutting down and unused adult sized pouch to fit a child 1/ Turn the edges of the pouch under 4 cm and sew 2/ Use the above measurements from the doll pouch pattern, or adjustable pouch pattern or measure your child as described. 3/ Open out the sling so there is two layers only with the wrong side facing out. Measure out the size needed and pin or tack the sling along the top flat folded edge. 4/ Try the sling on your child. If it is correct sew across the top edge. You can cut off the excess fabric or when you turn the sling right side out, tuck the flap or extra material created underneath (or sew it down). You can let out this seam as your child grows. 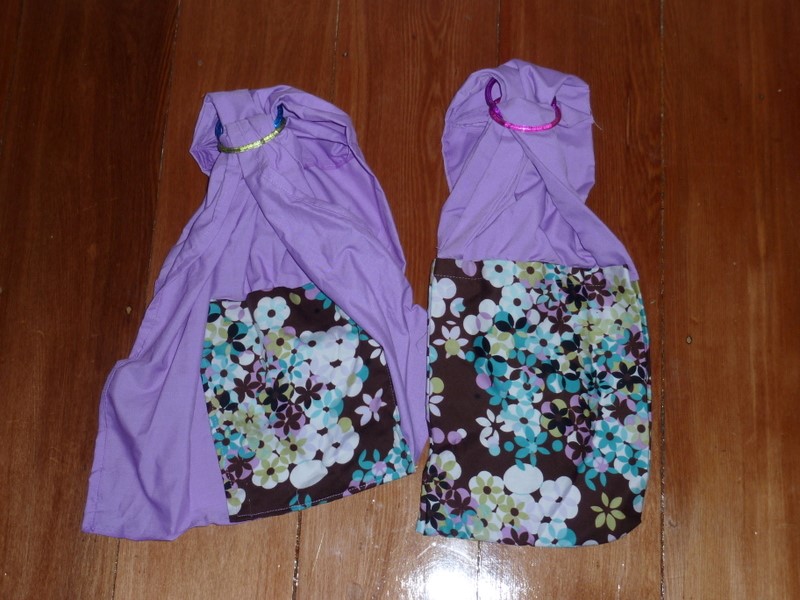 The wider width sling is on the left. Both have pockets (the one on the right going across the whole width) and were made using child sized plastic bracelets for the rings. (note: the bracelets broke after a few years of light use so for a longer lasting sling you may want to use aluminum sling rings) Fabric needed: 35.5cm width for small dolls and 51cm for larger dolls. Length - 130cm for toddler - 141.5cm for preschooler - 152.5cm for older child or alternatively drape a tape measure completely around your child’s body (shoulder to hip and let the edge of the tape hand down to where you want the tail to end, and use this measurement). You can also make the sling a longer length than you think you will need, then try the sling on your child, then cut and hem to the correct length. (note: a tail longer than your child’s knees may be a tripping hazard). Sling Rings – Use child sized plastic bracelets (the ones I used were 5.5cm in diameter). You can also buy thin metal rings around this size from craft shops or alternatively you can purchase small size sling rings from slingrings.com which come in a great range of colours. 1/ Hem the long edges or your fabric. 2/ Fold and press one short edge down 12mm (not necessary for a reversible sling) 3/ Fold the sling in half lengthwise. This will create a pouch like pocket for the doll to lie in. The sling can be used on both shoulders but to switch shoulders you will need to rethread it so the open sides of the ‘pocket’ are towards your child’s neck. 4/ Measure and mark (15cm) across the top short edge. 5/ Gather the top edge in your hands and thread through the center of both rings. Pull the material through until you reach the measurement you marked earlier, then pin and sew along this line.  6/. You will now have a long piece of fabric with rings on the end. Thread the sling by gathering the short straight end, then threading it over one ring and under the other like a belt buckle. 7/ Try the sling on your child. Cut and hem to the desired length. Tip: One sling I made was too short so I sewed a contrasting fabric to the end of the sling (hemmed), using twice as much length as I needed. Then I folded it up and sewed the edges together, leaving the top open, to make a pocket. Decorating your Sling/Adding Pockets Some ideas:

|


 |  |
Wrap Skirt
Wrap skirts would work well with a light to medium weight wrap which drapes well. A heavier wrap would probably work better as an A line or perhaps as a less full wrap skirt. This wrap skirt also used up a lot of wrap since woven baby wraps are narrower than store bought fabric - slightly more than 4.2m so I think I size 5 would work best for this kind of wrap skirt. There would be a lot of small scrap pieces left over too to do something fun with.

A Line Chevron Skirt
 | |
I am happy with how it turned out even if it was a bit of a disaster at first! The bias cut gave the seams of the skirt too much stretch which made it difficult to put the zip in. This is a fairly common problem in bias cut skirts. I tried recommended ways to reduce this - letting the skirt hang for a few days, using interfacing and then bias tape but nothing would allow the zip to lay flat. I altered the fit at the top of the skirt halfway through sewing (the waist was too big when I tried it on so I took it in at the side seams and I may have taken a little bit too much off perhaps) although I suspect it really was the fabric and not my alterations which caused the problem. Since wraps already have a good amount of diagonal stretch already (that's why they are so comfortable for babywearing) cutting on the bias may have added a little too much.
It worked out in the end anyway as I added lacing and I think that looks rather pretty! The lacing and the panel underneath has added the advantage of making the skirt quite flexible in size.
| | |
According to wikipedia 'Western interest in the podaegi style has led to new wrapping methods which do go over the shoulders, and to narrower "blankets". Variants of this shape include the Iu-Mienh/Hmong carrier and the Chinese bei bei. Iu-Mienh/Hmong carriers and bei beis are both customarily used with over-the-shoulder wrapping and often have stiff sections which help provide head support or block wind'.
Below is the information I have been able to find. I have looked at Chinese, Korean, and Hmong sources for the most accuracy when looking at how these carriers were used traditionally, where possible, and I have also looked at thebabywearer.com (and similar forums like Natural Mamas, Baby Centre, and Mothering) to see how these carriers were viewed by western babywearers. The Babywearer is a forum based in the United States (but has users from around the world). It was the most popular forum for babywearers before the advent of Facebook and was established in 2003.
If you know of any other resources or information about this topic I would love to hear from you!
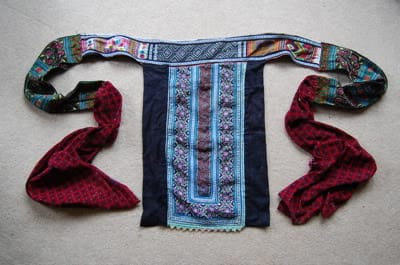
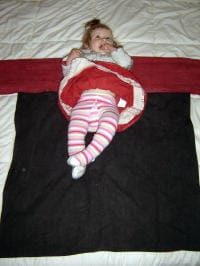
Podaegi
 |  |
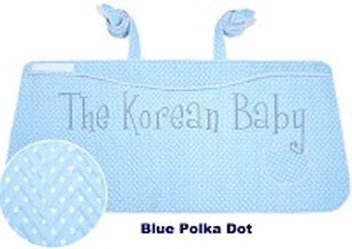
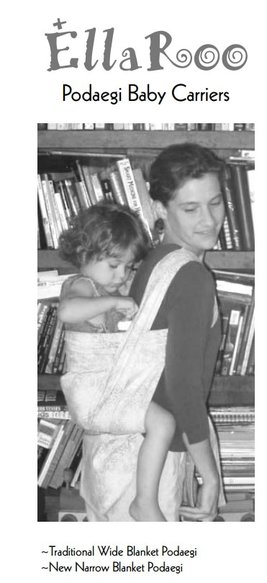
The Korean word 포대기 means 'baby carrier'. There are currently different ways of spelling the word since Korean words are transliterated into English. It is spelled podaegi, podegi, pod, podagi, etc. although Podaegi is the most common. An extensive article about the meaning and pronunciation of 'podaegi' can be found here https://www.uhboohbahbaby.com/2007/10/what-does-podae.html (Korean owned narrow blanket podaegi manufacturer) .
 |  |
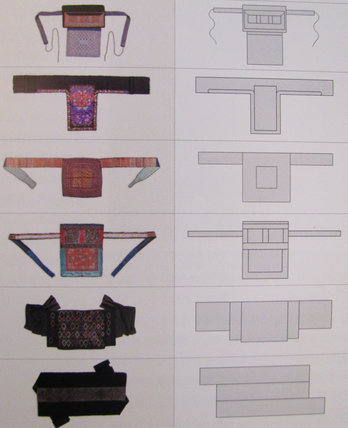
In Korea other styles of podaegi have been developed although they are relatively modern. There is a wide blanket version made to go over the shoulders (which is a regular wide blanket podaegi but the straps are attached vertically rather than horizontally so made to go up over the shoulders, criss-cross at the chest and then the ends are wrapped around as normal)
Some regular wide blanket podaegis have the regular straight straps but also have extra detachable straps that go up over the shoulders. Chunei (buckle podaegi) are also found. There is a lot of innovation. I have even come across a podaegi with a waist belt. Today Korean manufacturers also sell narrow blanket podaegi. (These appeared later than the western version but this doesn't necessarily mean that was the source) Narrow blanket podaegi and similar carriers are called podaegi or 'modern podaegi' by Korean companies.
Source: http://thekoreanbaby.blogspot.com.au/
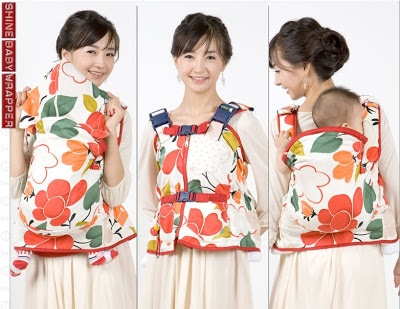
Source: Google Images
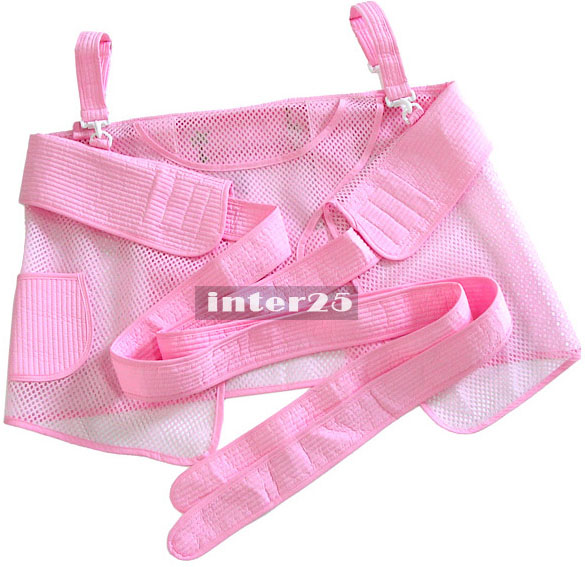
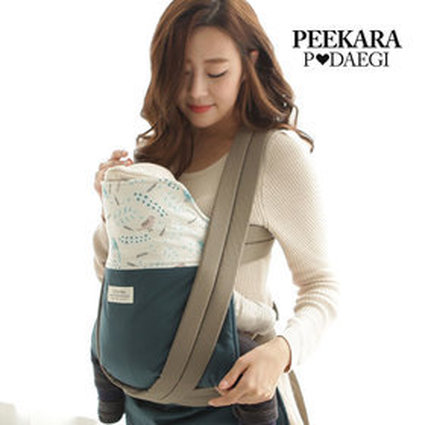 | 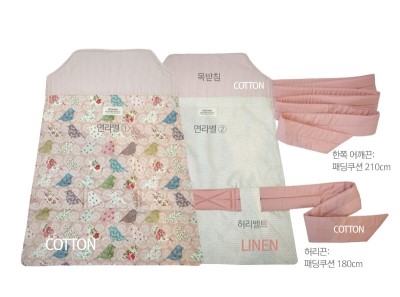 Podaegi with a waistbelt made by Peekara. |
traditional wide blanket:
https://www.youtube.com/watch?v=IG3gmCycv3M (ellaroo)
https://www.youtube.com/watch?v=06k8gYrpZjk&index=7&list=PL6icYMSgqiJbESaCwZ2ZBz2y2WWLQ2fPz
(one shoulder variation)
Narrow Blanket Podaegi (straight straps)
https://www.youtube.com/watch?v=_ESMrsJRr-4 (one shoulder variation)
https://www.hipababy.com.au/blog/podaegi-tips
narrow blanket podaegi (angled straps)
https://www.youtube.com/watch?v=vm2hrTBV5kw
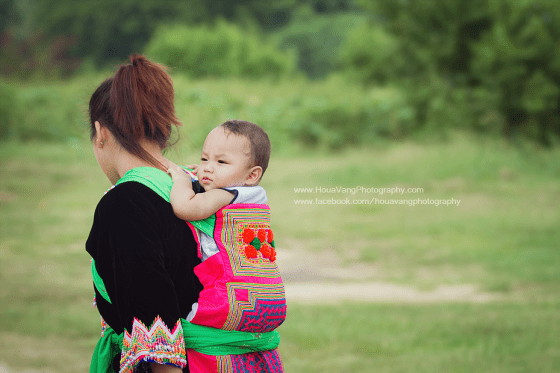
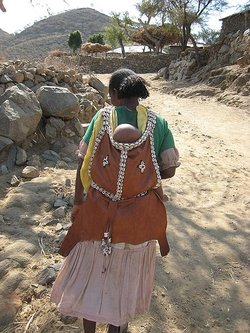
Hmong/Nyia
Typically heavily embroidered and decorated, Hmongs are often collected for their artistic value as well as for their function as baby carriers. They are truly works of art.
There is a lot of symbolism in the designs found on Hmong/Nyia carriers. The embroidered motifs and bright colours are to disguise the baby (as a flower) so evil spirits will not lure the weak spirit of the baby away. The geometric patterns or ‘paths’ on the central panel keep the child’s soul from leaving the body and the bad spirits from getting close to the child (https://conservancy.umn.edu/handle/11299/115678 - Hmong baby carriers in Minnesota: a material culture study. Chaney, Mary Alice (2011))
Traditional Hmong carriers are completely handmade right down to growing the cotton the carrier is made from as well as looming yarn, raising silkworms and looming the silk, dyeing, and embroidery . Being highly skilled in these handicrafts makes a girl attractive to suitors. Hmong mothers cut off the straps of their babies' carrier as a keepsake when they are done with it and then sell (often reluctantly) the carrier itself. Keeping the straps symbolizes the preservation of the ties that connect mother and child. So this is why a traditional Hmong carrier is sold without the straps. ( Bonding via Baby Carriers: The Art and Soul of the Miao and Dong written by Yu-Chiao; Lin, Christi Lan; Lin, Brenda Liu Lan)
The Hmong/Nyia style of carrier consist of two long top straps, usually straight across, and a long blanket. The blanket usually consits of a smaller square sewn on top of a larger one. A Hmong often has thin straps but some have shoulder straps that are very wide (about 15") and they are folded over each other a number of times (ending up about 3-4 inches wide) and then stitched to the body. Traditionally the Nyia is used as a back carrier only. The straps are brought across the shoulders before being crossed across baby's bum and tying off. Functionally it is very similar to an angled strap narrow-blanket podaegi.
Blue Hmong baby carrier. Applique on batik cotton cloth with ribbon and Thai silk border by Chia Chou Xiong, 26.25"x17" (Photo from https://www.lib.uci.edu/hmong-textiles-exhibit)

Source: https://wrapyourbaby.com/kinds-of-baby-carriers/
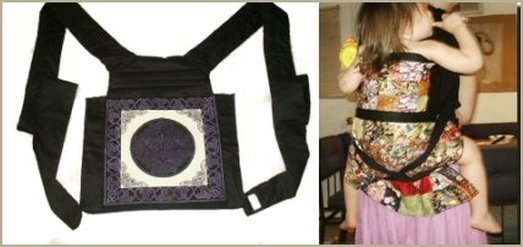
 | A Hmong style carrier made by Freehand (developed from a traditional hmong carrier the owner of the company had bought from ebay) |
A Nyia made by Dai Nyia Hmong Baby Carriers
Source:https://hmongbabycarriers.blogspot.com.au
There are other similar carriers found in this region too. Cambodia, Laos, etc. as well as Thailand; the specifics vary depending on the tribal group (Hmong, Mien, etc.) more than nationality, This beautiful example has a straight rectangular blanket rather than a shaped one. This carrier is from Laos. Carriers from this area are also known as a Paj Ntaubs or Pandaus 'flower cloth'.
How to wear a Hmong/Nyia
https://www.youtube.com/watch?v=IRdD__v-EKM
https://www.youtube.com/watch?v=WDaJcUQFc2E
https://www.youtube.com/watch?v=MgwmeC26lz8
https://www.youtube.com/watch?v=HOOPYM3iSb0
How to wear a Lu Mien
https://www.youtube.com/watch?v=CFsXLFosgHo
Bei Bei
According to the owner of the 'My Bei Bei' brand 'bei bei' literally translates to 'back quilt'. It is a different carrier to the Hmong/Nyia carrier as well as to the traditional Korean Podeagi. 'A Bei Bei can be worn like a Hmong carrier but a Hmong carrier can not be used like a Bei Bei. A Bei Bei is a traditional carrier of it's own and is still widely used'
My Bei Bei, Jun 14, 2007 (https://www.thebabywearer.com/forum/)
Similar top strap only carriers can be found in other regions in China, although some of these carriers have variations in construction. Lots of examples of Chinese two strapped carriers are detailed in the book 'Bonding via Baby Carriers' (most of them from Guizhou province in southwest China with many of the carriers made by the Miao (Hmong ) or Dong (Kam) minorities. There are also some top strap only carriers made by the Rau-jia a subgroup of the Yao people, the Shui minority, and by the Ge-jia group)
How to Use A Bei Bei
https://www.youtube.com/user/mybeibei
   |   source:https://centraliowabwi.wordpress.com/2014/07/ |
Popularity and Use in the West
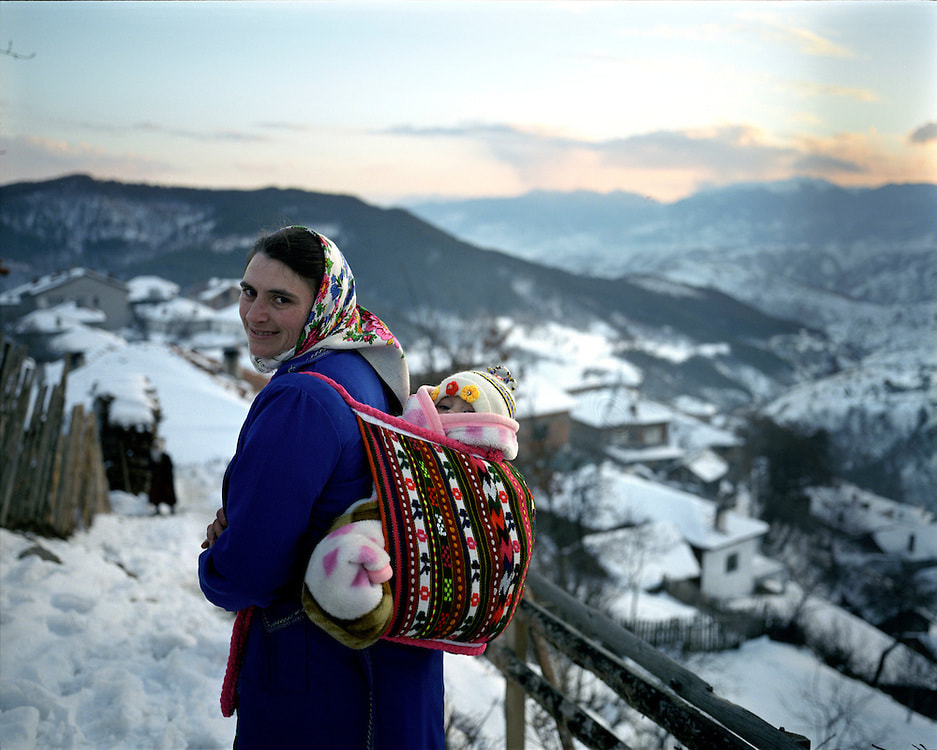
Wide blanket podaegi, Hmong/Nyia and Bei Bei were all known about and discussed on the popular babywearing fourms - such as The Babywearer (babywearer.com), and Natural Mamas.
Podaegi were well known and somewhat popular. In the first decade of the 2000's There were several US makers of podaegi. Ellaroo, Freehand, and Lovewrap were among the best known. There were also a few small WAHM (work at home Mum) companies and wrap converters who soon offered podaegi's too. Podegi makers were also found in Europe (eg Zidee, Kleinsmekker and others).
Ellaroo discontinued production by 2007. In 2008 only Freehand were making podaegi's in the US but were joined be UhBoohBahBaby in 2007/8. Wide blanket Korean podaegis were well known and the people who preferred this style often bought direct from Korea.
The Hmong/Nyia carrier was fairly well know by early users of thebabywearer.com but far less poular than podaegi. There are twice as many threads about podaegi than Hmong. Hmong were sometimes imported from Vietnam but there were two local makers of this style. Freehand was the most well known. They adapted their version directly from a carrier bough from ebay.
There was also Dai Nyia Hmong Baby Carriers (a company based in Thailand)
(https://hmongbabycarriers.blogspot.com.au/2012/11/blog-post.html) although that company started a few years after the other maker had closed and the popularity of this style had fallen (this company was not mentioned on thebabywearer). Occasionally there were posts from people who bought or were given their Hmong carriers directly from overseas or from local immigrant Hmong poeple (or bought through ebay).
The bei bei was known to the early users of thebabywearer.com and seemed to be a little less popular than the Hmong (but 'bei' is too short a term for the search engine at thebabywearer.com so I may have missed some threads). There was one company who imported bei bei from China as well as producing their own. Like with the other carrier types babywearers would sometimes import these carriers directly. Babywearers in the forum would often use these carriers in the same manner as a narrow blanket podaegi even though traditionally these carriers were used differently.
These three carriers were seen as distinct styles but there was a lot of overlap.
Development of the narrow blanket style
The first podaegi's made for the western market had the very wide blanket and straight top strap of the traditional podaegi but later some of the same companies came out with a narrow blanket version. They just shrank the width of the blanket - the rest of the carrier was constructed in the same way (eg straight stap only). Ellaroo is a good example of this. Ellaroo took over another company making wide blanket podaegi's called Onmamasback (which was one of the first companies making podaegi's to appear) and kept the same basic traditional design although they did add padding to the straps.
The narrow blanket podaegi is first mentioned in 2004 (although it doesn't sound like it was a brand new idea so may have been around before this)
https://www.thebabywearer.com/forum/threads/vain-podeagi-question.116/page-2
The original ellaroo podaegi instructions although they do have a narrow blanket pictured do not show the tying version where the straps go over the shoulder first (Hmong/Nyia/Bei Bei style). The tying options are more traditional (well except for the front facing out option!) Torso carry is shown plus a front and back carry that is tied in a similar way but after the straps are crossed under the arms instead of going back around and bypassing the shoulders the straps are placed over the shoulders. This creates a carry that puts little weight on the shoulders as it distributes the weight to the wearers torso (and it does feel much more like a torso carry than a shoulder only carry) (basically it's worn like a FWCC or a BWCC for those familiar with woven wrap carries). It's almost like it's in between the old and new way of wearing.
Photos of Ellaroo wide and narrow blanket podaegi's (tied in the same way.) The blanket in later versions of their narrow blanket podaegi's were made longer.
southlondonslings.files.wordpress.com/2011/06/ellaroo_podaegi_insert1.pdf
   | 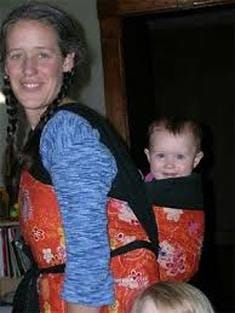 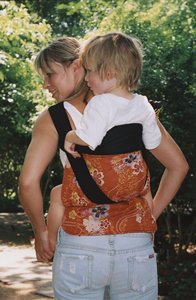 image source: google images |
The angled strap version appeared not long after (not offered by Ellaroo but typical of the later narrow blanket podaegi). Freehand switched from straight to an angled strap version (they may have offered both styles for a while) and were the most popular maker (this company also made a Hmong style too).
I suspect this change may have been influenced by the fact that the straps of the narrow blanket can be tied similarly to the top straps of a mei tai and that's what people tended to do, as that was what users were more familiar with (from the more popular mei tai / meh dai). This use may also have been influenced by the narrow blanket Asian carriers which were used over the shoulder only and some members of the babywearer were also familiar with.
There are certainly instances in the forums of people buying the Ellaroo podaegi and tying it without reading the instructions - tying it more like a mei tai with the straps over the shoulder instead - and liking it enough to stick with that even when they realized the way they had tied it was 'wrong'.
... I just got an ellaroo podaegi - it's the small blanket version. I tried it today with my 11 month old. Great I thought, didn't take long to put on and seemed comfy.... then I looked at the instructions again and realized I had put it on wrong....Does anyone else have a podaegi and use it tied this way - can anyone see an obvious reason why it shouldn't be used this way? Please let me know how everyone else gets along with the small blanket podaegi (ellaroo) (from thebabywearer.com Josie, Jan 15, 2005)}
Quite a few forum members mentioned that they thought the narrow blanket podaegi was more like a Hmong than a traditional wide blanket podaegi (most of the later narrow podaegi's available had angled straps and were not designed to be used in a torso carry so in use they certainly were in fact more like Nyias/Hmongs). However Podaegi picture threads were comprised of wide and narrow blanket podaegi, hmong, and bei bei so I think they were all still seen as being in the same broad category which could also be broken down further if desired.
While Podaegi's, Bei Bei, and Hmong were mainly seen as distinct carriers and there are quite a few posts asking for clarification of the differences and if there there is an advantage of one over the other. With narrow blanket podaegi's though there was also certainly sometimes confusion about which carrier type they really belonged to.
One thread in 2007 was called 'Podaegis..confused over naming confusion. ;-)
n response to the thread -'help ease my confusion...trad pods verses other pods? The poster asked "Okay why r the carriers that look like Hmong carrier called a podaegi just like the traditional korean kind? Are these kinds of carriers also used in Korea? How did they come to be called podaegis"
Some interesting quotes from the forums:
" i still really wonder if calling the narrow blanket Podegi's "podegis" is correct or if really they are traditional MT's (which afaik from all the pictures I see typically have top straps only) just using in a non-traditional way if we take the straps under our arms first...Anyhow, I don't think it matter too much...top strap only with rectangles hanging down... "
mom2twinsplus2, Apr 6, 2005
"the differences .... appear to be artifacts of specific manufacturers, not of hmongs themselves, at least from the info i found.real korean podaegis, AFAIK, are always wide. some pod makers in the US thought it'd be cool to make a narrow, MT-ish one, so they did. kinda reinventing the wheel, IYKWIM.(from thebabywearer.com ellyzoe1, Mar 11, 2006)
" They have been westernized and generalized.
now a lot of pods are with slightly angeled straps, traditionally the straps (or strap) was straight.
Now it seems like any ABC that does not have bottom straps is getting called a podegi.
Traditionally and currently there are variations on the podegi, so you will see a lot of carriers that are called podegis"
Alohaparenting, Mar 17, 2007
"Many of the traditional carriers that look like narrow podaegis are actually hmongs or bei beis"
OregonMom, Mar 18, 2007
"Podaegis are not traditionally narrow, the narrow podaegis are a western adaptation. Podaegis also have a straight body, and the body is not really long. The straps are also straight across.
Hmongs are tarditionally 'narrow', meaning that they do not wrap around your body like traditional podaegis do. The body of a hmong is also longer, and curved by the 'seat' of the carrier (where the baby sits). Looking at a Hmong, there are also two sections, the seat and the headrest are often different designs/patterns. The straps are more at a diagonal in relation to the carrier than a podaegi.
Westernized 'narrow' podaegis are often a combination of the two. Some have straight straps, some are angled. Some are straight bodied, some have a curve in the body, or a difference in the pattern or material around the seat area."
OregonMom, Jan 16, 2007
From a discussion about bei bei's
"They wear quite differently from either the hmong or the pod--they are similar, but quite honestly I think that the bei bei "comes first" relative to narrow blanket pods... the narrow pods are newer. "
Jenrose, Jun 14, 2007
"I'm still trying to figure out what the difference between a hmong and a narrow blanket podegi is really. The only thing that I see different is the way that the baby is carried traditionally in a hmong (legs straight down) vs a podegi (legs straddled around mom). Since Korea shares a lot of its culture with China, Mongolia & Japan, being right smack in the middle of them, I see how the podegi can be very similar"
UhBoohBahBaby.com
mibelleson, Feb 6, 2007
"Discussion about a traditional Chinese carrier found on ebay 'Funny that we westernized a Korean carrier to look like a traditional Chinese carrier. I'd like to get one just to compare it to one of my pods"
daemonwildcat, Mar 21, 2009
From mothering.com
The narrow blanket podaegi seems to be seen as a western variation according to this Korean based podaegi vendor:
"Then later as time went by, Koreans came up with many other versions like:
mesh, modern podegi with buckles (also called chunei) and people from the west came up with funky ones called "narrow blanket" with straight or angled straps. The name "narrow blanket" is because it's just a narrow piece of fabric and it covers only baby's body and not right up to mama's body in the front. The ones we have here in Korea are everything except the narrow blanket." Jen - Traditional Korean podaegis and chuneis, Mothering forum 07-13-2008. https://www.mothering.com/forum/245-babywearing/930945-podaegi-confusion.html
Other two strap baby carriers
I have read speculation that this style of carrier is older than the four strapped mei tai/meh dai and the four strapped carrier evolved from them. I haven't found any good resources to support this but if anyone has any good sources I would love to know!
More photos of top strap only baby carriers can be found in this article
https://interactchina.wordpress.com/2011/05/12/chinese-mei-tai-baby-carrier/
Two strap/top strap only carriers are also found invented independently in other parts of the world. The skinnbog or krippsack - a traditional carrier from Sweden where baby was usually carried both legs to the side like in a pouch (although this carrier has loops on the bottom to thread the straps through so in use is actually more like a meh dai/mei tai or onbuhimo.
https://baranara.blogspot.com.au/2008/01/traditionellt-brande-i-sverige-skinnbg.html)
A similar traditional top strap only carrier is also found in Bulgaria. I haven't been able to track down much information about this carrier. If you know anything about it (especially if you have a flat shot) I would love to see it. Update: I did find a flat shot and this carrier has two straps each in a continuous loop (almost like a non adjustable ombuhimo). This carrier is also found in Serbia.
 |  Source: https://annakari.photoshelter.com |
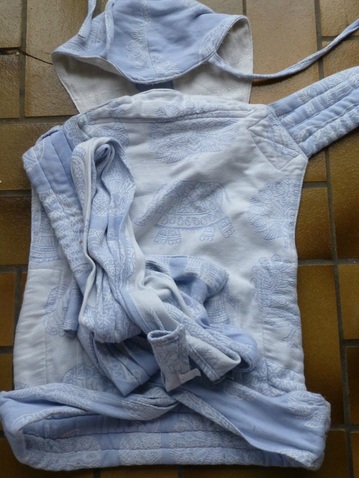
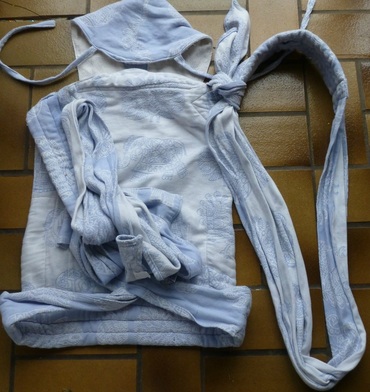
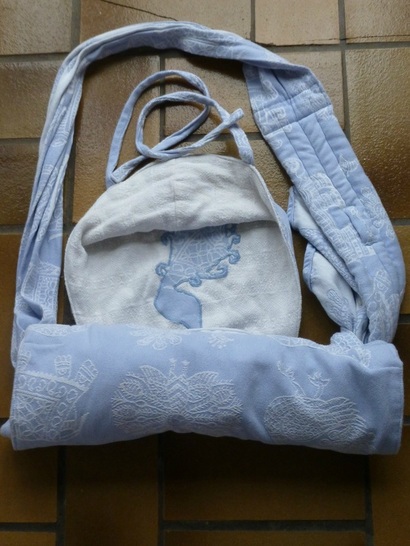
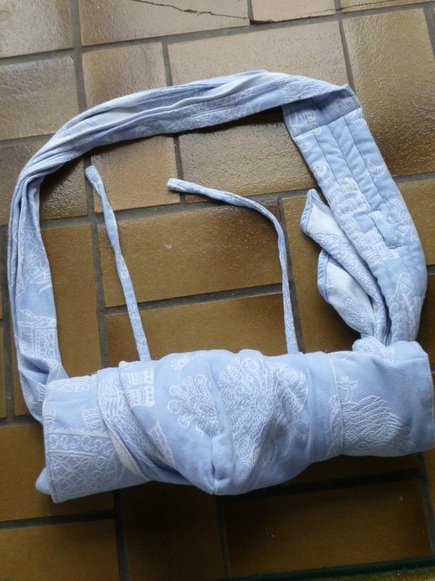
My podaegi like most western designed podaegi is a hybrid of different styles. It has a straight strap design (like a hmong, bei bei, or wide blanket podaegi) a body shape that is wider at the bottom than the top (a bit like a Hmong but without the stacked squares), a fairly long and wide blanket (like a bei bei) but can be worn in a torso carry (torso was only traditionally used in the wide blanket podaegi).
The narrow blanket podaegi was most likely a natural development from introducing the wide blanket podaegi to users with a different wearing style but it was also quite possibly influenced by traditional carriers as well. I think it can be reasonably argued that the angled strap podaegi is very similar to a nyia/hmong/bei bei style since it can only be worn with the straps over the shoulders. However Hmong/Nyia and other similar styles of narrow blanket traditional carriers are not used for a torso carry. The narrow blanket straight strap podaegi seen in the west can be. My podaegi can be used comfortably as a torso carrier, (and some of my customers certainly use it this way) - so while my carrier is a mixture of different styles I consider it more of a podaegi style (albeit one with a much narrowed blanket and one with other carrying positions and strap tying possible).
Some of my past customs.
 |  |
references
https://interactchina.wordpress.com/2011/05/12/chinese-mei-tai-baby-carrier/ (blog from China. Top strap only carriers are also described as 'mei tai'.)
https://southlondonslings.files.wordpress.com/2011/06/ellaroo_podaegi_insert1.pdf
https://mystickorea.blogspot.com.au/2012/03/podaegi-korean-baby-sling-emerging-as.html
https://thegrandnarrative.com/2010/07/20/podaegi-hanbok/
http://www.mothering.com/forum/245-babywearing/930945-podaegi-confusion.html
https://www.uhboohbahbaby.com/2007/10/what-does-podae.html
https://theartofhmongembroidery.wordpress.com/2013/10/22/precious-babies/
https://magiccityslingers.wordpress.com/2007/06/10/book-review-bonding-via-baby-carriers/
https://hmongbabycarriers.blogspot.com.au/2012/11/blog-post.html
https://conservancy.umn.edu/handle/11299/115678 - Hmong baby carriers in Minnesota: a material culture study. Chaney, Mary Alice (2011)
https://interactchina.wordpress.com/2011/05/27/hmong-miao-embroidered-mei-tai-baby-carrier-art-yes-but-love-is-more/
https://sbindependent.org/wang-center-launches-chinese-baby-carrier-exhibition/
http://mybeibei.com/index
https://centraliowabwi.wordpress.com/2014/07/
https://en.wikipedia.org/wiki/Baby_sling#The_podaegi_and_other_Asian-style_baby_carriers
https://iowacitybabywearers.com/2016/12/31/with-respect-for-east-asian-carriers/
https://notyourpodbutai.tumblr.com/post/154698098962/respecting-east-asian-traditional-baby-carriers
http://thebabywearer.com/forum/
Beloved Burden: Baby-Wearing Around the World, 2015 by I. C. van Hout (Editor)
Bonding Via Baby Carriers: The Art and Soul of the Miao and Dong People 2001 by Yu-Chiao Lin, Christi Lan Lin, and Brenda Liu Lan
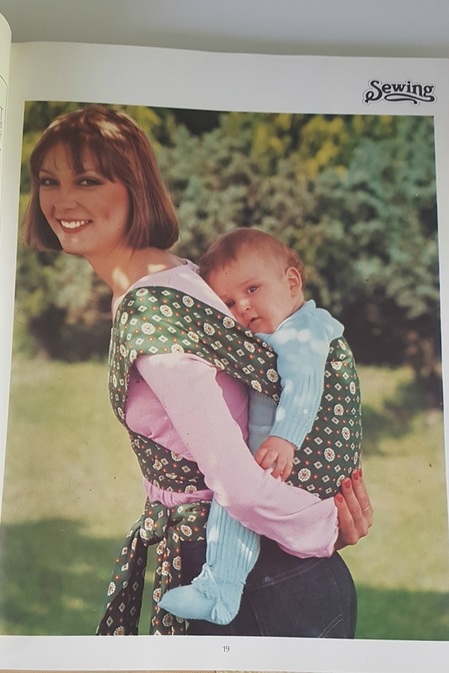
Westernized mei tai's didn't become popular until at least the early 2000's and this is one of the earliest patterns I have seen. The Nursing Mothers Association (Australian Breastfeeding Association today) made mei tai's since the 60's but they were more traditionaly styled in construction and use. If anyone has a pattern earlier than this one I would love to see!
It's an interesting pattern and if I still had a child willing to be worn I'd try it out! I would add extra reinforcing at the straps though - an x box or bartack.

Personally I just find a clean surface if I can but if I can’t I don’t worry too much. If my straps get dirty I spot clean them or wash the carrier (wash on cold on a delicate cycle – in a laundry bag if you have a top loader). I haven’t had any problems getting the straps clean, even my white strapped carrier, the only stain I couldn’t remove was my fault (don’t give a toddler chocolate while wearing!)
However there are a few other methods you can use to minimize your straps dragging on the ground, most of them simple and easy.
1/ Find something to rest your straps on.
If getting out of the car, lay the straps on a seat, but any clean surface will do, such as a table or chair.
Tie the waist strap on, then hold on to the top straps so they don't drag on the ground.
Then put on one shoulder strap at a time (if doing one at a time, You can control where they go a little better and get it on without it dragging on the ground).
After getting the shoulder straps situated, you can tuck the ends into your waist strap (and/or your pockets). Then grab your baby and untuck one strap at a time. If the straps still come too close to the floor while you are putting the carrier on just untuck/retuck it back in until they are too short to touch the ground.
2/ Pre tie
Put the carrier on before leaving home (with baby inside so you get a good fit), remove the straps off of your shoulders, and take baby out, without untying. Or if you want to tie without baby just tie the the mei tai on you front the way you would if baby were inside, only leave it loose. Leave enough room to slip your baby into the body.
When you get to your destination hold baby up on your shoulder, slide baby down into the body. Make sure to position their legs on either side of the body so that their knees are higher than their bum. You may need to pull up on the top of the carrier to settle them down inside.
When you get to a clean and dry place retie so that the carrier is snug enough and the straps are in a good place, with practice, if you can leave it just loose enough to slip baby in, you might not need to make too many adjustments after.
If you need to take your baby out you don't take the whole thing off every time, just untie or slip the shoulders off and once baby is out, loosely tie the shoulder straps back on so they aren't trailing the ground.
3/ Braided Strap Method
This clever method was shared through Wrapsody’s babywearing hack challenge. Link to the original article. https://wrapsodybaby.com/keep-mei-tai-straps-clean/ . This also works for a back carry.
1. Braid each MT strap (like you would a wrap) leave about 30cm unbraided (just enough so that when you flip the straps over you shoulder you can just reach the end behind your back). You can do this sitting in the car, or before you leave the house 2. Tie MT around your waist (the braided section will no mean the straps are short and not dangling on the ground)
3. Pop baby in MT
4. Flip one MT shoulder strap over your shoulder, reach behind you back with the opposite hand and grab the end.
5. Pull the end to ‘unbraid’ the strap and bring it around and under baby’s bottom as you normally would. Tighten the strap stand by strand if you have wrap straps.
6. Repeat with the other strap and tie off how ever you prefer.
7. Enjoy what ever you planned to do with clean, dry MT shoulder straps!
Author
I love to sew. I have five curious and active kids who keep me busy!
Archives
March 2024
October 2022
August 2022
July 2022
May 2022
May 2021
March 2020
August 2018
July 2018
June 2018
April 2018
February 2018
November 2017
September 2017
August 2017
July 2017
June 2017
April 2017
March 2017
February 2017
December 2016
September 2016
June 2016
June 2015
February 2015
May 2014
April 2014
March 2014
January 2014
December 2013
November 2013
October 2013
August 2013
June 2013
May 2013
March 2013
February 2013
January 2013
December 2012
November 2012
October 2012
September 2012
July 2012
June 2012
May 2012
April 2012
March 2012
January 2012
October 2011
August 2011
May 2011
April 2011
March 2011
February 2011
January 2011
December 2010
November 2010
October 2010
September 2010
August 2010
July 2010
June 2010
May 2010
April 2010
 RSS Feed