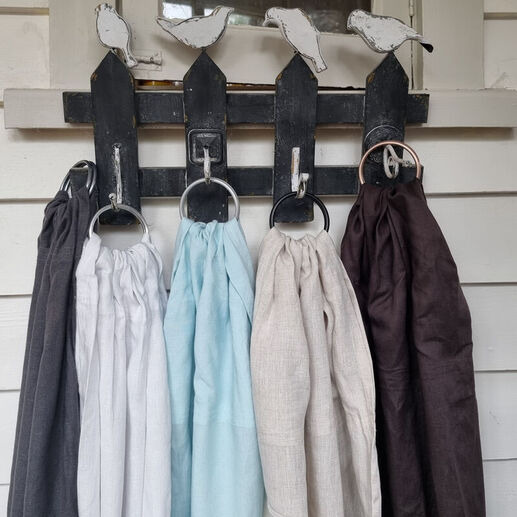
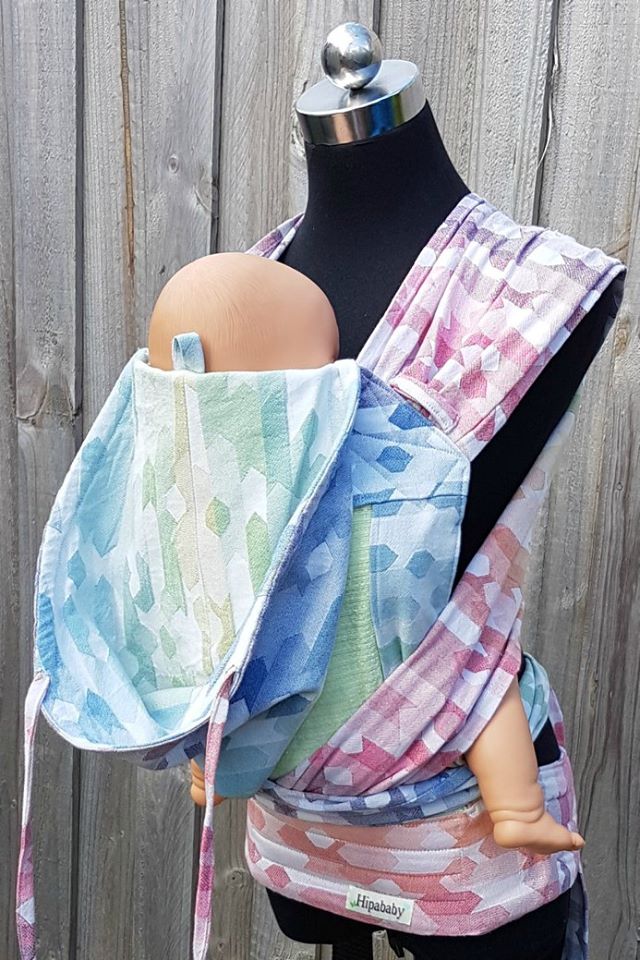
 Linen (flax) is one of the most sustainable fibres that can be used for ring slings. Flax requires minimal water and pesticides and will grow in poor quality soils. Between the textile and food industries every part of the plant is used with nothing going to waste. Linen can be both lightweight and strong, and is great at absorbing moisture without holding bacteria, so is perfect for summer babywearing. The moisture wicking properties of linen will help you and baby to feel cooler on hot day. Linen softens up beautifully with use. Linen colours pictured - graphite, nimbus, ice mint, natural and truffle. How To Wash And Break In Your Linen Ring SlingDo not use fabric softener or bleach products - or detergents which include them. Also avoid detergent with optical brighteners.
Unthread the ring sling for washing. You can slip a sock around the rings so they do not knock about in the washing machine. Wash on delicate cycle on cold with a liquid detergent. Hang dry and iron while still slightly damp, this is the easiest way to minimize wrinkles in your ring sling (although linen will always have a tendancy to wrinkle, I think this just adds to the beauty of this verstatile fabric) A linen ring slings will naturally get softer as you wash and wear it buy to hurry it along you can steam iron, tumble in the dryer with tennis balls on air dry, run it back and forth through the rings, or sleep with it for a few days, leave it in a hot car, or sit on it. You can also braid your ring sling (but don't store long term like this to avoid permacreasing your linen).
0 Comments
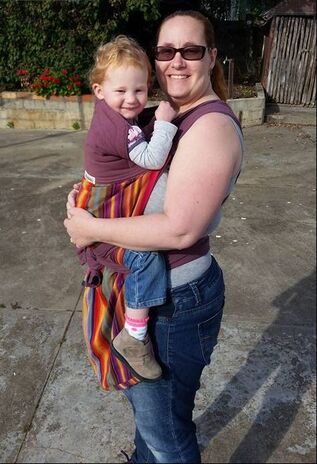
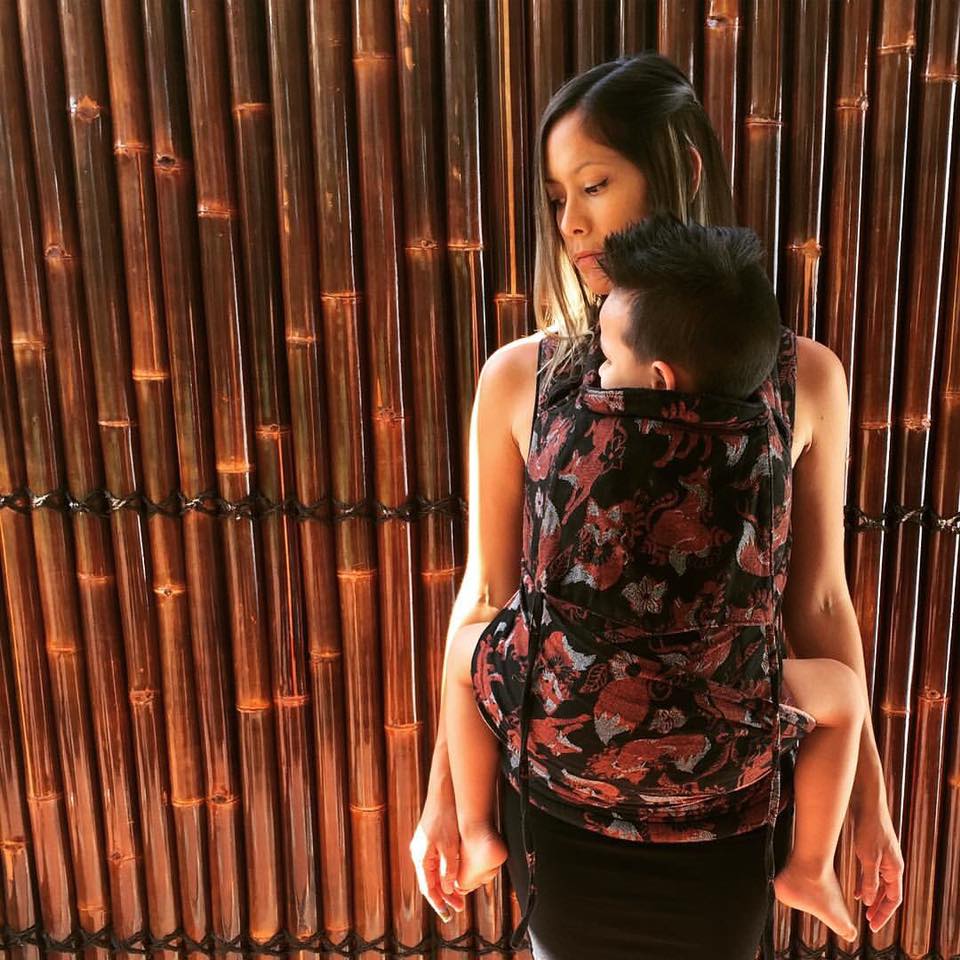
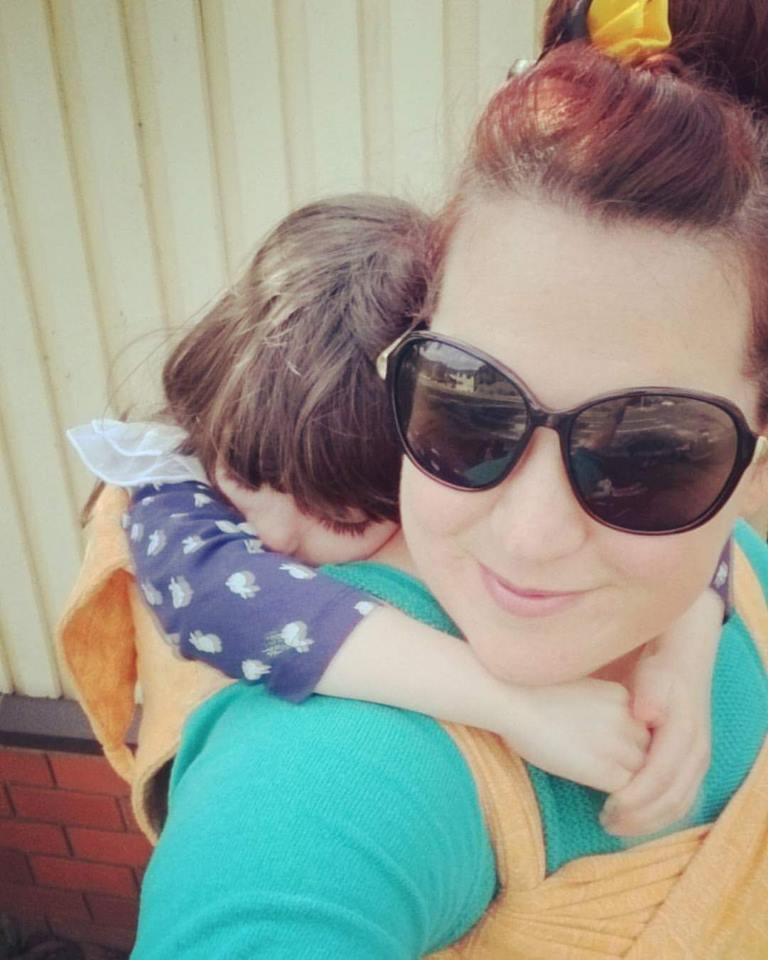
It's world breastfeeding week! I didn't feed much in slings at home but I did often when I was out and about. How else would I finish my shopping or eat my lunch? Ring slings were my favourite for breastfeeding in as they are so quick and easy to adjust. Have you fed your baby in a sling or carrier? 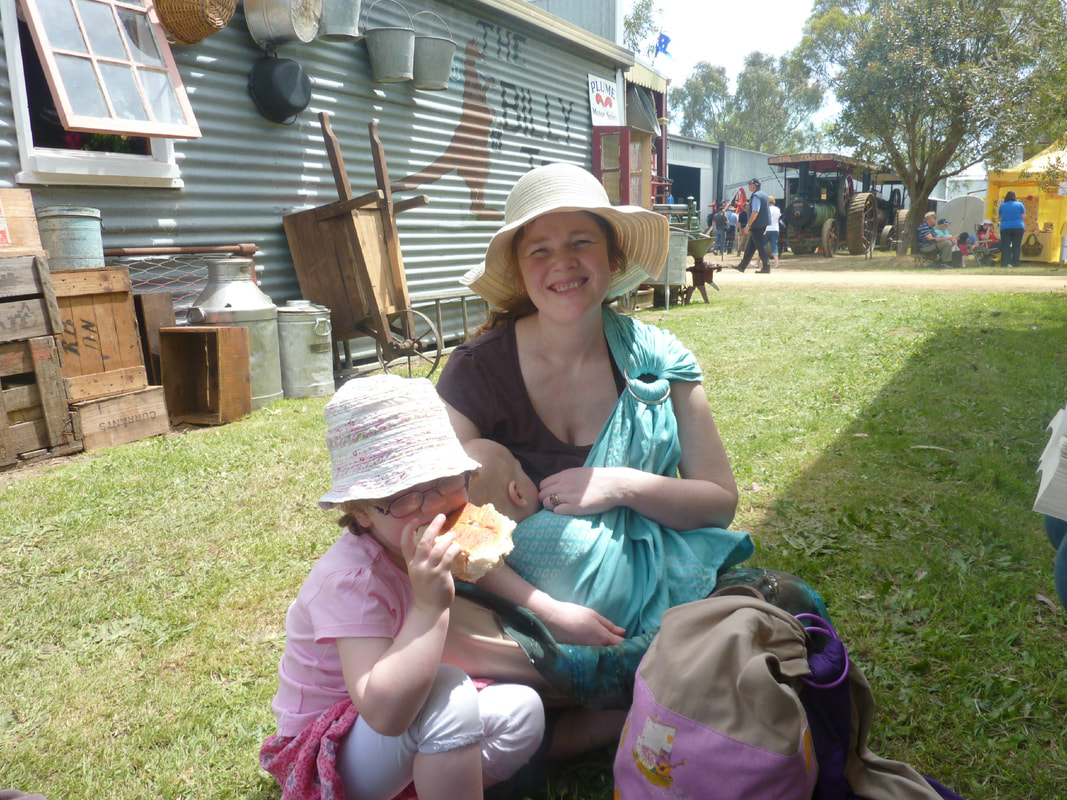 Tip: Wear a breastfeeding singlet/tank top under you t shirt and then you can pull up your shirt from the bottom. This is also really great for cooler weather. Remember to always return your baby to an upright position and adjust your carrier after you have finished feeding.
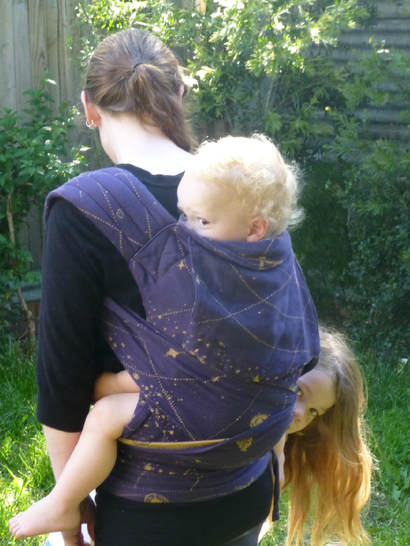
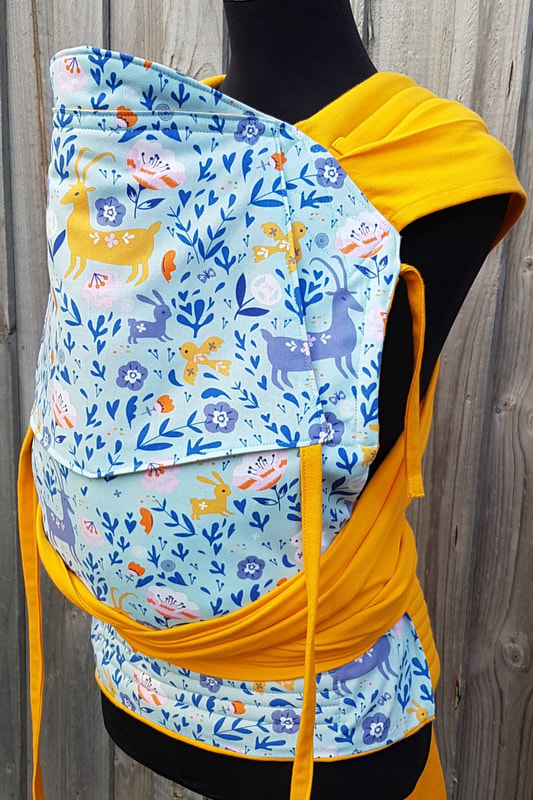
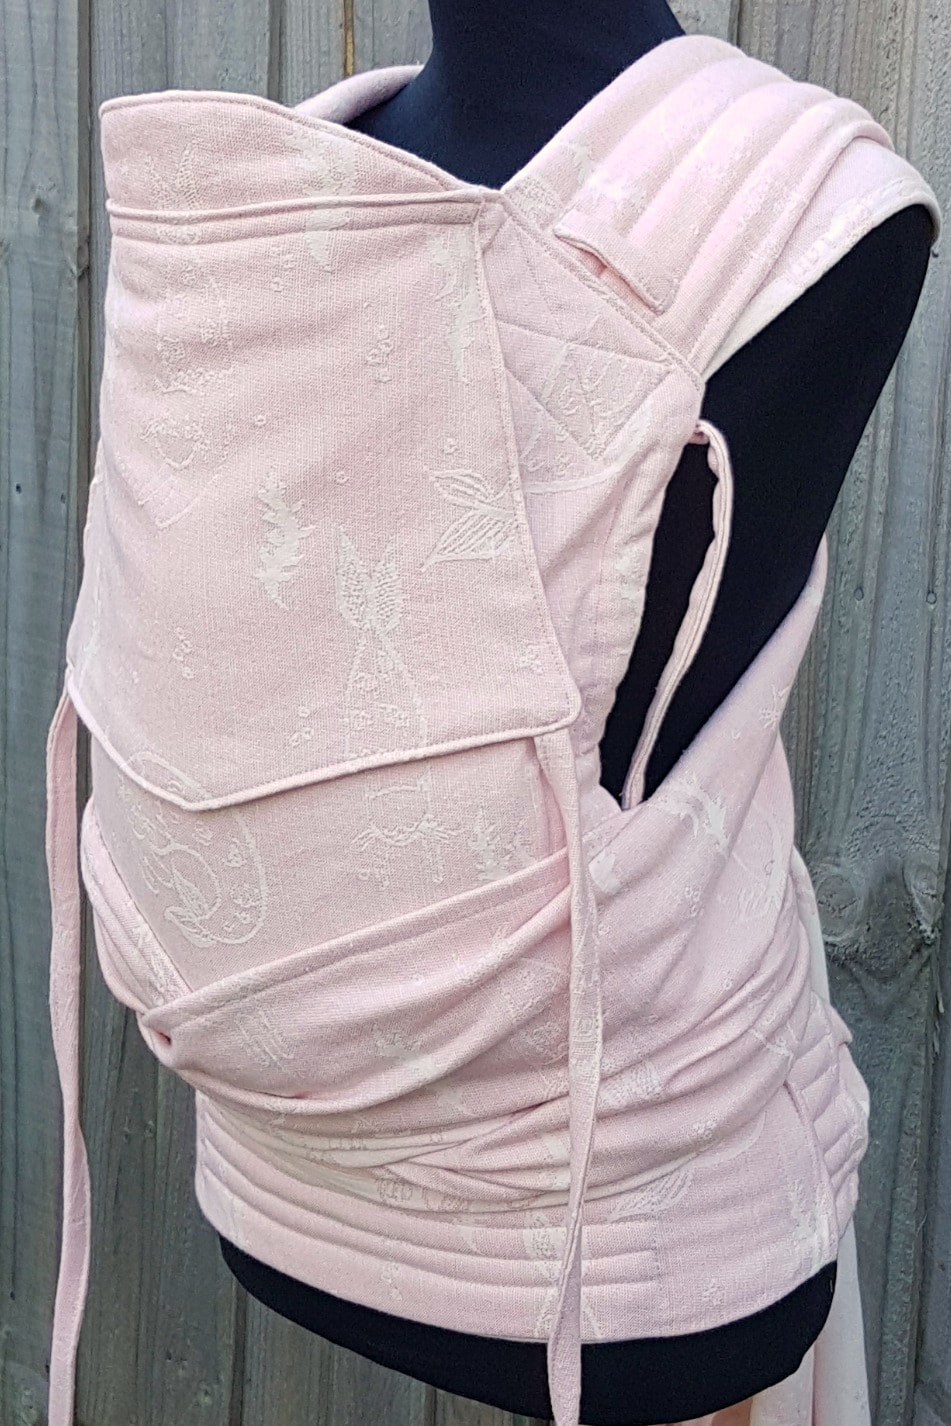
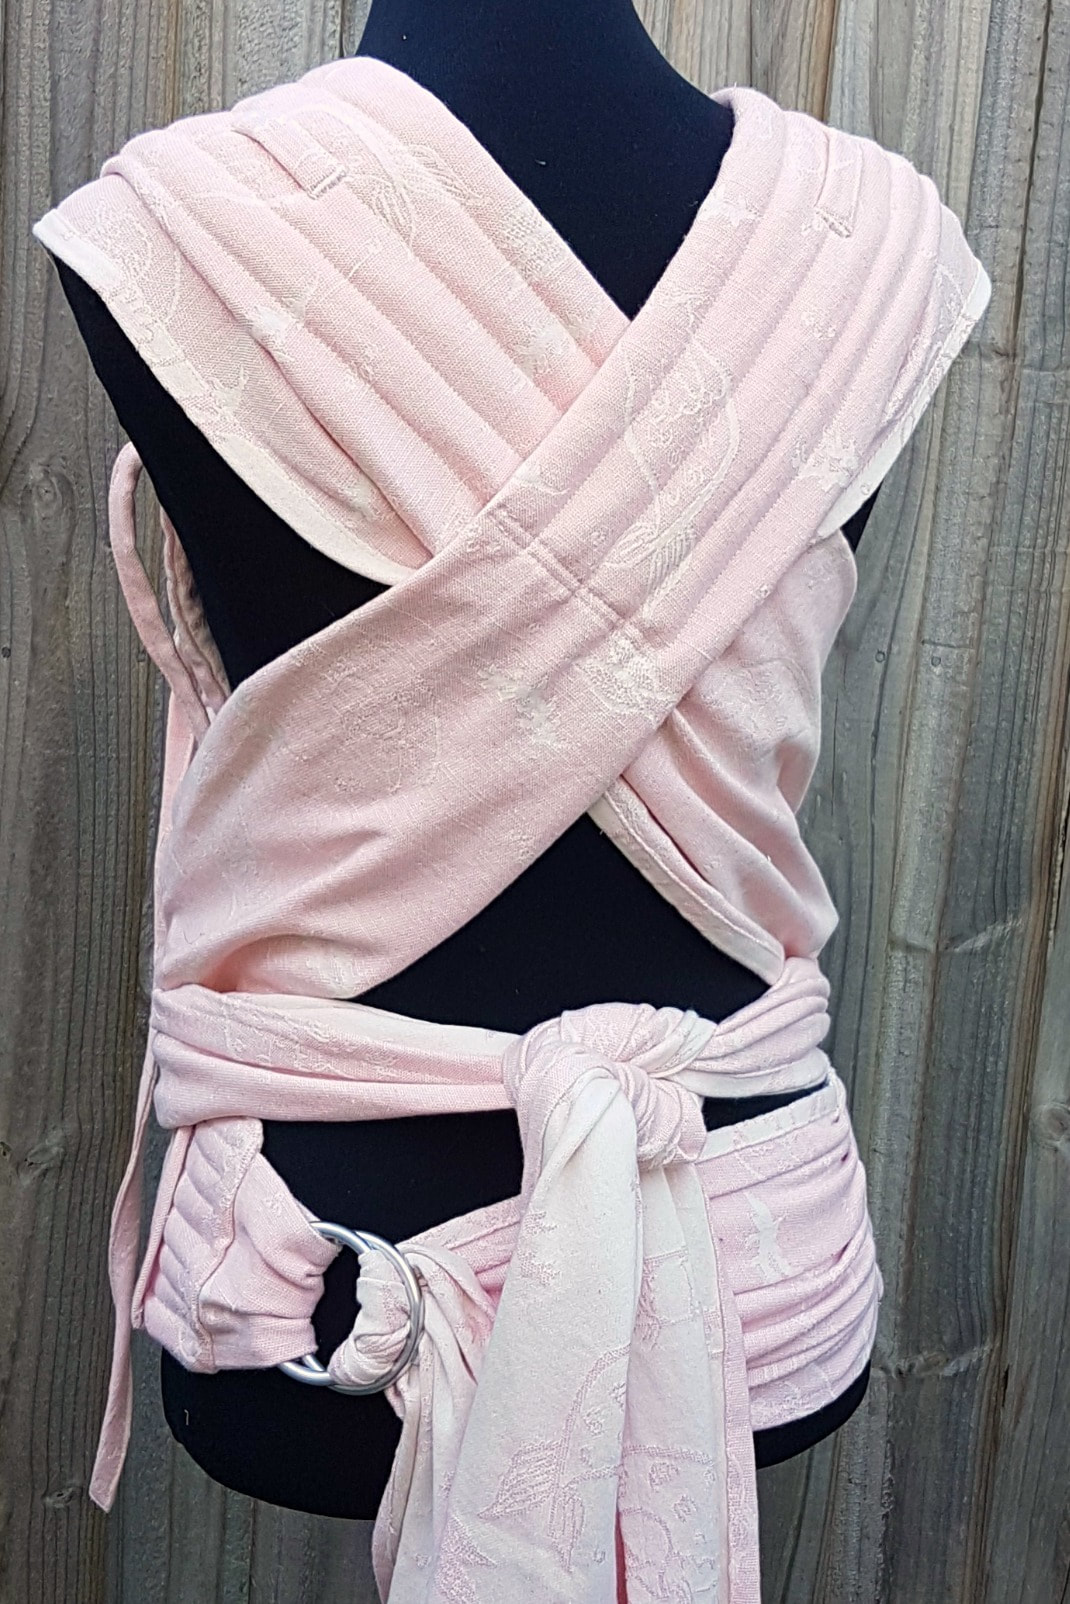
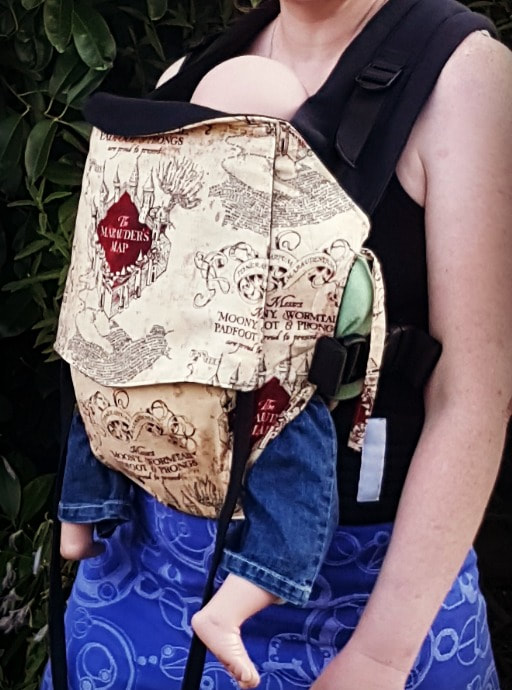
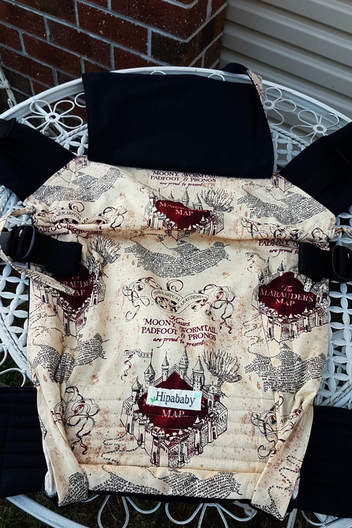
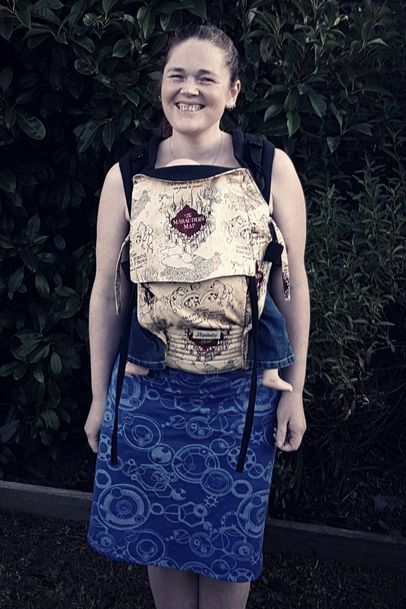
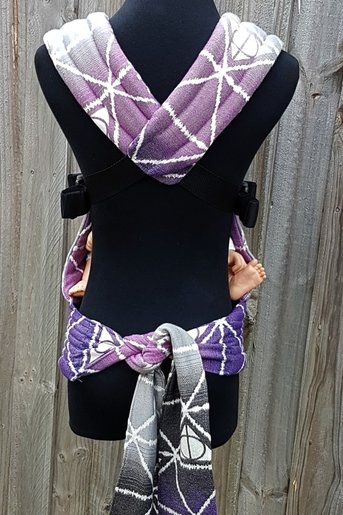
Below is a video showing how to breastfeed a newborn in a ring sling. https://www.youtube.com/watch?v=2RvgjJm0ruo A video with an older baby https://www.youtube.com/watch?v=UN8Eono1rlg&list=PL9hKPtJid7hSa2h_FVbkSPriC-20QvO2t&index=2 Some more tips and how to switch sides. https://www.youtube.com/watch?v=yLJLFQnUCGY There are severeal carrier styles available. Which one is right for you? Meh Dai A meh dai has four long straps and a rectangular shaped body panel. This carrier style was inspired by traditional Chinese baby carriers. It is a very versatile carrier and can be worn on front, back, and even on your hip. A meh dai is is supportive for long periods of carrying. This carrier style will fit a fairly large age range so it's great if you have both a baby and a toddler. The relatively unstructured nature of the fabric panel means it is easy to modify through small adjustments. This carrier style is also great for sharing between different sized wearers. The shoulder straps can be tied in different ways to vary how weight is distrubuted on your shoulders and you can wear the waistband at your waist or at the top of your hip bones (where ever is most comfortable for you). You also can spread the shoulder straps over baby's bum for added support if desired. There are severeal different shoulder strap styles to choose from. Your can read about the different styles here. Most meh dais are reversible so you can potentially get two different looks in one. Meh dais have good airflow due to open the open sides so can be a good summer option. To adjust your meh dai for a perfect fit you can roll the botton to make the carrier shorter or make it narrower by cinching the botton with a ribbon. Built in adjustments (an optional extra) make this even more convenient. The sides of the panel cinch down with a drawstring and the waist is sewn in a channel making it easy to cinch. There is a velcro closure to make sure the panel stays in the right spot when fully extended and when not in use the velcro is covered by a piece of fleece so it won't pull on you carrier or clothing. The waistband is quilted which offers great support without being bulky. The waist can be be worn apron or non apron style (see this article for more information). Meh dai's do take a little longer to put on than a full buckle carrier but not by much. You will get very quick at putting your baby in with a bit of practice. Wraps vary in thickness so some wrap conversion meh dais can be somewhat bulky to carry around if the wrap it's made from is quite thick, but this is easily solved by bringing a bag if you have and up and down toddler, or you can tie the carrier up into a handy bundle with carry handle (see this article for instructions). Some people are concerned that long strap tails are at risk of getting dirty in muddy weather. However I found I could almost always find somewhere dry to tie the carrier on (and if not they are easy to wash). Alternatively there are clever solutions like tucking the tails into your pockets or braiding the staps to shorten them (or even partly pre tying your carrier). You can find some more tips here. A meh dai is easy to learn to use and while it's fun to explore fancy finishes with your straps you don't need to do this to enjoy your carrier. The basic carries are quick to tie and comfortable A small advantage of the meh dai over the half buckle that it is a little quicker and easier to roll the waist to shorten the carrier (with a half buckle you have to take the buckles off and rethread them to do this otherwise they will be upside down). Your can also tie your waist straps though the shoulder straps for a waist free high back carry.   Half BuckleA half buckle is a hybrid baby carrier that combines the ease of a buckle carrier with the comfort and versatility of a wrap. It is the same basic design as the meh dai but with a buckle instead of a tie waist. A half buckle can be used in the same ways as a meh dai and feels very similar to wear. The advantages are that it is a bit quicker to take off (and you will never accidentally untie the waist straps instead of the shoulder straps!) and the buckle can help you tie the waist a bit more firmly, which is useful when you prefer your waistband to sit at a particular spot. It is also slightly less bulky without the long fabric waist straps. 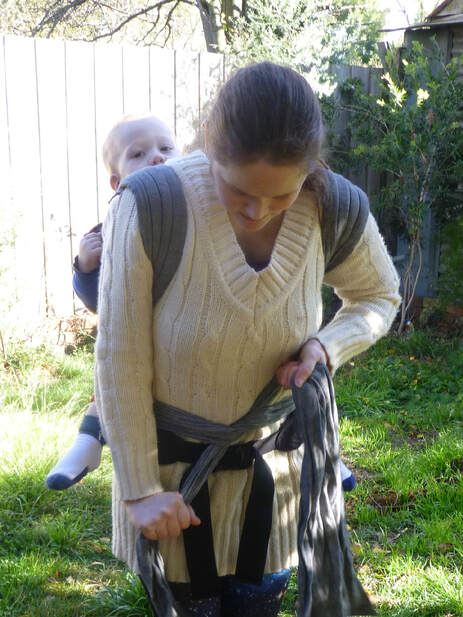 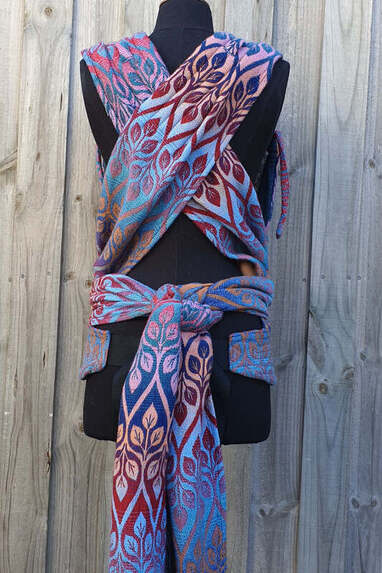 Full BuckleThe Hipababy full buckle is fairly unstructed and not bulky so feels similar to the comfort of a meh dai to wear. Full buckles are very easy to use, just pop baby in and go! A full buckle is the quickest carrier to put on so is great for an toddler who is up and down a lot. It aslo folds up small enough to be convenient to carry around in your bag just in case. Full buckles fit a fairly wide age range (especially with built in height and width adjustments added) although not quite as flexible in sizing as a meh dai/ half buckle. The waist can be be worn apron or non apron style (just remove the buckles and reverse them). Full buckles are reversible for two different looks but if you add fit adjusters to your shoulder straps that is no longer the case. Fit adjusters are a small length of webbing with a slider which cinches the shoulder straps shorter which can be quite useful when sharing between differen sized wearers. 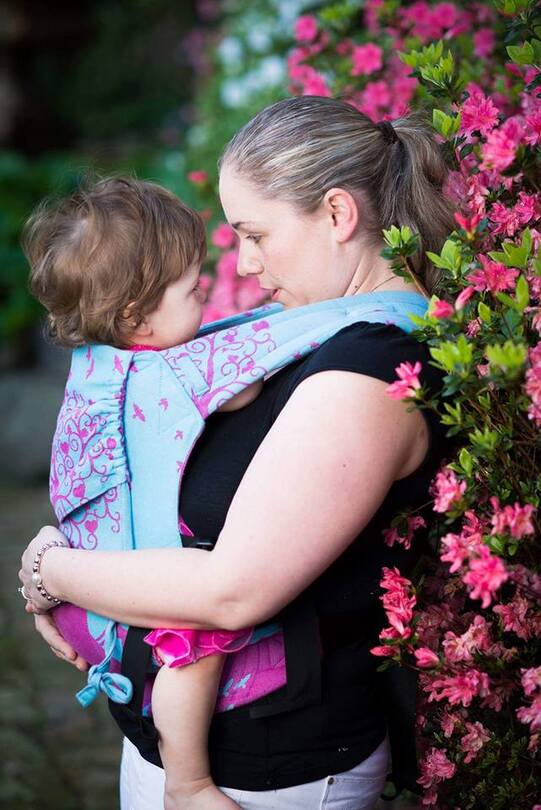 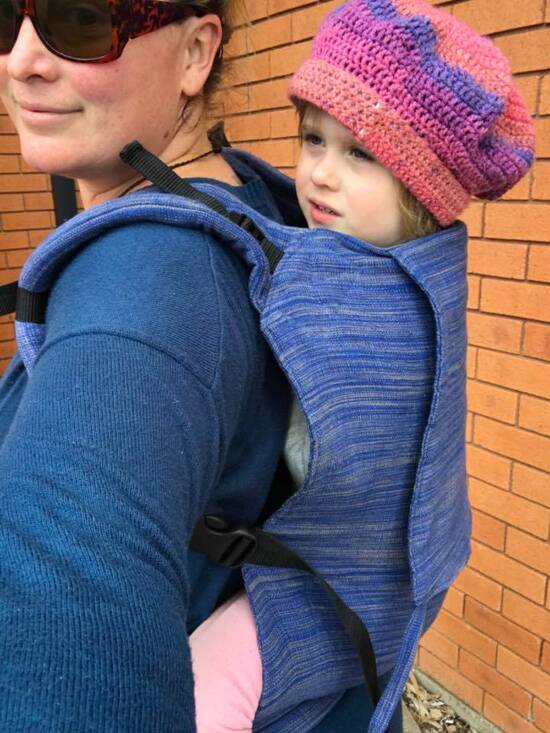 Reverse Half BuckleA reverse half buckle has buckled shoulder straps and a tie waist (or ring waist). Quick to put on and folds up fairly small so is a great carrier to have in your bag just in case. Also great if you don't like the feel of a buckled waistband but want the convenience of buckled shoulder straps. Some people like the look and comfort of spreading the wide waist strap over their stomach. Pictured below is a revese half buckle with ring waist. 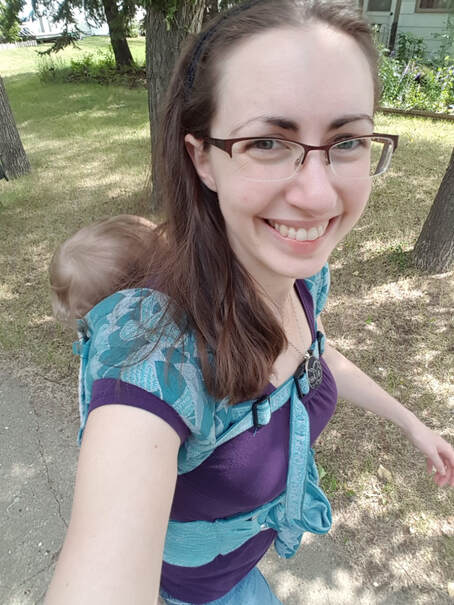  Narrow Blanket PodaegiThe poadegi is a traditional baby carrier used in Korea. The western version has a narrower blanket but can be used in a similar way. Similar carriers are also found across South East Asia (eg the nyia used by the Hmong or the bei bei from China). A podaegi has two long straps which are sewn horizontaly and a long blanket body panel. It is similar in use to a meh dai without the bottom straps and with the added advantage of being able to be used for torso carries. A podaegi is the most versatile of the carrier styles and one size truly does fit all. Where you tie the straps determines the height of the carrier so your baby will not grow out of the podaegi. You can wear this carrier as a torso carrier or use the straps for shoulder support. There are many ways to tie (you can use any carry that you would in a woven baby wrap as long as it is a carry where baby sits in the centre of the wrap). You can wear your little one on your front, back, or hip. Similar to a woven wrap you don't need a hood but you can add one if you prefer, or a headrest. Podaegis like meh dai's and half buckles are great for sharing between different sized wearers. There are only two straps to deal with so can be very quick to tie on. Fairly compact when folded so easy to carry around. 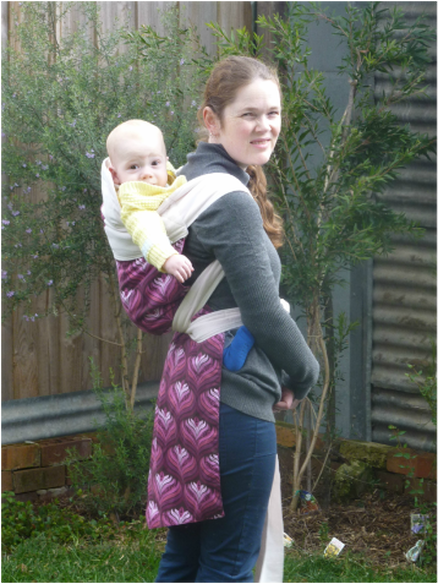
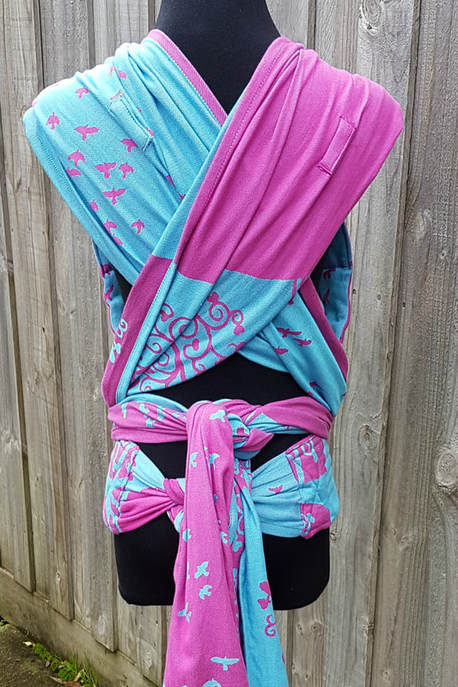
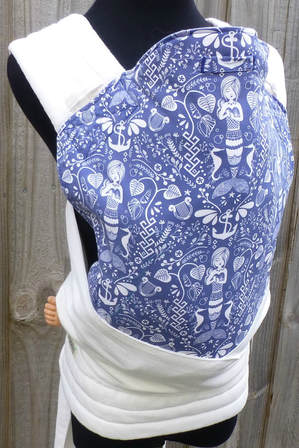
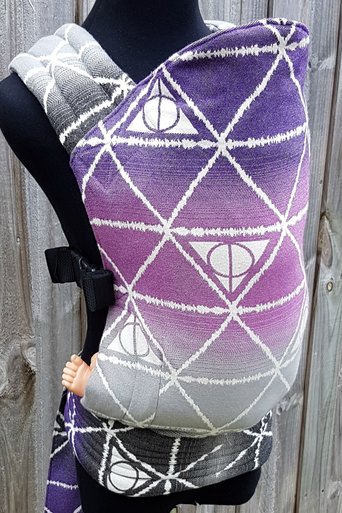
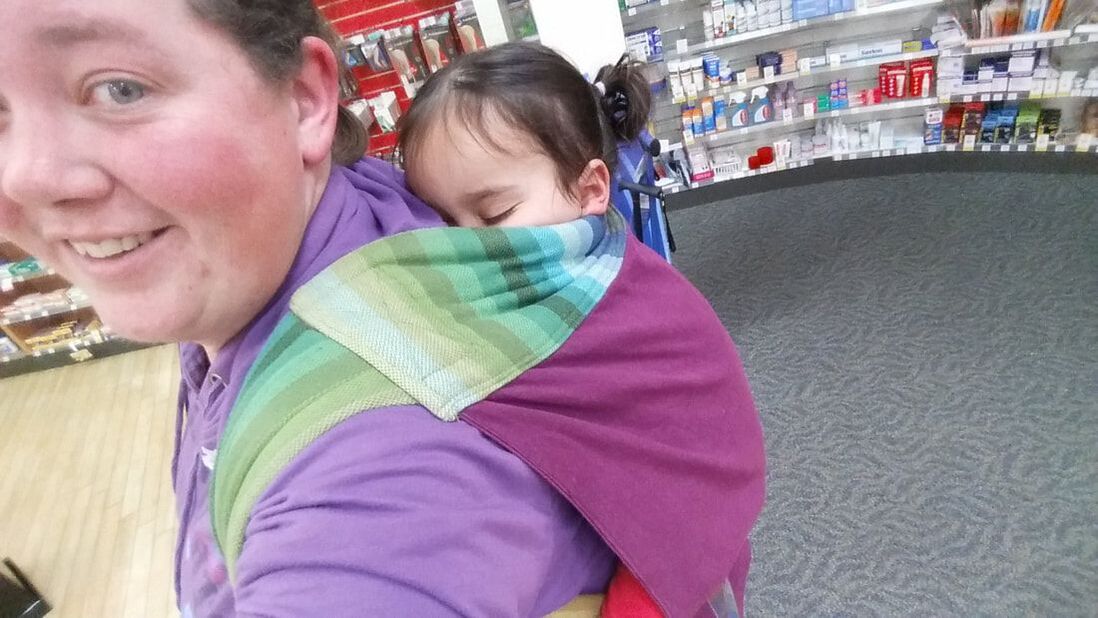 Ring SlingA ring sling is a long piece of fabric, usually around 2m long with a pair of sling rings sewn in. It is based on traditional tied on shawls or lengths of fabric used as carriers all over the world (for example the rebozo found in Mexico). Ring slings are great for newborns and small babies as it is very easy to get a customised and snug fit. Ring slings are also great for sharing between different sized wearers. There is a small learning curve to get used to positioning baby and tightening the sling but soon it will feel like second nature. Most ring slings I make are wrap conversions but I also offer linen ring slings. Ring slings made of linen can help to keep your baby cool in summer. Linen is a very strong fibre so the fabric can be thinner than other fabrics typically used for ring slings, but will still hold your baby comfortably and safety. This makes them perfect for hot weather and their lighter weight makes them very easy to adjust for beginners. The only disadvantage is that if you have a heavy toddler you make prefer a thicker double layer linen sling or a wrap conversion for more cushiness on your shoulder. Alternatively using a heavy weight linen instead does make quite a cushy toddler sling but you then lose the advantages of being hot weather friendly somewhat (contact me if you would like that option) A wrap conversion is made from a woven baby wrap cut to length. If your wrap is a size 5 (4.2m) the wrap can be split into two ring slings (great for sharing with a friend). Since ring slings are a one shouldered carrier it can be a bit tiring to carrier heavy toddlers for long periods of time but they are great for situations where your toddler is up and down a lot. A ring sling allows your toddler to rest tired legs on a long walk, or get a little bit of connection before going off to play again. They are also great for a quick trip to the shops or for school drop offs and pick ups. I also really liked ring slings for picking my sleeping baby up from their car seat- since they are so quick to put on baby will often just snuggle in a continue their nap. A ring sling is the easiest carrier to have on hand for when you need it. It folds up small so is easy to just pop in bag. Handy for breastfeeding on the go and the tail can be used as a cover up or sun shade. Ring slings are great for nosy babies who aren't old enough for a back carry. A hip carry gives your baby or toddler a good view of the world but they are still able to snuggle in for a bit or rest or sleep if they need to. 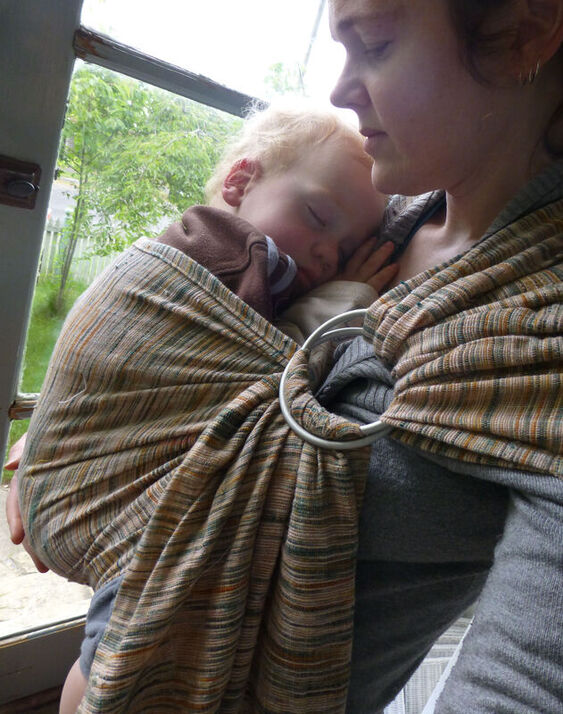 Wrap Conversions or Linen?Woven baby wraps make great ring slings and can be converted into any of the other styles of carriers I make. Woven baby wraps are specifically woven to carry babies so they have just the right amount of give to mold around your baby and are very strong and hardwearing. If your wrap is not long enough I can add in some extra fabric to make up the extra length (depending on your chosen carrier style). Further information about wrap conversions can be found here and if you would like to order your own wrap conversion or custom carrier visit my shop. What if you are interested in a wrap conversion but don't have a wrap? There are some alternatives to buying a brand new wrap to convert (although that can be a good option if you are love a specific colour or pattern). Used wraps are fine as long as they are in good condition. It is fairly easy to source a second hand wrap as you can often find a good deal on facebook groups or marketplace or on ebay. Another alternative is to use Colimacon & Cie. This is a woven fabric specially made for babywearing produced in France from organic cotton, and comes in a wide range of beautiful colours. I have a small selection in stock but can order in any of the colours. Some wrap companies also produce plain white wraps which can be dyed if prefered. Linen makes breathable and light carriers and is available in a huge range of colours. Linen is great for summer and packs up small and will also soften beautifully with with wear and washing. 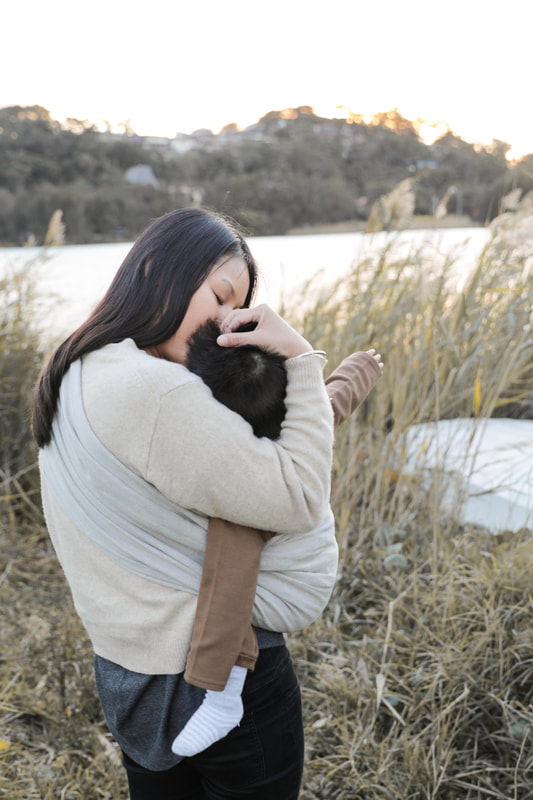 Flared Straps (padded to wrap)
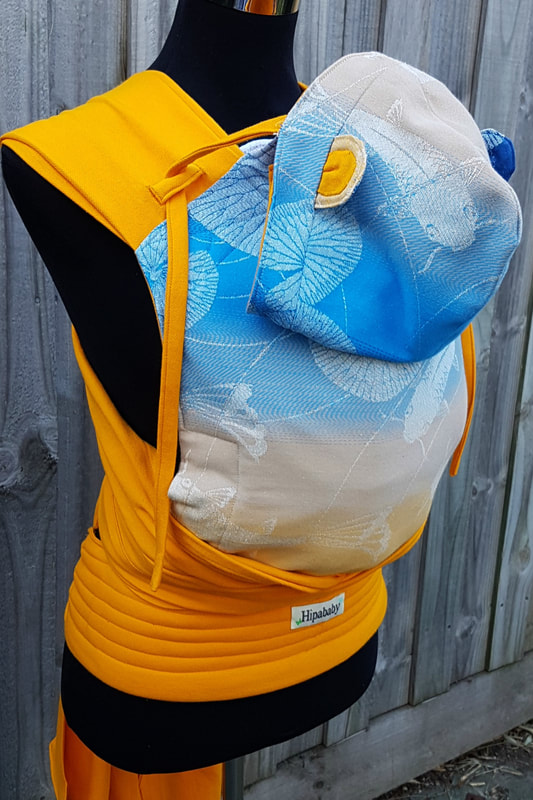
This variation is the result of combining both the regular padded strap and the wrap strap. These start with a padded section at the top of the strap and then transition to a flat wrap strap half the width of the wrap (or to about 33cm if the strap is made from fabric other than a wrap). The wrap part of the strap can be worn bunched or spread out. This strap style is my most popular style. Pro: You don't have to worry about pressure points if you don't get them spread just right. Straps don't spread over your shoulders as far compared to wrap straps in a back carry which some people prefer. You can spread the straps up over the body of the carrier for more support but just tying them unspread like regular meh dai straps works great too. You can use the spread out strap to widen the base of the carrier. Con: Petite wearers (under size 10 (Australian sizing) may need petite padding especially if you like to wear your baby in a high back carry as this will give more space for the wrap part of the strap to spread out.
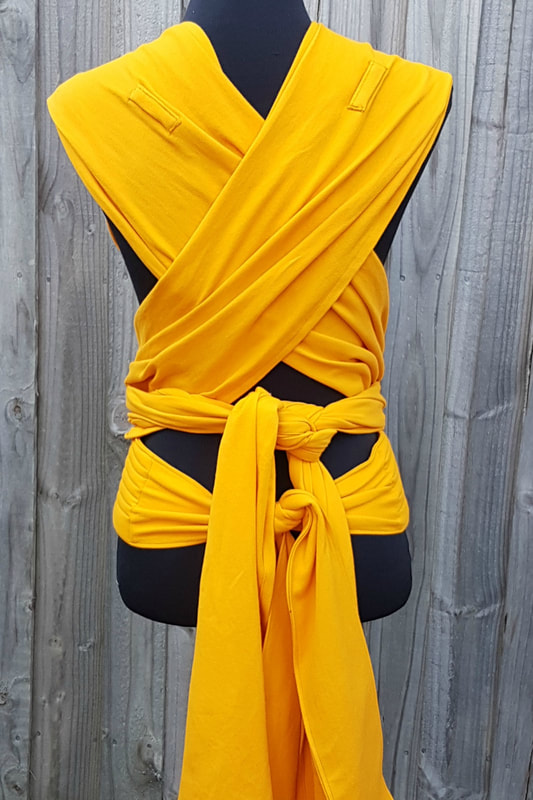
 Unpadded wrap strapsTwo styles of wrap strap are available - pleated and gathered. The gathered style spreads a little more widely but they feel similar to wear. Pro: Some people love the wrap like feel of unpadded wrap straps. The straps distribute the weight of baby well and you can spread the shoulder straps as much or as little as you like. You can tailor the perfect fit by tightening the straps in just the right places so it feels comfortable for you. Works wonderfully for front carries. Con: May not be as comfortable as padded straps for back carriers (although this is personal preference). as these straps work best by cupping the shoulder. Wrap straps sometimes need careful spreading so the strap is spread out comfortably over your shoulder so may take longer a little longer to put on. May sometimes feel restrictive if you need a lot of arm movement.
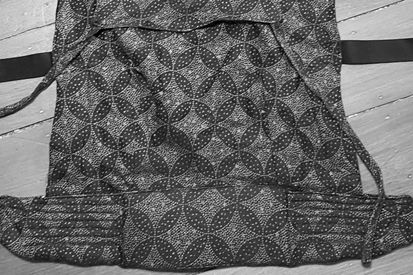
Unpadded wrap straps sewn in with a box pleat
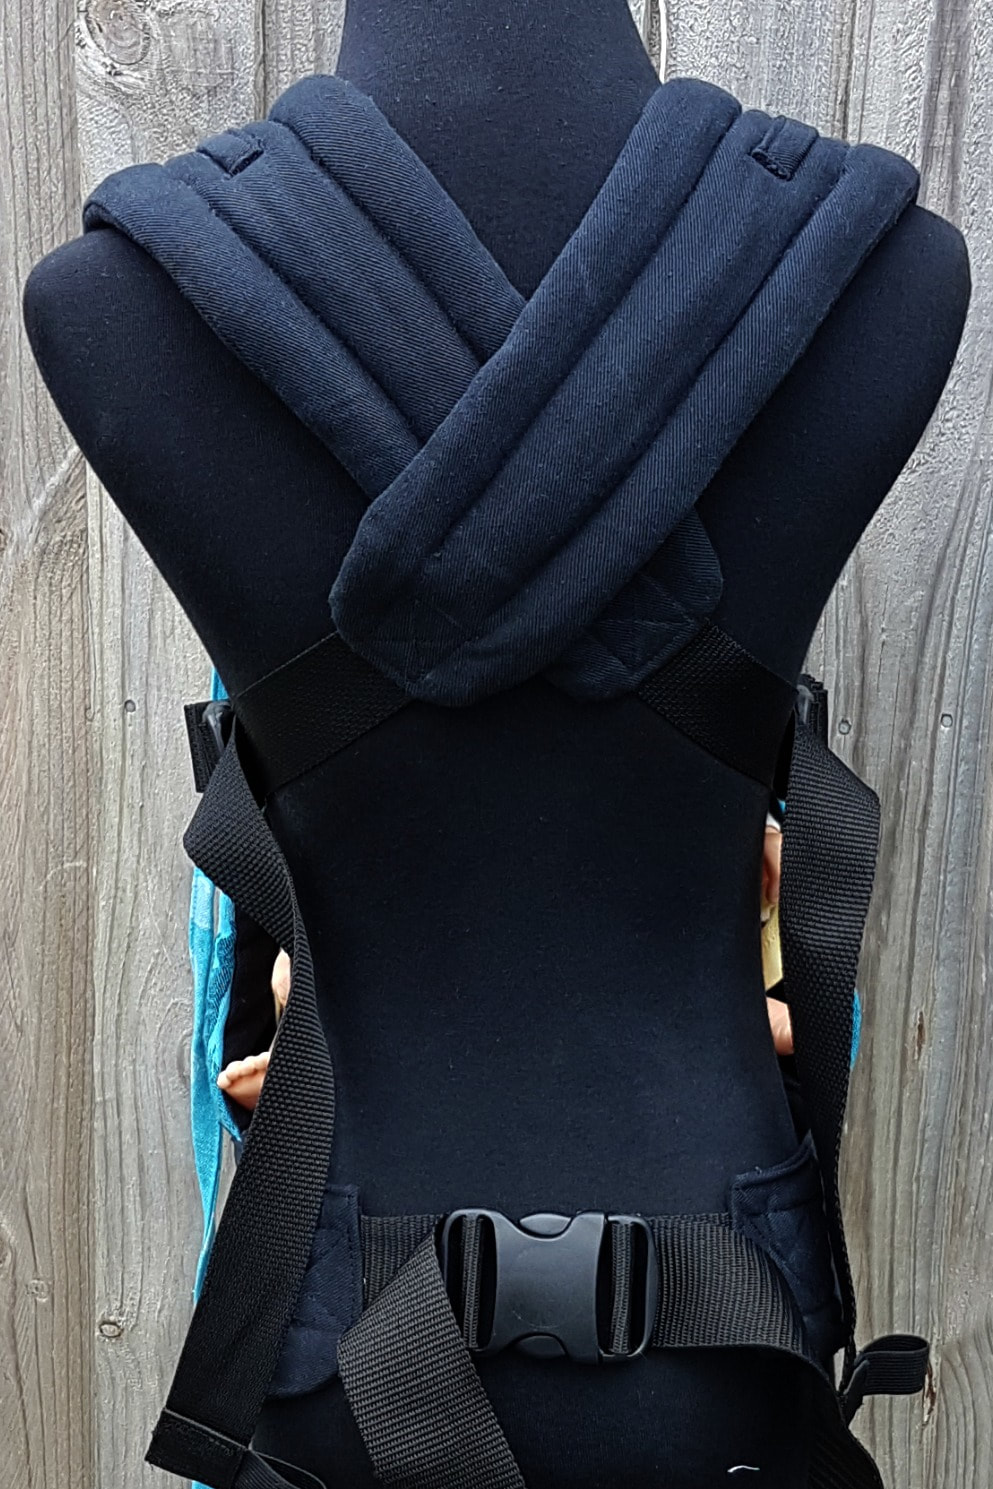
Padded Straps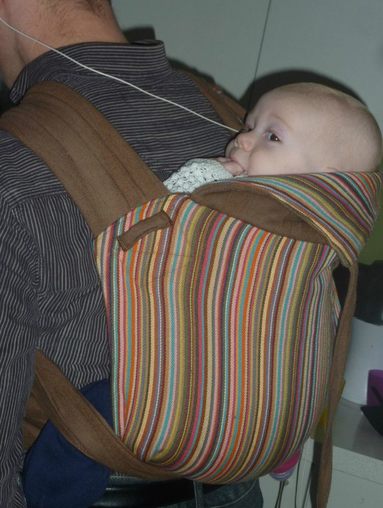 These straps are IIcm wide the entire width the strap with padding over your shoulder. Easy to use, nothing to spread so quick to put on and less bulky so easy to carry around in your bag. Padded straps are slightly less versatile as there is no wrap part of the strap to spread out for extra support if you need it but you can tie a lexie twist over baby's bum or a tie chestbelt (i.e tibetan style) for some extra support if you need it and that works well. Without wrap straps you can't widen the base once the width has started to be outgrown (but you can still use the straps to pull your toddler knees up to a more ergonomic position). If you don't often spread your straps this a comfortable and compact option.
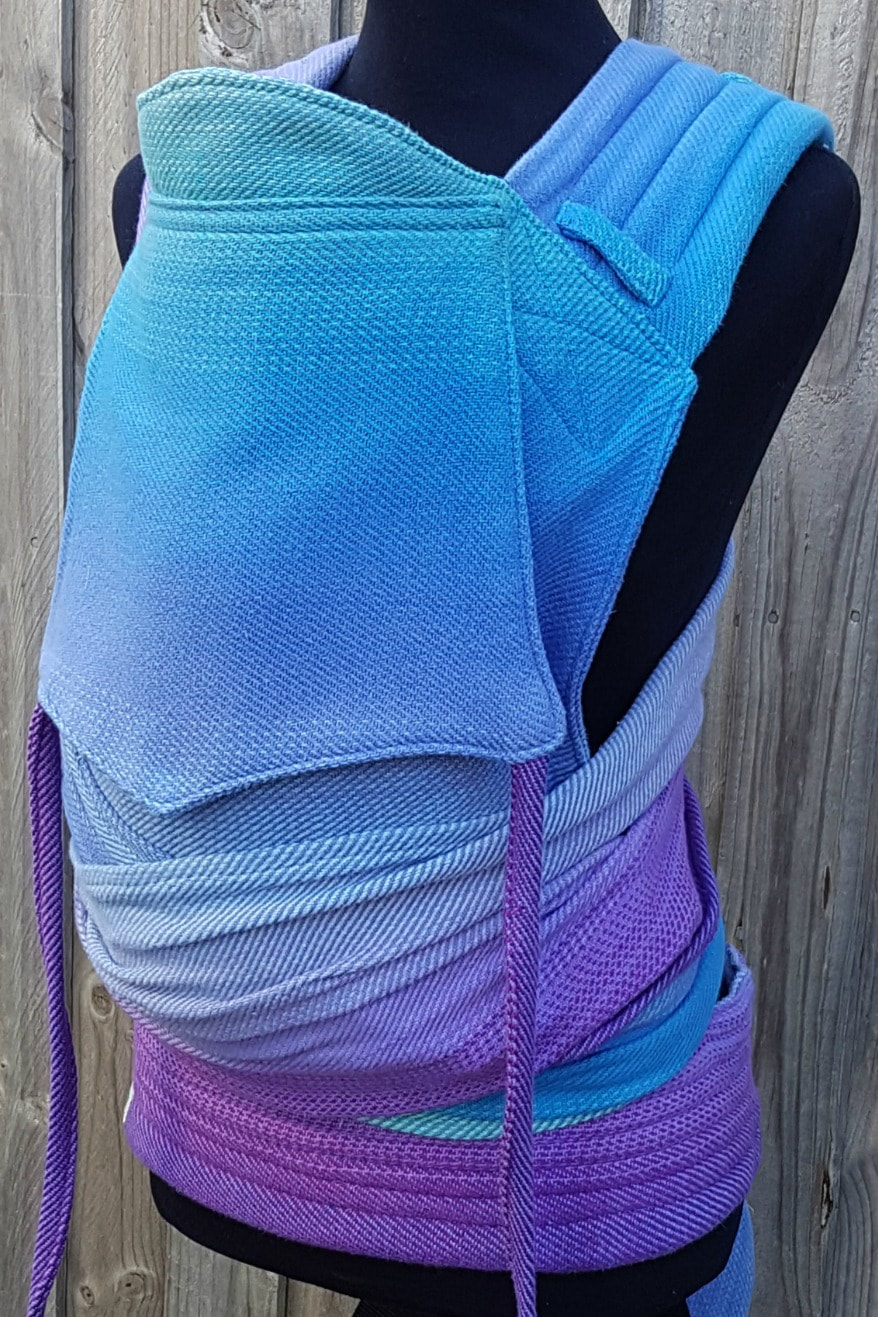
Combination StrapsA combination strap is a hybrid between a wrap strap and a padded strap at your shoulder (best of both worlds!) It gives extra width to spread over your shoulder but you can leave it unspread (useful for back carries). The flap which pulls out over your shoulder can be over or underneath the straps. The fold over is the default but but it can be useful to have the strap sewn the opposite way (to pull out from underneath the strap) for a reversible carrier as you will see more of the reverse colour on the reverse side of the strap. (If you would like the straps to be sewn the opposite way to usual please let me know). Strap flap folds over the strap (default).
Reversible carrier (wrap strap pulls out from underneath)
Flap folding out from underneath the strap. Strap Lengths: Standard strap length is 2m which is long enough to lexi twist and tibetan tie for most people but may be too long for a petite wearer who may prefer the shorter length(187cm). Plus-sized wearers may need up to 230-250cm of strap to have the most tying options. How do you modify a Hipababy full buckle to make it a better fit for a small baby? With a custom made carrier you the option is available to add a built in cinching system and some in stock carriers will have this available too. If your carrier doesn't have the built in adjustments you can modify your carrier by cinching the base with a ribbon and/or wearing the waist apron style. Wearing the carrier with the carrier a little higher on your body than shown below will also shorten the body panel further. A baby size carrier (38cm x 38cm/ 15"x 15") is suitable from around 6 months or so but when cinched will work from around 6kg/00 clothes (or around 2-3 months). Infant size (35.5cm x 37cm/14" x 14.5") works from around 4 months uncinched or from newborn (4kg cinched). Don't use a larger sized soft structured carrier with a small baby as you will not have enough back support increasing the risk of slumping. When using a full buckle with a baby under 4 months baby's back must be well supported and baby's chin must not fall onto their chest (which can obstruct breathing). Baby also must not be buried right down into the carrier. Ideally you would want the top of the carrier (where the straps are attached) no higher than earlobe level. Below are some tips and tricks on how to use the built in adjustments, or if you have basic carrier without built in cinching some tips to help to get a better fit. The carrier in these instructions is a baby sized carrier with adjustable base and sides. The demo doll is wearing 00 clothes so is around the size of a 3 month old. How to modify with a ribbonIf you have a standard carrier with no built in adjustments you can use a ribbon or accessory strap to cinch the base of the carrier to a narrower setting. It is easier to tie the ribbon on with the waistband already clipped around you as the waistband will lay flatter that way. Tying with a ribbon will also shorten your carrier a little. If you need to shorten the height even further you can wear the waist apron style (more on that later).
Using a carrier with built in adjustmentsIf your carrier has built in adjustments cinch the carrier as shown in the photo below and then put your carrier on as normal. Pull the height adjustment ties to scrunch the fabric to the desired height and tie in a loose knot. Fold the edges of the waist back on itself like an accordion. This will keep the fabric from slipping back and will cover the Velcro strip. For an in between width, fold more loosely or just scrunch the waist instead. Remember make sure your baby is close enough to kiss! This will ensure you can monitor baby's airway and the higher you wear the waistband the shorter the panel will be which also helps to get a good fit.
How to wear apron styleWearing apron style will shorten your carrier even further. You will need to remove the buckles and re-thread them the opposite way for this method so your buckles don't end up upside down. Flip the waistband so the reverse side facing out and the panel is hanging down like an apron. You may also need a ribbon for this as the folds on the adjustable waist tend to spread a bit wider when worn apron style. Put the panel on as you normally would. When you are finished you will not see the waistband under baby's bum as you would when wearing in the regular way. If your carrier has a built in height adjustment you can cinch the panel before putting the carrier on and that will shorten the carrier the maximum amount. 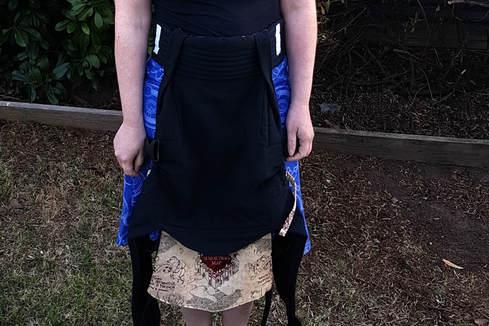 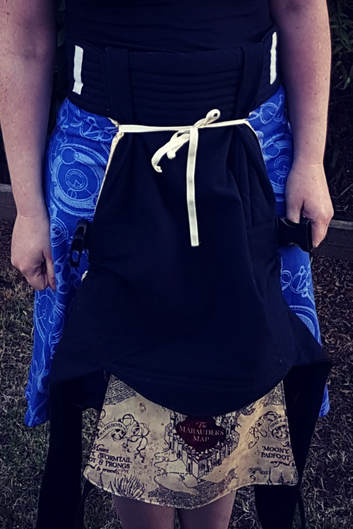 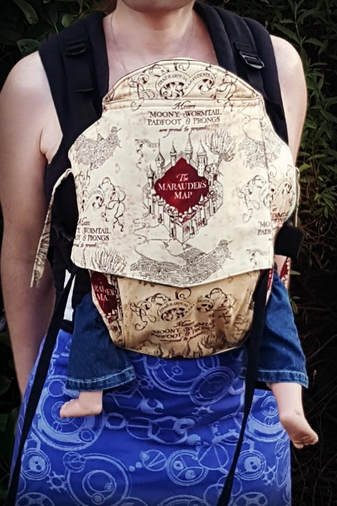 Height of the panel uncinched. 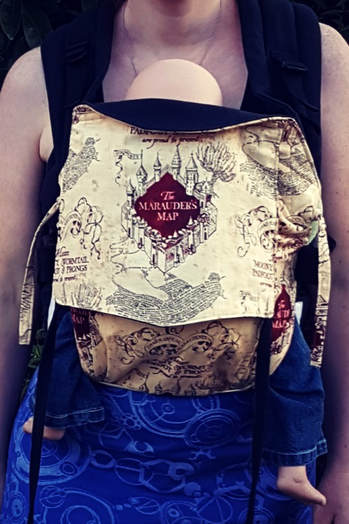 Height of the panel cinched with the built in drawstring and headrest folded down.
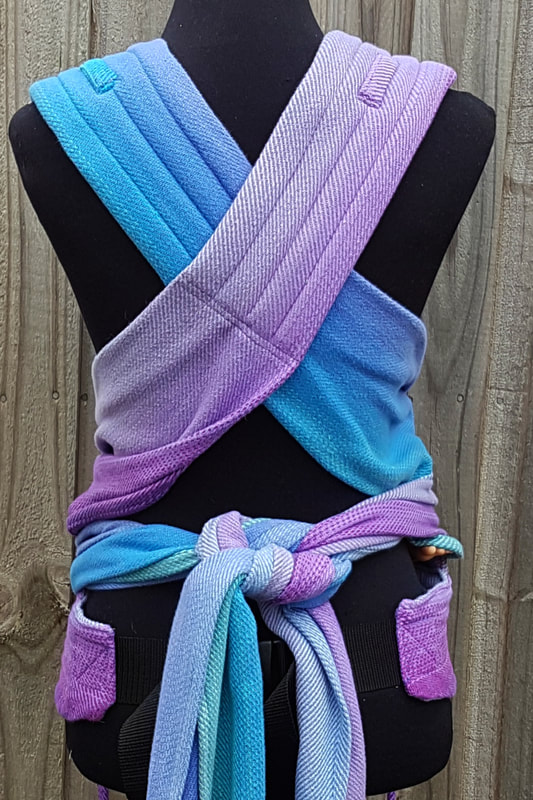
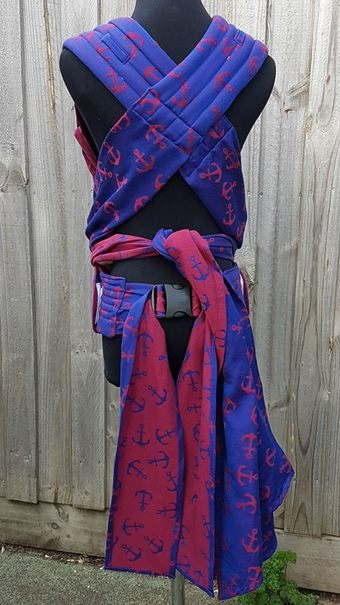
 What are the advantages and disadvantages of different waist styles? All the waist styles are comfortable to wear but there there are subtle differences between them. Below is some information to help you choose. All of my carriers have a padded waist. When worn non apron style. a padded waist helps to transfer your child's weight to your hips rather than your shoulders. Padding can also prevent the waist band from digging in when worn to carry heavy kids. The waist is not too thickly padded though so you can also wear it apron style if you prefer. Wearing apron style (and sometimes rolling the waist too) is handy for shortening the body of the carrier when wearing with a smaller baby. All of the waist style are compatible with an the adjustable base option. Tie WaistThis is an option for meh dai's/mei tai's , half buckles and reverse half buckles (buckle shoulder straps). Pictured below is a reverse half buckle. I usually sew this waist as a continuous length double layer (11cm wide). Sometimes there is not enough continuous length in a wrap for this so I can usually get around that by sewing the waist in three parts and the ties can be double layer (11cm wide) or single layer wrap style ties. I will also sometimes sew this waist in two parts (joined in the middle of the wasitband) with double layer ties. It just depends on how much continuous length available in your wrap. If you have a preference just let me know. Advantages: Can reduce the muffin top look (especially if you have single layer ties) as you can spread the straps out across your stomach. If your waist ties are long enough you can thread them through the shoulder straps for a waist free carry. A tie waist is very easy to share between different sized wearers. Disadvantages: Can take a little practice to get the waist tightened effectively. Takes slightly longer to put on. You need to check you are untiying the right knot when taking baby down (shoulder straps should be untied first).
No Webbing WaistSimilar construction as a tie waist but this style has a buckle threaded through the strap and the ties are slightly narrower so it's easier to thread them through the buckle. The total length is shorter than a tie waist (approximately 70") so the length will not be too annoying when the buckle is threaded on (a buckle takes up less length than a knot). Advantages: Can be used both as a buckle or a tie waist. Quick to put on and off when used with the buckle threaded. A buckle waist is easier to get a firm, tight fit and is handy if you want the waistband in a specific spot every time you wear it. You can't accidentally untie the wrong knot when using the buckle. Minimizes the muffin top look as straps can be spread out more across your stomach. Disadvantages: The length may be short for plus sized wearers when used as a tie (but a longer length is available in custom orders). When the buckle is threaded on this style is not as easy to share between wearers as the fabric ties are not as easy to pull through the buckle (especially the single layer ties version). This waist is best adjusted before putting the carrier on. Once adjusted though you can just leave it set so it's quick to put on, as long as the carrier is not often shared with another wearer.
Buckle WaistThis waist adjusts with a buckle and webbing. Advantages: Quick to put on and off when used with the buckle threaded. A buckle waist is easier to get a firm, tight fit and is handy if you want the waistband in a specific spot every time you wear it. You can't accidentally untie the wrong knot if you have a buckle waist and tie staps. There are elastic ties on the end of the webbing so excess webbing can be rolled up out of the way for a neat and tidy look. Easy to share between different wearers. Disadvantages: If you are very petite you may prefer a custom length for the padded section of the waistbelt.
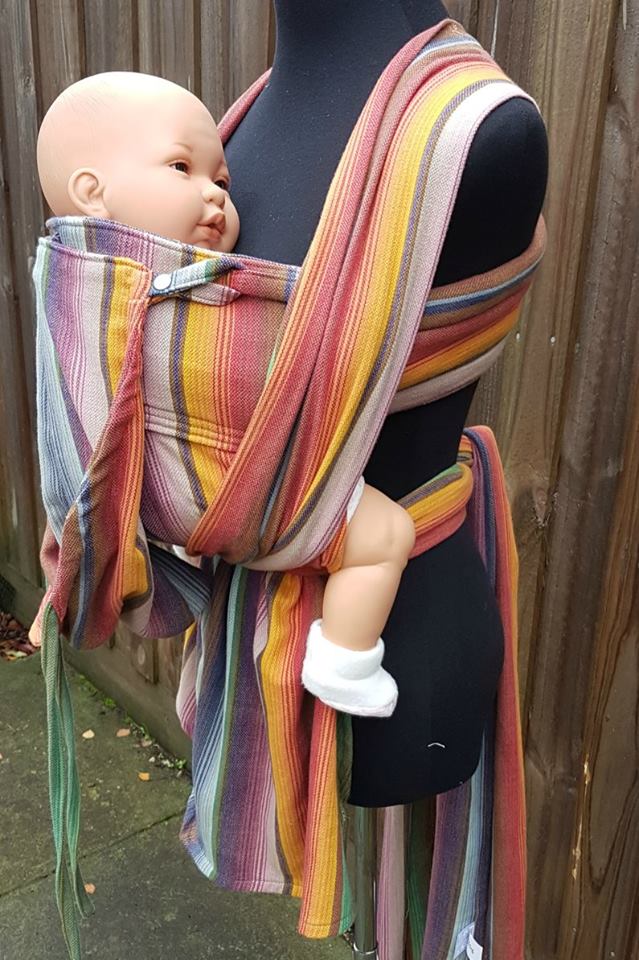
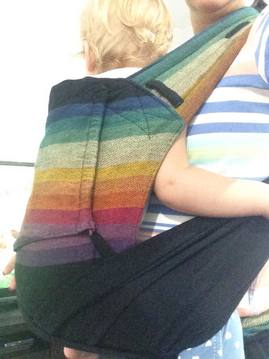
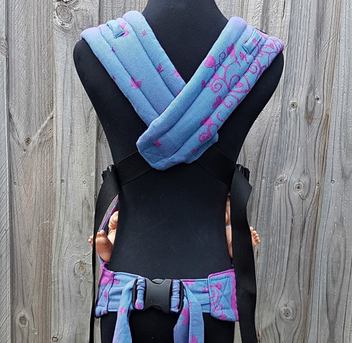
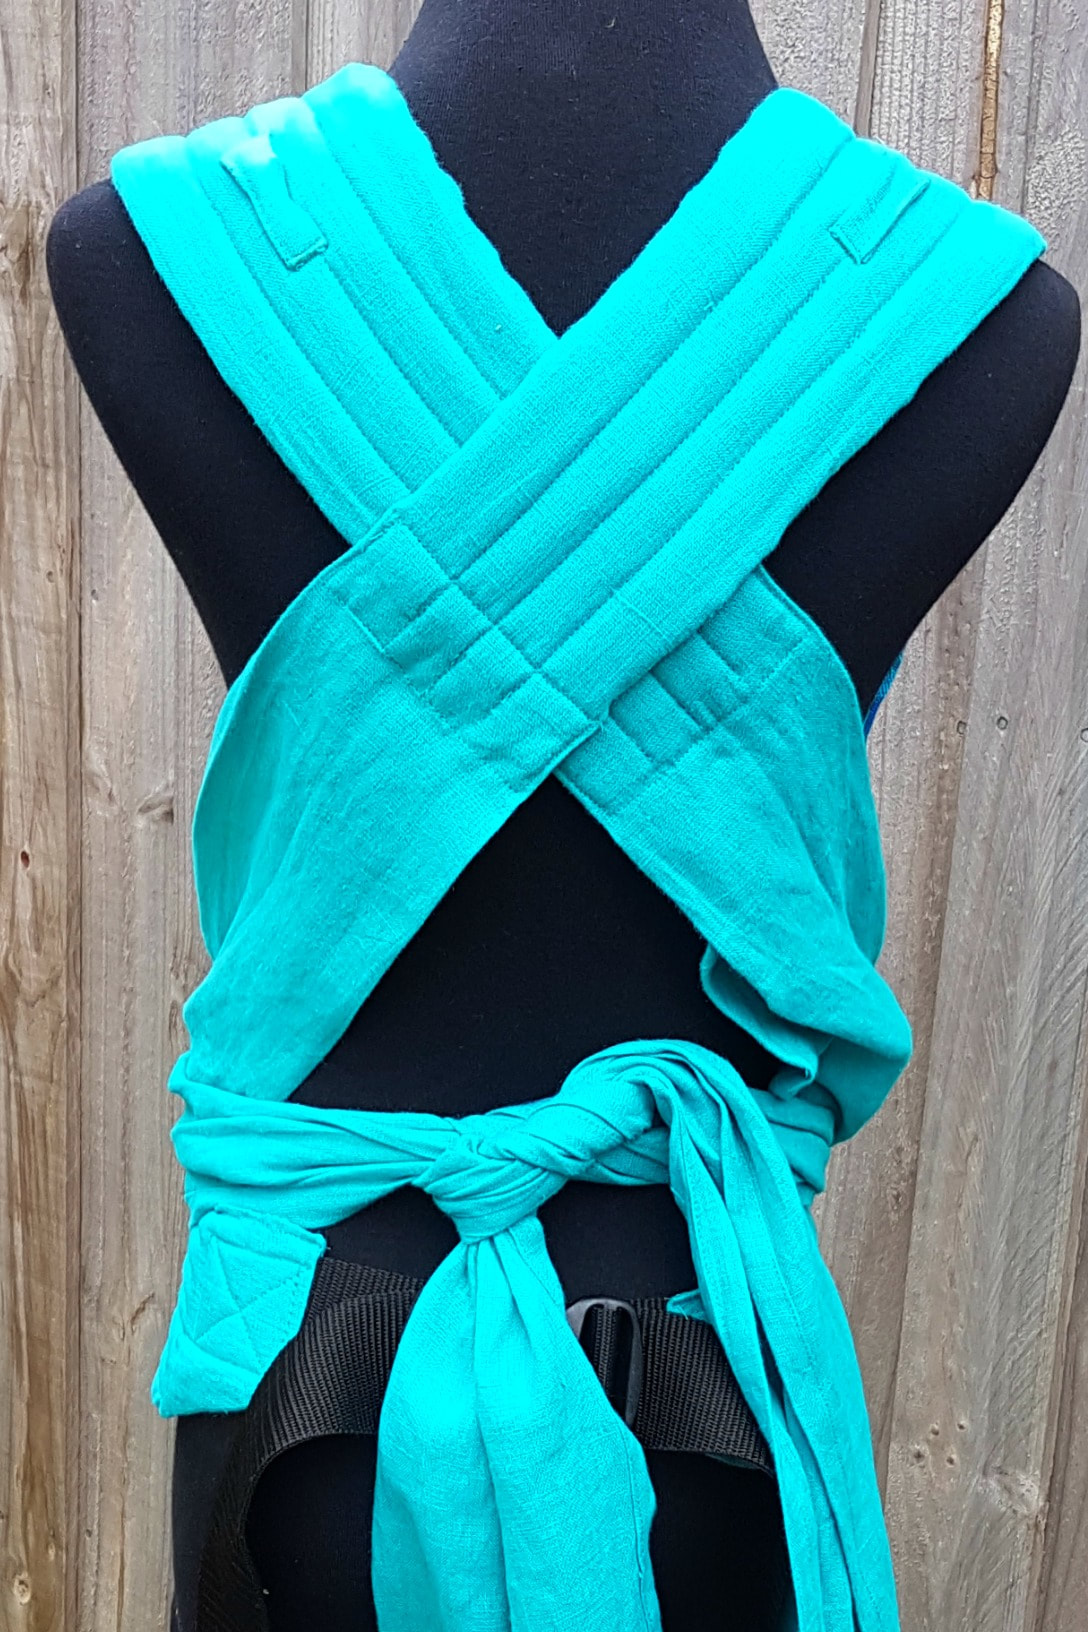
Ring WaistThis waist has a ring closure. You thread the tail through the ring in the same way you would thread a ring sling. The total length of the waist is 155cm (length can be customized) Advantages: In a back carry you can spread the fabric out across your stomach very comfortably and it is easy to tighten. Easy to do a high back carry without the waistband slipping or loosening. Very easy to share between different sized wearers. Disadvantages: The long tail may be annoying for petite wearers (can by customized easily though). Can take longer to put on than a buckle or tie waist. 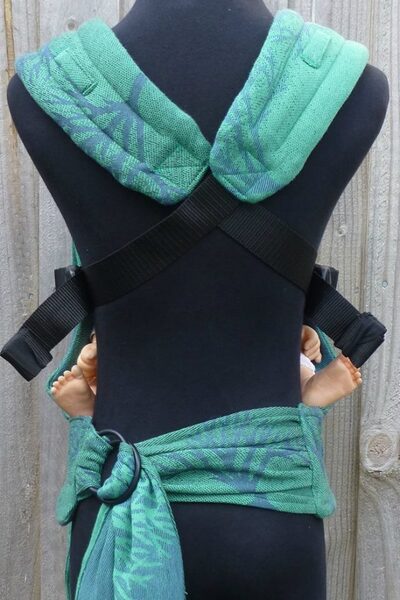 HybridThis waist has a closed cell foam in the centre and padded with fleece across your hips. It can offer extra support for heavy children by helping to transfer more weight to your hips. The hybrid waist can't be rolled like the padded waist can.
My mei tai's, half buckles, and full buckles vary in how they fit and how easy they are to modify to fit different sized children. I don't recommend wearing too big a size in half buckle/full buckle. Ideally a mei tai should also be the correct size but they are much easier to modify to fit than the other styles so can fit a wider size range. Mei Tai's and half buckles have no darts in the smaller sizes (so your baby will be held close to your body) but the toddler size does. Darts allow a wider/deeper seat without having to make the whole carrier wider and tend to make the whole carrier fit a bit bigger. Carriers with darts tend to hold your baby slightly away from your body (which transfers the weight mostly to your hips) so I have added darts to all my full buckles to help keep the weight off your shoulders since you cannot offset this weight by tyiing the shoulder straps as you can in a mei tai/half buckle. If you have Flared Straps (padded to wrap) on your carrier you can use the spread out wrap part of the straps the extend the width of the seat for a child who has begun to outgrow it. It is not essential for a toddler to be knee to knee by the way (one of my daughter was happily carried occasionally up to five years old in a standard size carrier) but knee to knee does tend to be more comfortable and allows a better weight distribution for wearer and wearree. Sizing is a guide only and is based on my average sized children plus some customer feedback I am always looking for more feedback so if you have any thoughts on sizing I would love to hear from you! In general if your baby is on the smaller side of average you may get a longer use out of a particular size or if your child is at the top of the charts it may be outgrown sooner. 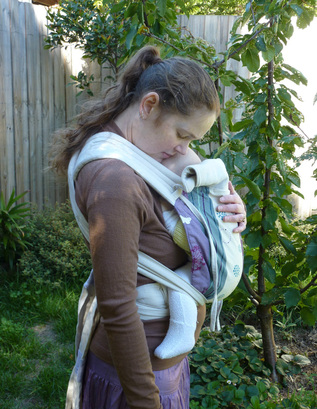 Mei Tai'sQuick size guide - if you baby is under a year old size 1 is best, if you baby is over a year size 2 is recommended, and if your baby is at least 18 months then choose toddler. Prefer a mei tai that will you can use across a large age range? - choose size 2 (standard). Want more detail? See below! Size 1- baby size - from newborn to young toddler. Adjustable base option available (on custom carriers) for legs out carry from an early age. Click on the link for action photos and dimensions. This design has a curved top edge and straight sides but a straight top edge option is available. Size 2- standard size - suitable for both babies and toddlers. This size has a wider and taller body to support the weight of your older baby and toddler well. Curved top edge for extra head/back support. This size fits best from around 6-8 months but can be used for younger babies with modifications. To use with a young baby the bottom can be rolled up to make it shorter and cinched with a ribbon to make it narrower or baby can be carried with legs froggied inside the carrier. The body is also slightly contoured so when you roll the bottom to make the mei tai shorter for a baby it will be narrower as well allowing a small baby to be more comfortably legs out. The mei can be used legs out (with the bottom rolled) from around 4-5 months. This size mei tai suits babies up to around 2-3 years. Size 3 - toddler size - This carrier is taller and slightly wider than size 2, with seat darts for a deeper seat. This size fits from at least 18 months to around 3-4 years. Curved top edge and straight sides. Mei Tais are the most versatile in how they fit. They will fit all sized wearers although if you are plus size you may like extra long straps for tying tibetan or if you are petite (less than a 23" waist) you may prefer petite waist padding to get your waist strap as tight as you like. Mei Tais are easy to modify for a small baby by rolling the waist band to reduce height or by cinching the base with a ribbon to reduce width for legs out. Mei tai's can be worn apron or non apron style (wearing non apron will increase the height and wearing apron will reduce it). I can also add an adjustable base to your carrier which means you can adjust the width and the waistband will always lie nice and flat and it's easy to roll if you need to too. The smallest size mei tai I make is 15" as I feel this is fairly easy to modify to fit a newborn and will not be outgrown too soon. A 14" carrier is a better fit for a very small baby and I did use this originally as my baby size but I found that my small to average daughter outgrew it by 12 months. I can make this size on request though if you don't need your carrier to be suitable for toddler wearing. Please note baby and standard size mei tais have no darts to allow a close fit. I can make these sizes with darts on request but bear in mind they will fit slightly differently (in general they will fit bigger). 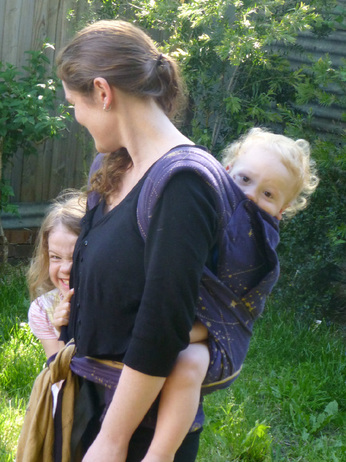 Half BucklesHalf buckles are not as flexible as mei tai's in sizing and are meant to be worn non apron style. Like a mei tai you can roll the waist and wear apron style but it will sit a little diffferently. Like mei tai's this style of carrier is reversible - just remove the buckles and rethread the opposite way. Small babies can be worn froggied or with the base rolled and cinched (for legs out). Although half buckles are designed to be worn non-apron style t is still possible to comfortably roll the waist to shorten the carrier or to wear apron style since the waist is padded rather than structured which can let you use the carrier sooner with a smaller baby. Baby size (size 1) will fit from newborn (with legs froggied in or with base rolled and cinched for young babies) until 18 months. An adjustable base in recommend for babies under four months old. You will need to roll the waist for a better fit for babies younger than 4-5 months in a legs out carry. Standard size (size 2) will fit best from around 8-10 months until around 2-3 years. Toddler size fits from around 18 months (small to average sized toddlers will fit best in this size from 2 years. Measurements for half buckles - The length of the waist belt is 73cm including buckles, but I can make that smaller or longer if you need it. The length of the padded section is 63cm. Please note baby and standard size mei tais have no darts to allow a close fit. I can make these sizes with seat darts on request but bear in mind they will fit slightly differently (in general they will fit bigger). 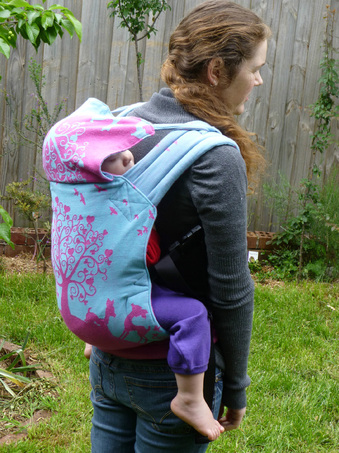 Full Buckle/Buckle TaiFull buckles are the most convenient style of carrier to use but least flexible style sizing wise so I have added another sizing option (infant) to suit for smaller babies. You can cinch base with ribbon if the base is too wide but young babies cannot be carried with legs froggied. Babies under a year fit best in infant/baby size. 18 months is really the minimum age for toddler size (unless your child is very tall) as the body panel is quite tall. Small to average size toddlers will fit best in toddler size from around 2 years and will generally not fit comfortably before this.
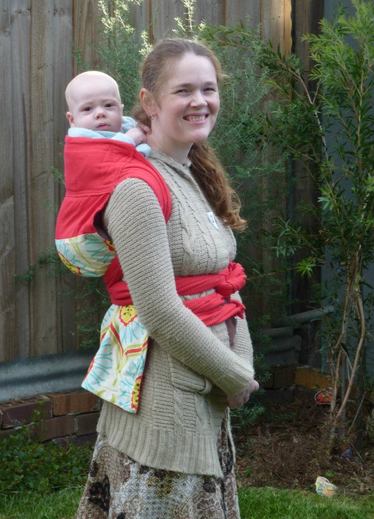
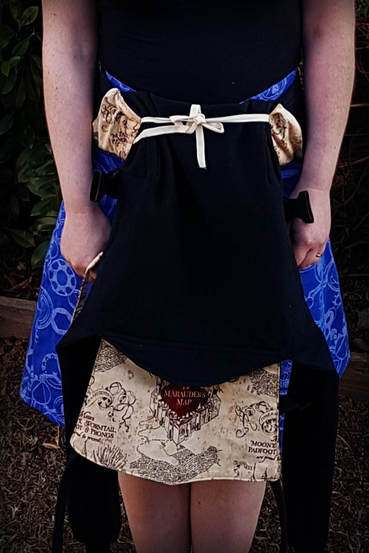
Infant (35.5cm x 37cm/14" x 14.5") 4 months - 18 months Baby/In between (38cm x 38cm/ 15"x 15") 6 months - 2 years Standard (40.5cm x 42cm/16" x 16.5") 10 months - 2.5 years Petite Toddler/ In between (43cm x 43cm/ 17"x17") 18 months - 3 years Toddler (46cm x 46cm /18" x 18") - 2- 4 years Preschool (48cm x 50cm) 19" x 20" - 3 years - 5 years Standard Strap (16"/40cm) fits from 158cm to 180cm tall, Australian dress size 10 - 16. If you are outside this size range you may need petite or extra long straps. Petite straps are 14"/35cm and 18"/46cm for extra long. Fit adjusters/adjustable strap is available. Adjustable Size The adjustable base and height option added to on infant or baby size carrier will make your carrier suitable for a smaller baby than stated above. Babies vary in height so some babies may fit in the carrier sooner or later than others - just bear in mind that babies under four months must be well supported in the carrier with no slumping for optimal positioning. Custom Size You can choose use a shorter height size to suit a baby who likes arms out or to share between siblings (a toddler and preschooler for example). Some popular combinations are toddler width and standard height or preschool width and toddler height. Flared Straps are my version of padded to wrap straps. Straps that start off with a padded section and then flare out to a wrap strap. They are most often found on wrap conversions but this style of strap can also be found on mei tais made from cotton duck or linen. You can tie the straps in all the ways shown in my insturctions but you can also spread them across baby's bum for additional support. It's very easy to do! Follow these steps for nicely spread out and tensioned straps every time. Put your carrier on and get your baby onto your back using your preferred method. I like to hip scoot. I am using a half buckle in this demonstration. Clip the waist belt on and let the carrier hang behind you. Hold your baby on your hip, then scoot your baby around to your back. Using the straps pull the body of the carrier over your baby. Keep on hand on baby until baby is secure. 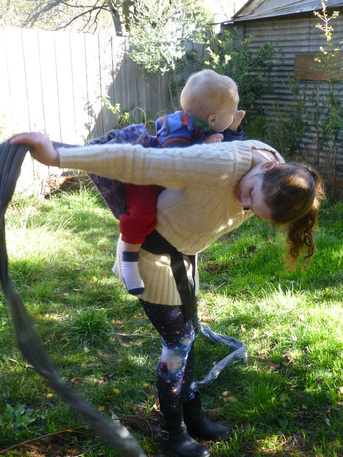 Pull your straps straight into the air and bounce a little (this seats your baby deeper into the carrier). 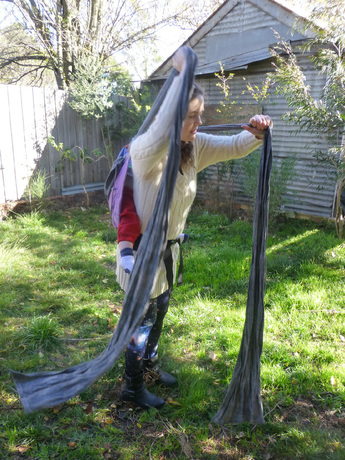 Bring the straps over your shoulders and pull them towards the floor. Hold one strap between your knees and bring the other over your arm and down to pass over baby's leg. 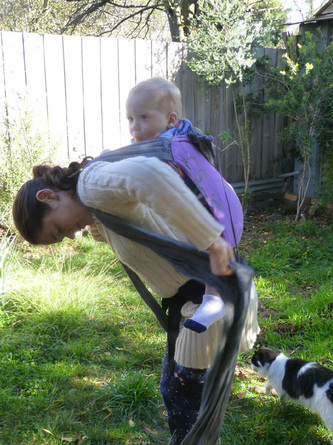 As you bring the strap over baby's leg hold it by the top edge and pass it across baby's leg and back keeping your arm and your top rail high. Pass the top rail to your opposite hand. 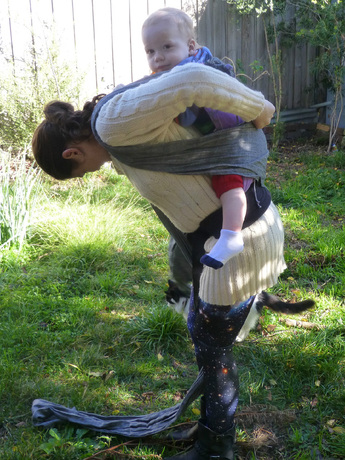 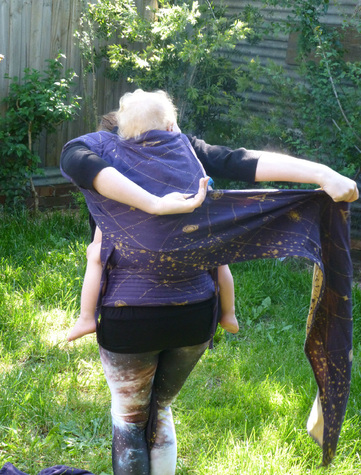 Pass the strap over baby's leg keeping it spread out. Lift baby's leg over the rail so the strap is now bunched under baby's legs. If you skip this step and only pass the strap under you will loose tension. 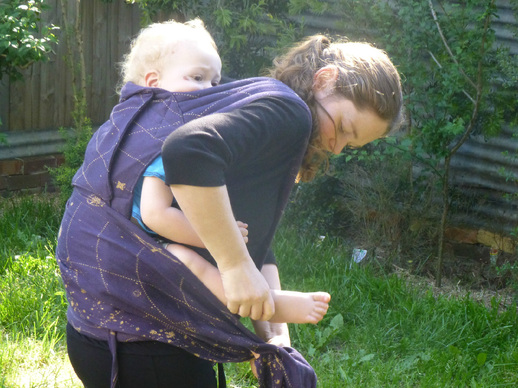 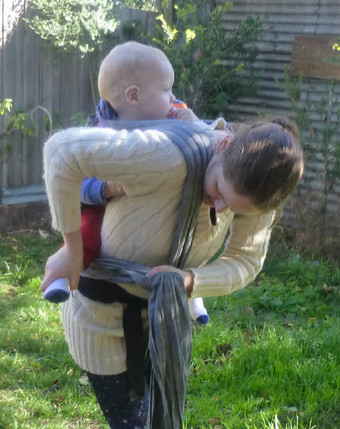 Repeat for the other side and tie in front.  All done!. 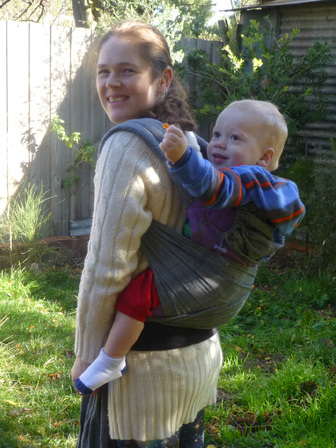 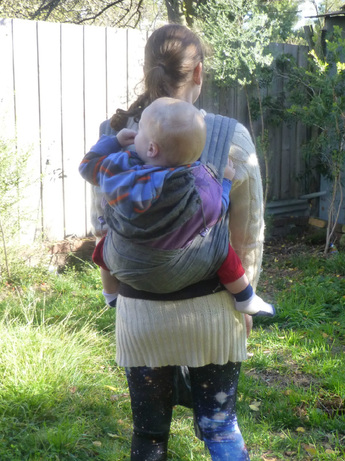 I usually wear my mei tai 'apron style'. This is where you tie the carrier around your waist like an apron. The print you want to show when the mei tai is worn will be towards your body. This is the method I describe in my instructions. When sitting in the mei tai the baby's bum will sit below the top of the waistband in a pouch made by the mei tai. There is another method you can use to tie your mei tai around your waist - the non-apron style. Tying this way distributes baby's weight differently. More of your baby's weight will be distributed towards your hips. You can tie around your waist or at the top of your hips. To tie this way hold the mei tai with the print you want to show facing towards you and reverse side facing out. Then flip the waist band under once and tie around you waist. Put your baby in the mei tai with your preferred method and tie on as normal. The whole waist band will sit below your baby's bum (see picture below) allowing it to direct more weight towards your hips. Tying non-apron also lengthens the body which allows you to get more use out the mei tai if your baby has grown too tall for that size. 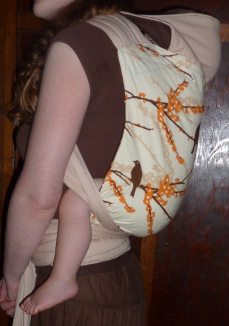 non- apron style - baby's bum sits above the waistband 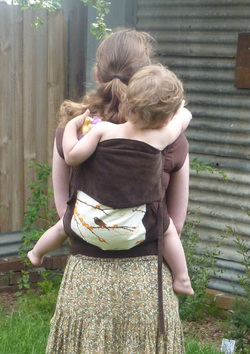 another example of non-apron style 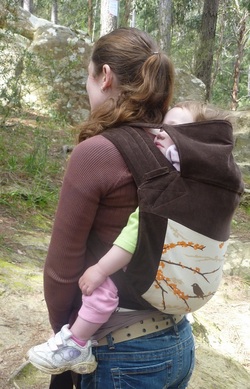 An exampe of apron style - baby's bum is below the waistband. You can't see any of the waistband under baby's bum when the mei tai is worn.
|
AuthorI love to sew. I have five curious and active kids who keep me busy! Archives
May 2024
|


 RSS Feed