|
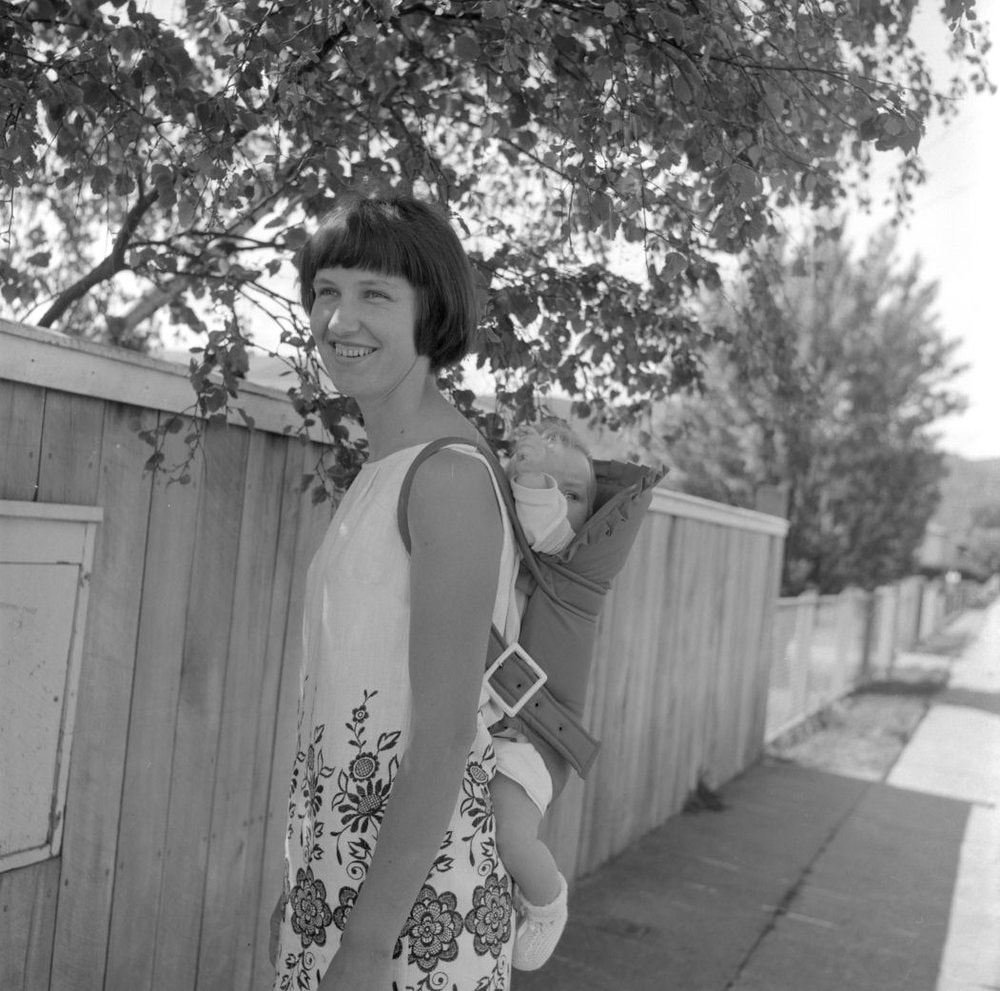
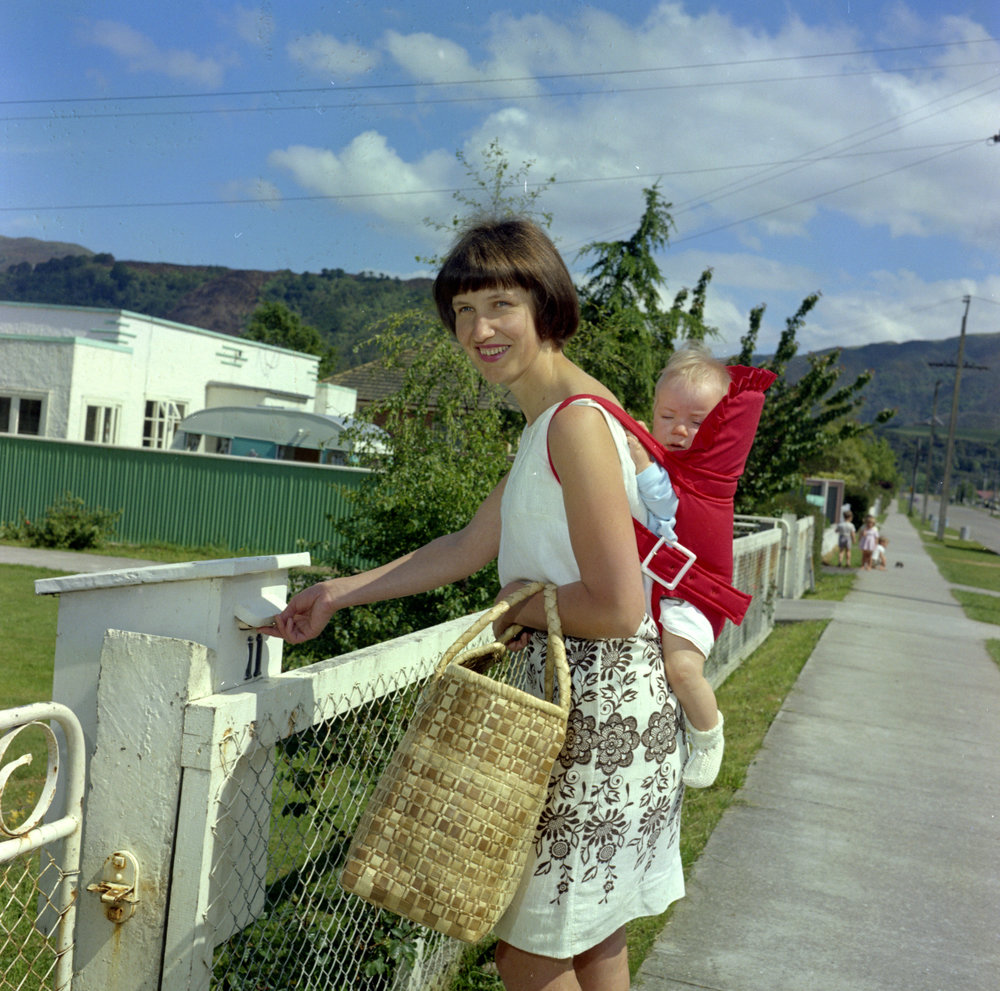
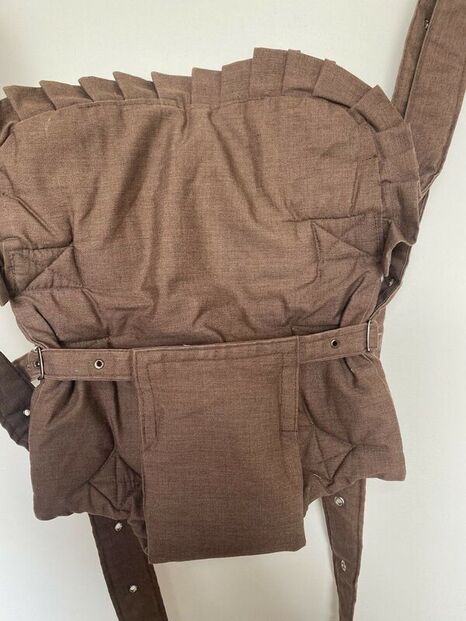
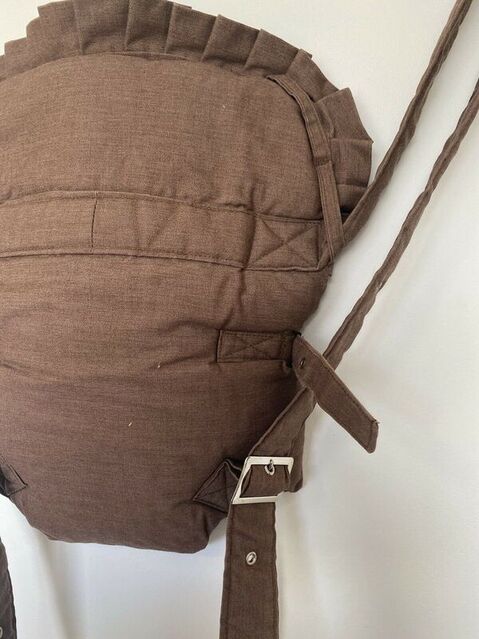
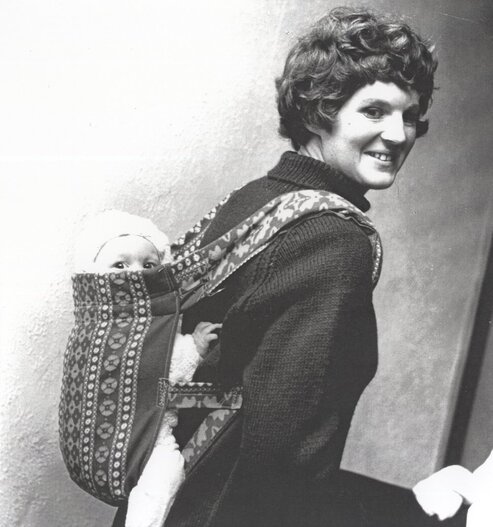
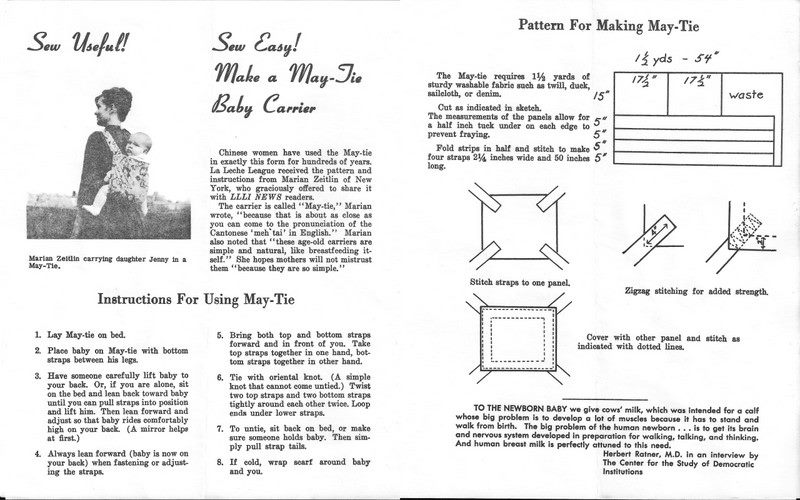
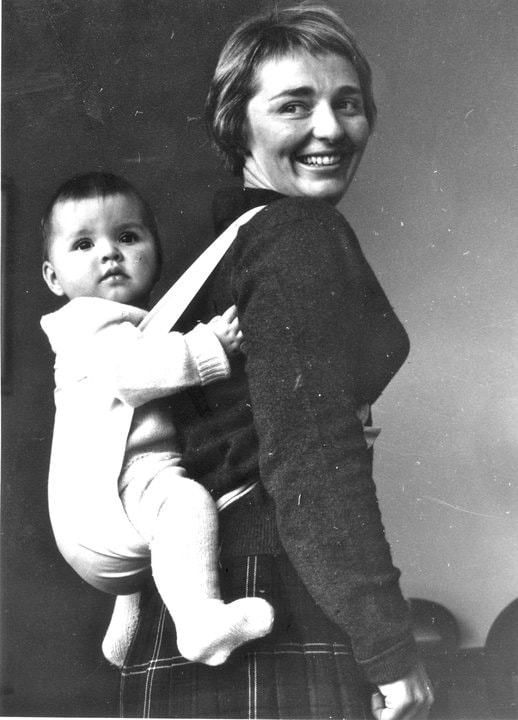
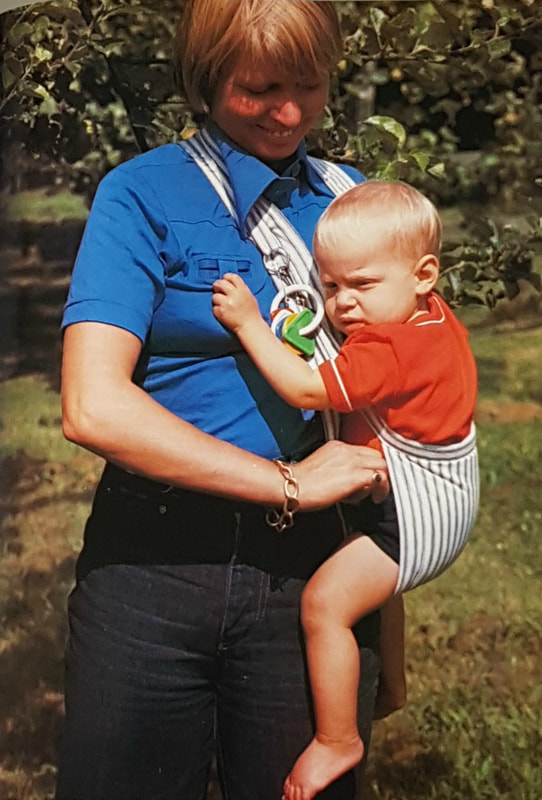
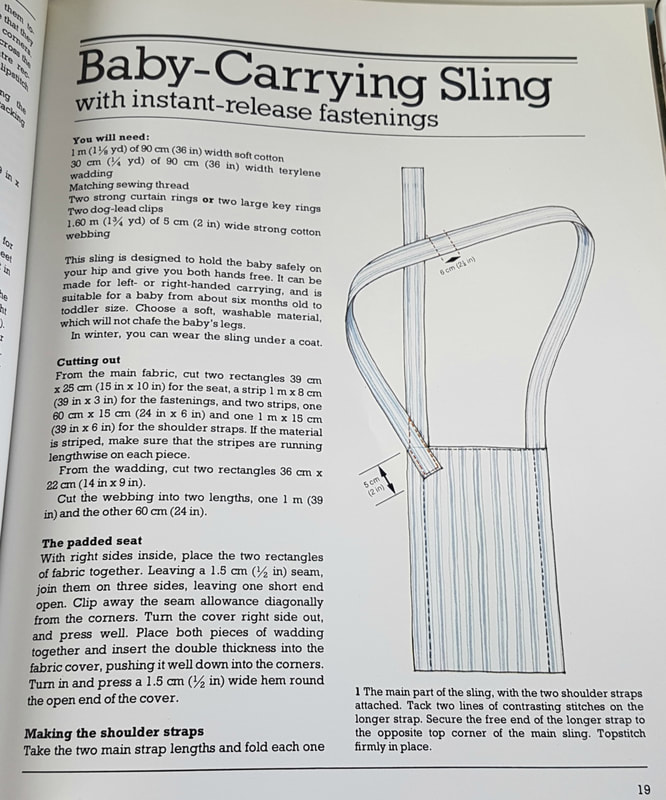
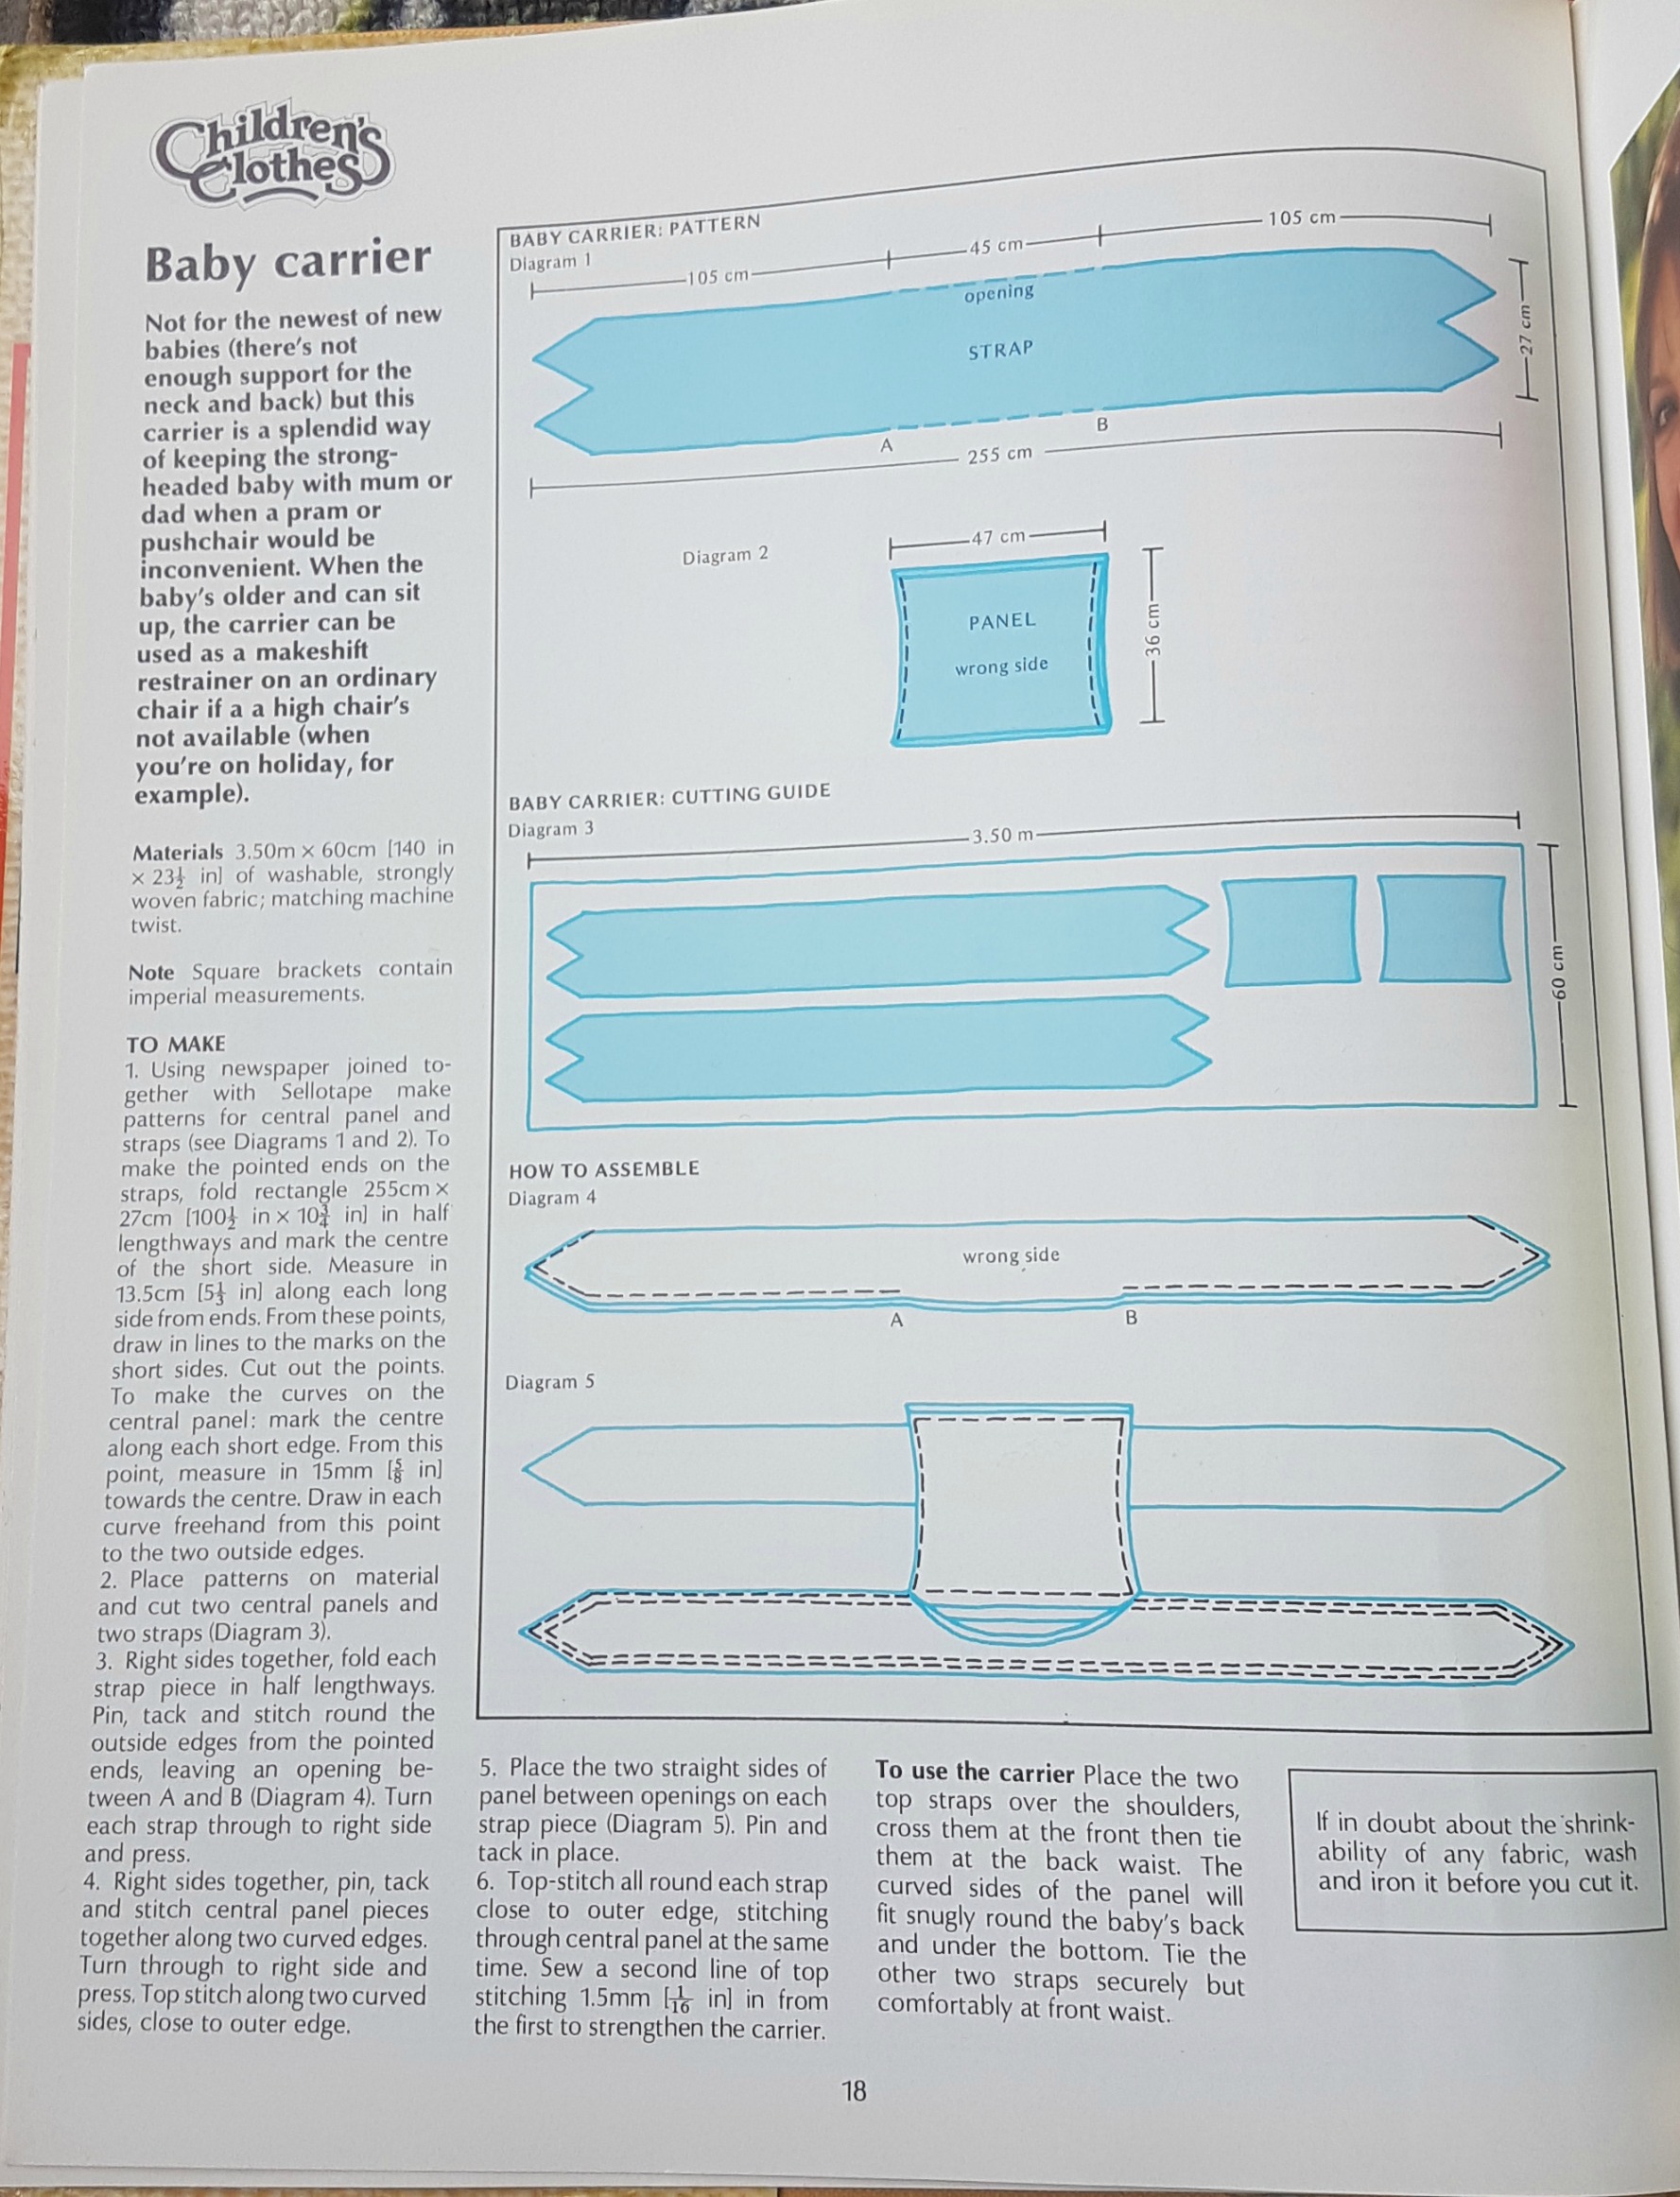
I came across a vintage baby carrier on ebay called the Maral which led me to discover an interesting bit of babywearing history. This carrier was patented in the 1969 in New Zealand and was part of a revival of interest in babywearing that occured in the late 1960's. Baby carriers were especially popular among Le Leche League members. Marilyn Campbell in 1969 ran Maral with her husband Alistair and also organised the first formal La Leche League meeting in upper Hutt. Diane Hildreth "Yes Maral. When I was with Parents Centre Upper Hutt we promoted them in our magazines. I had one for my son Iain when he was a baby. They were fantastic. You could wear them back and front, adjust the straps and they provided head support which others on the market did not. I could do the veges for tea, vacuum, do the washing, all while I had in safely close to me." (Facebook comment from You know you grew up in Upper Hutt, Zealand when you remember.........' on the 29/30 September 2017 Christine Oliver "All of my 4 babies were carried in a bright yellow one of these in the 1980s. I offered to sell them in Perth WA as I had so many queries about where to purchase but Marilyn was content to keep the business small and local." (Facebook comment Upper Hutt Heritage Facebook page on the 29/30 September Photo by Wilfred Revelle Jackson 1970 Photo by Revelle Jackson 1970 Maral baby carrier back and front view. A different baby carrier from the same era from the Upper Hutt City Library Heritage Collections. There is not much information about this one, possibly handmade. Lynne McLellan and bay Tascha. Photo by Revelle Jackson date unspecified. Some parents made their own carriers, the Le Leche League offered a pattern (printed in their magazine) https://dunedinbabywearinglibrary.files.wordpress.com/2012/09/may-tielllphoto.jpg Do you have any memories of the Maral baby carriers or of babywearing in the 1960's or 1970's in New Zealand? Sources:
https://dunedinbabywearinglibrary.wordpress.com/background This is a comprehensive article covering the history of babywearing in New Zealand. https://uhcl.recollect.co.nz/nodes/view/21615 https://uhcl.recollect.co.nz/nodes/view/2273?keywords=marilyn%20cambpell&type=all&highlights=WyJtYXJpbHluIiwiY2FtcGJlbGwiXQ==&lsk=0d1c146c0e7a22f218341709c97a0a8c https://uhcl.recollect.co.nz/nodes/view/9425?keywords=campbell%20baby%20carrier&highlights=eyIwIjoiY2FtcGJlbGwiLCIxIjoiYmFieSIsIjIiOiJjYXJyaWVyLiIsIjQiOiJjYXJyaWVycyIsIjEyIjoiY2FycmllciJ9&lsk=6a7a7743138d923d210d814d8a2f7f53
0 Comments
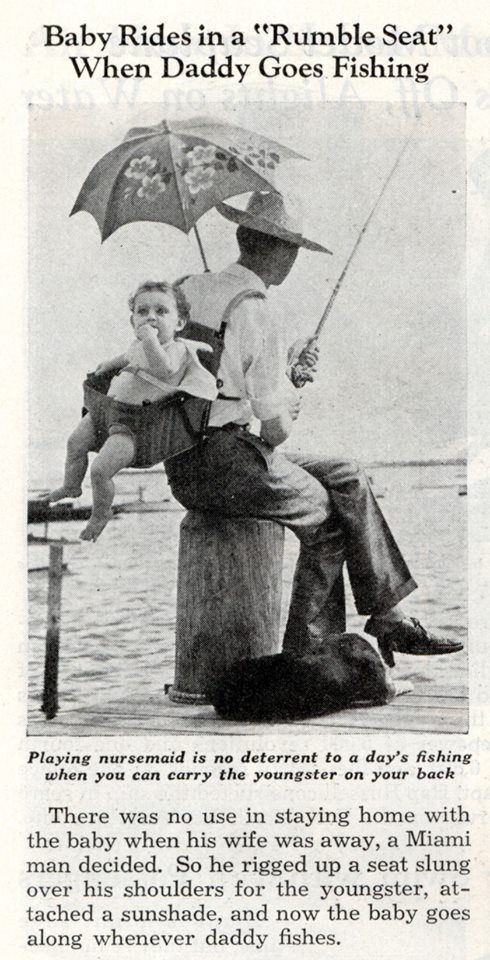
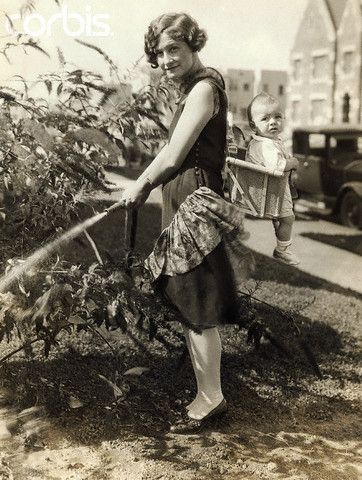
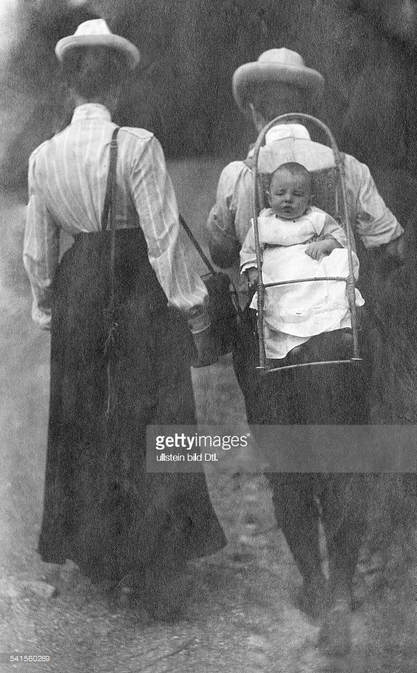
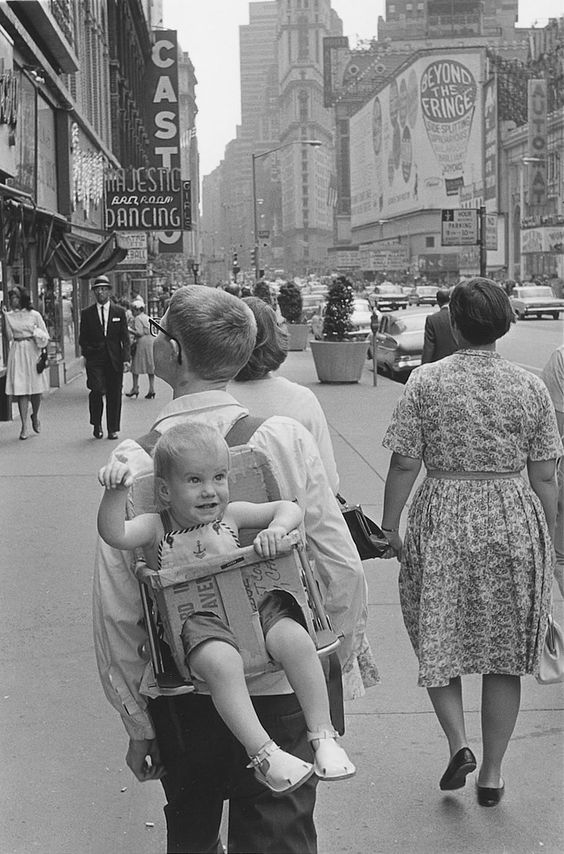
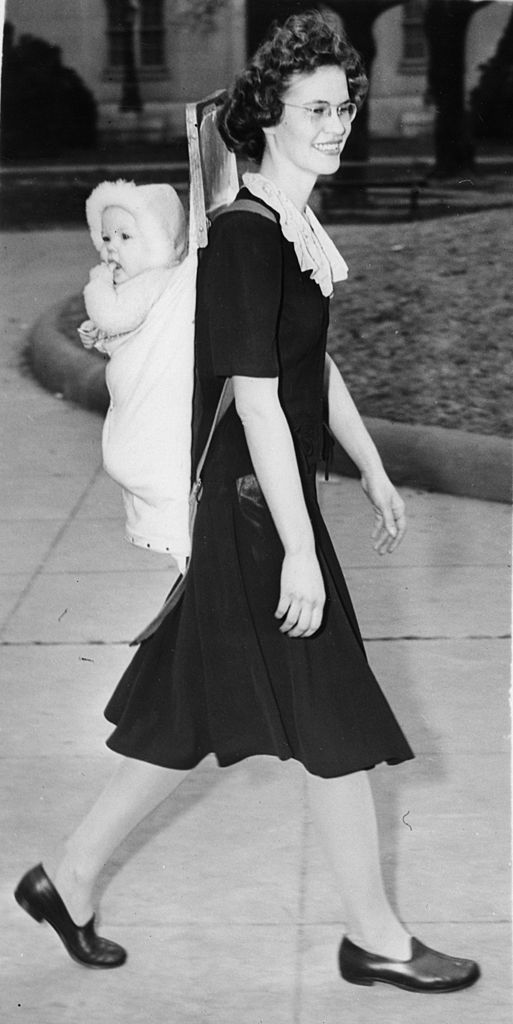
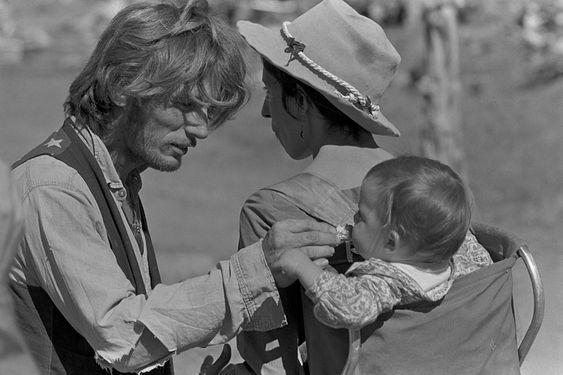
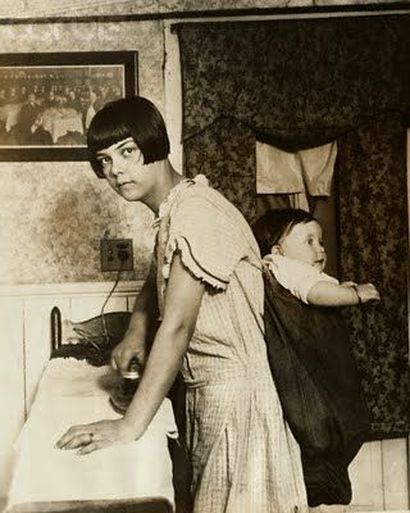
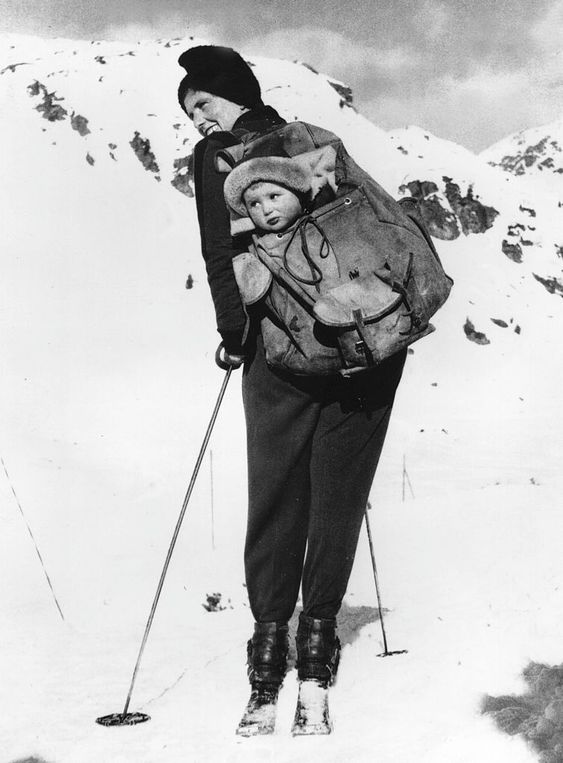
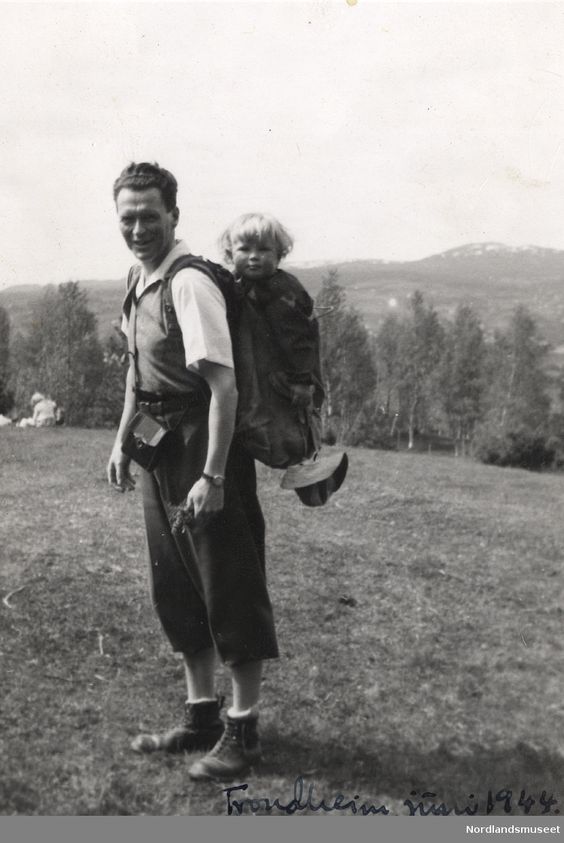
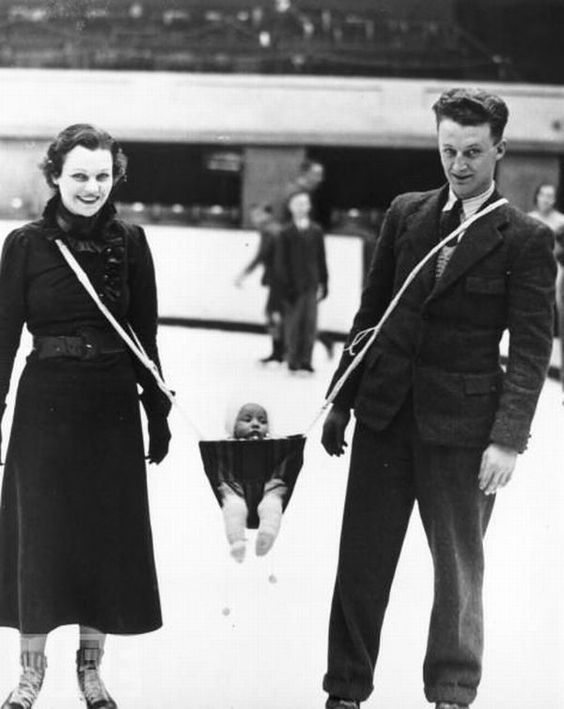
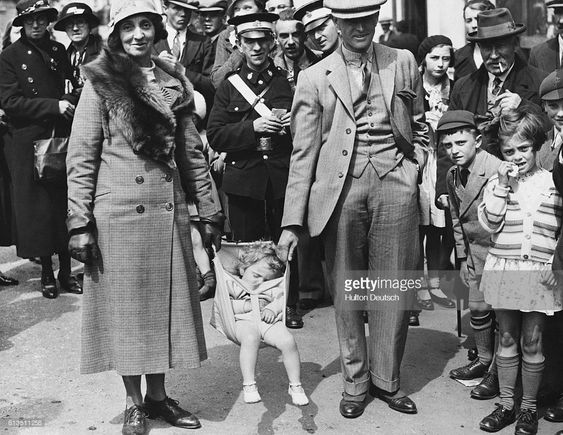
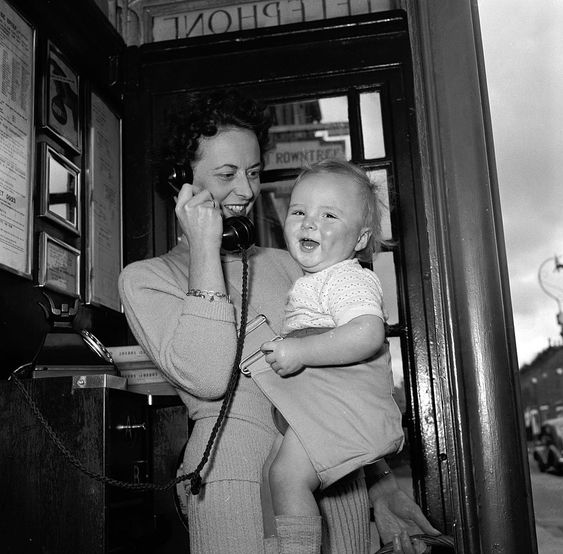
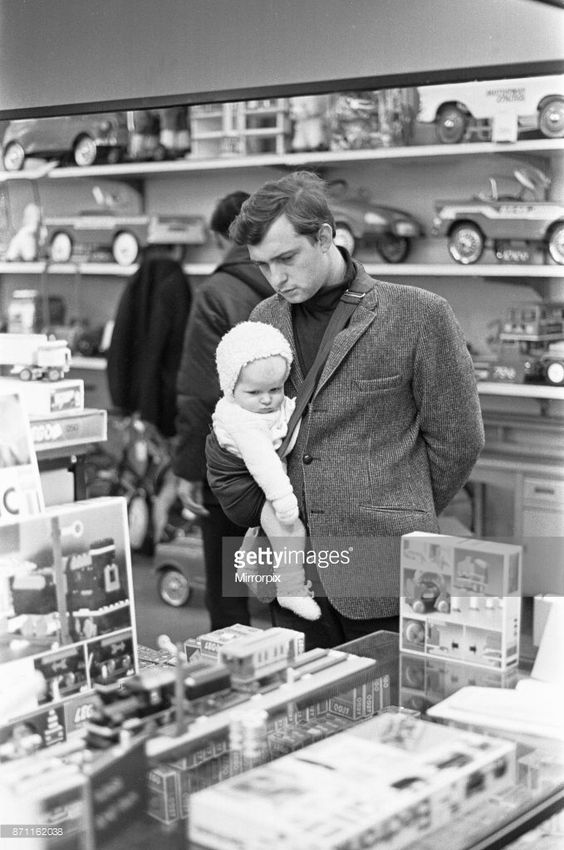
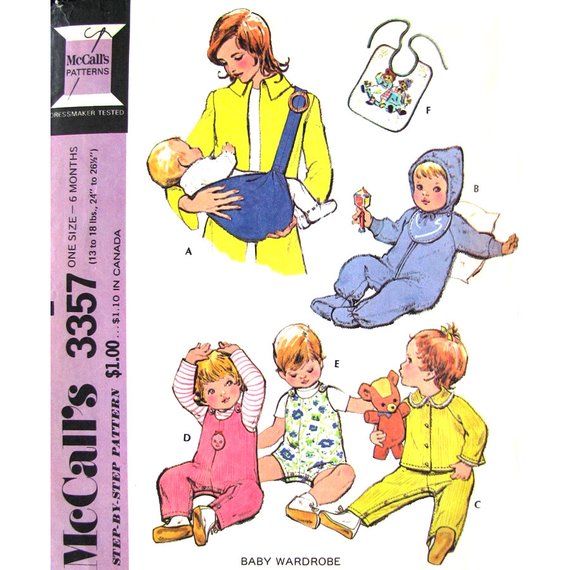
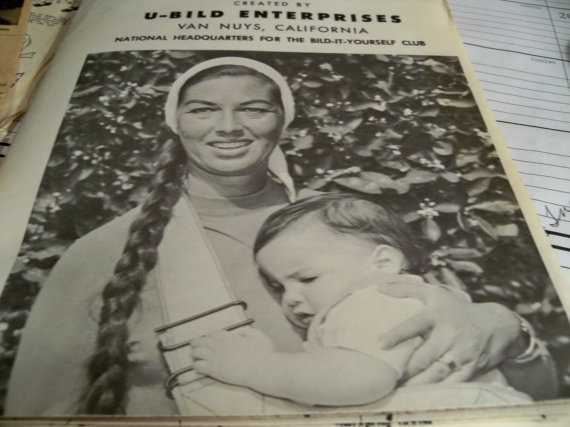
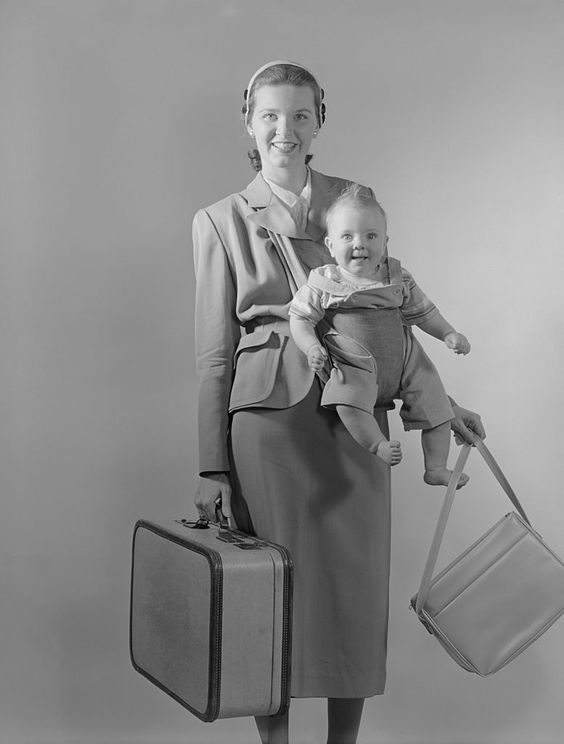
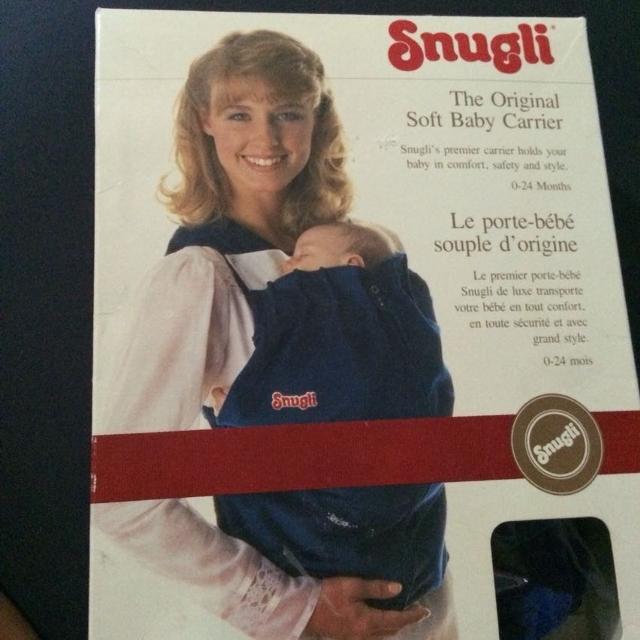
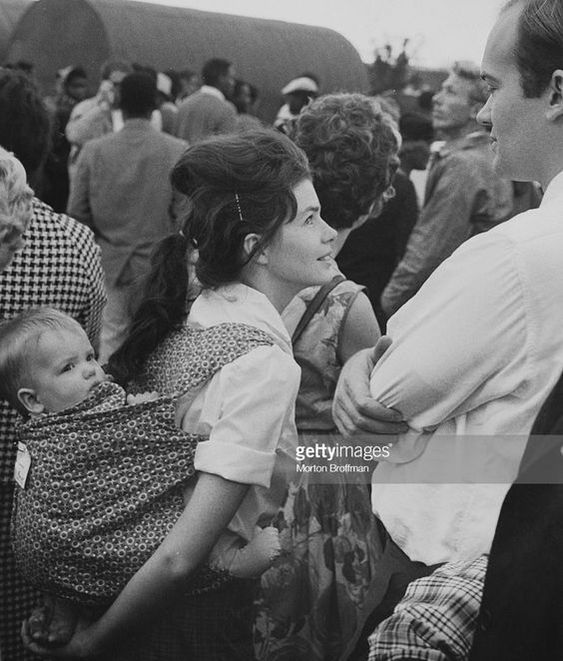
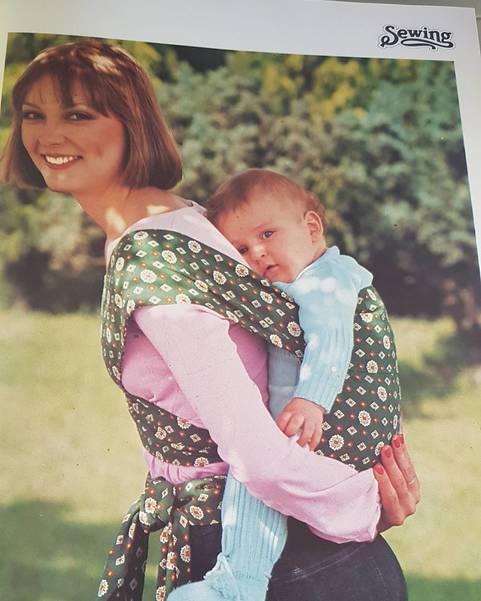
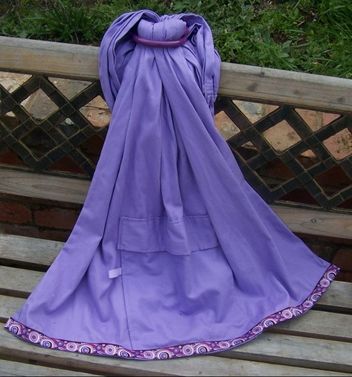
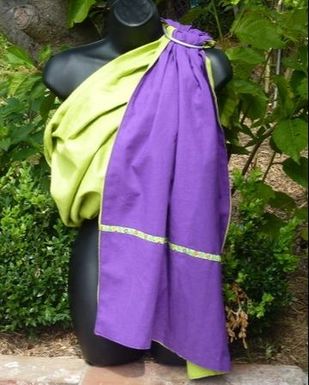
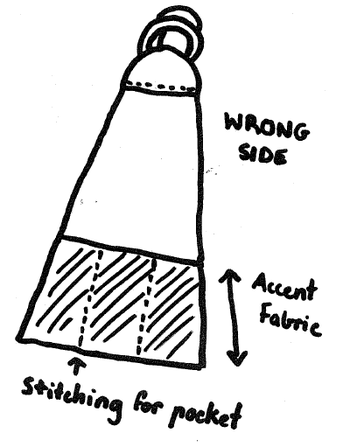
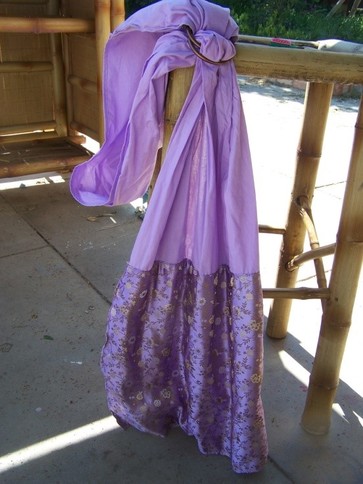
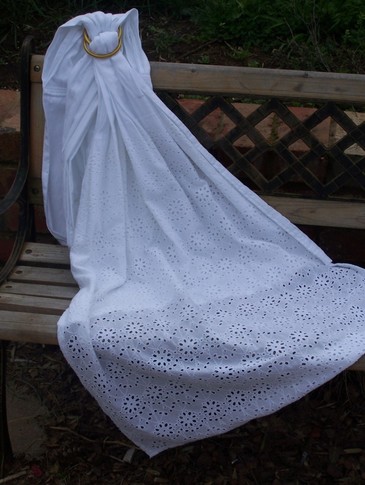
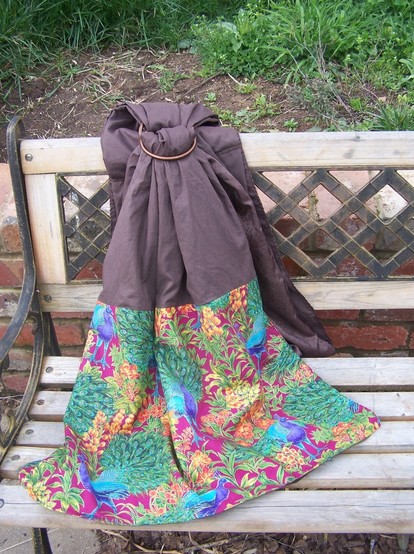
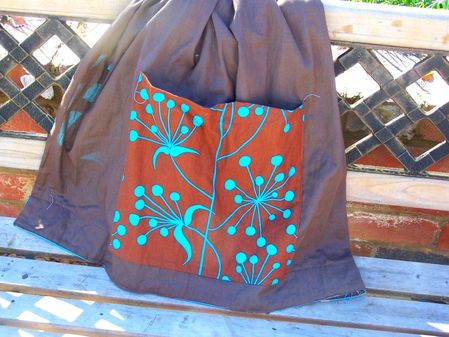
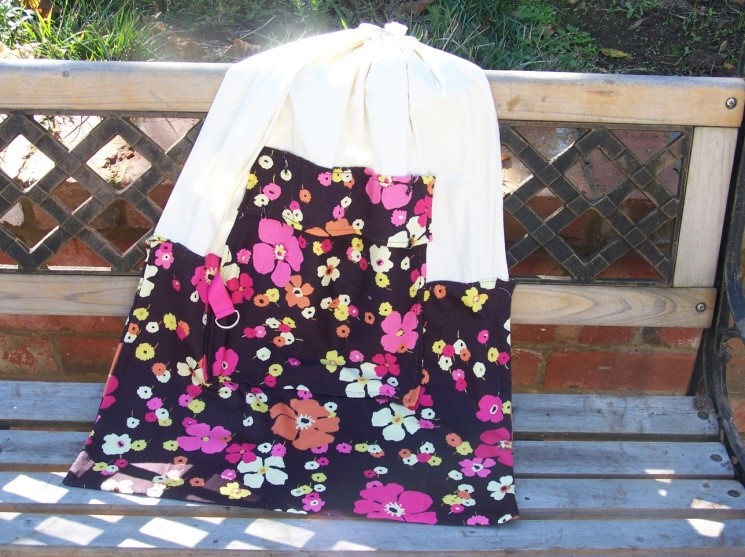
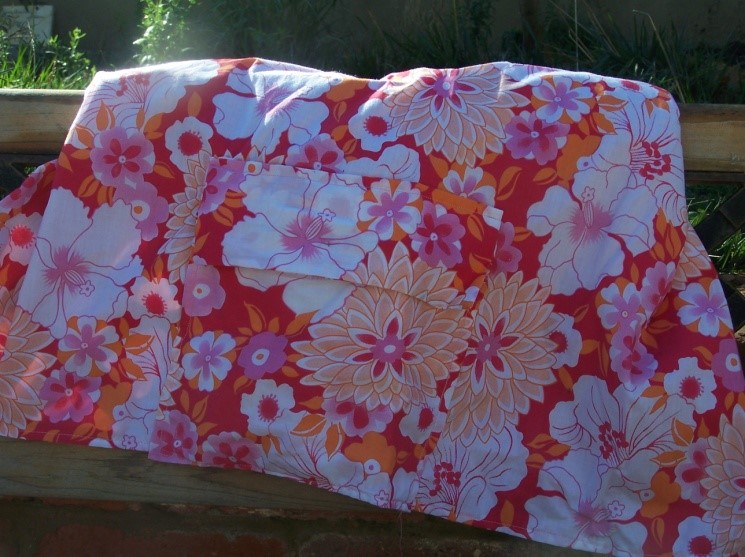
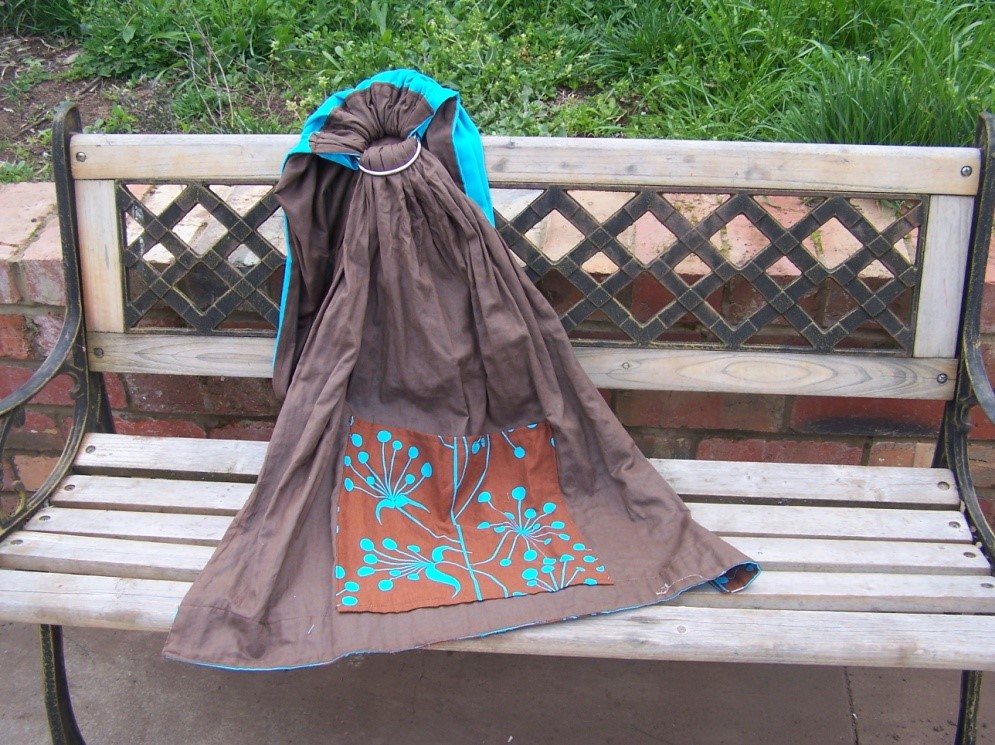
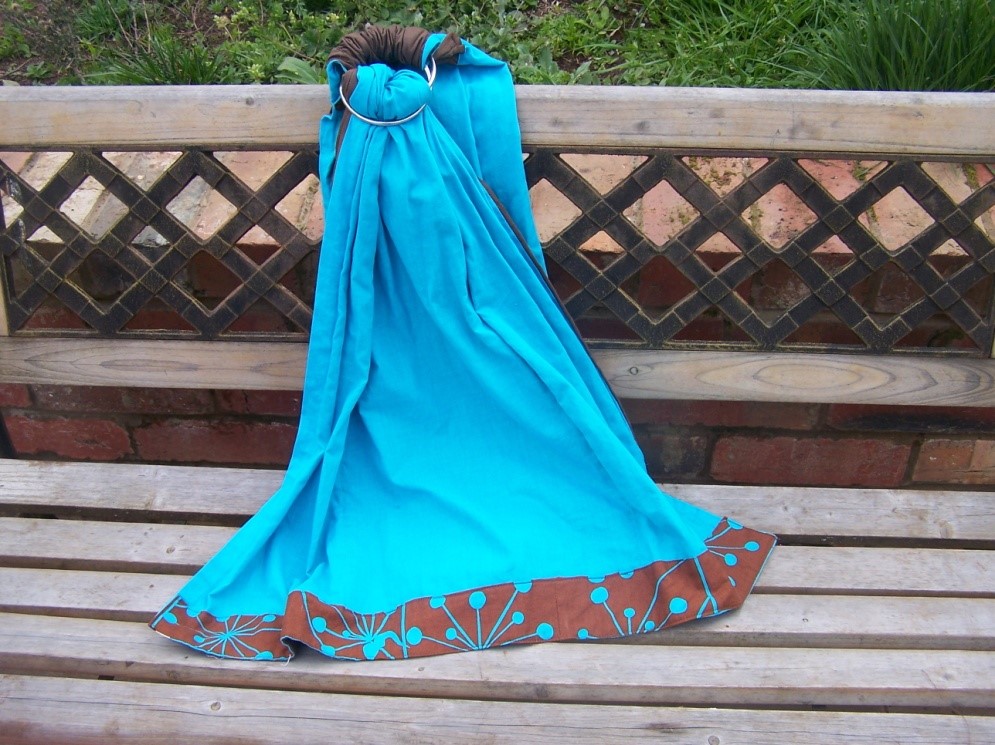
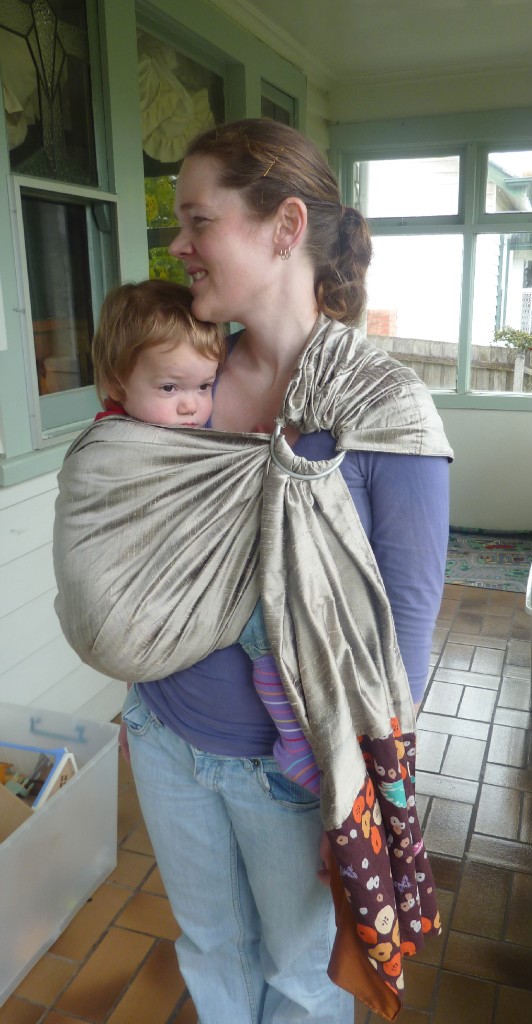
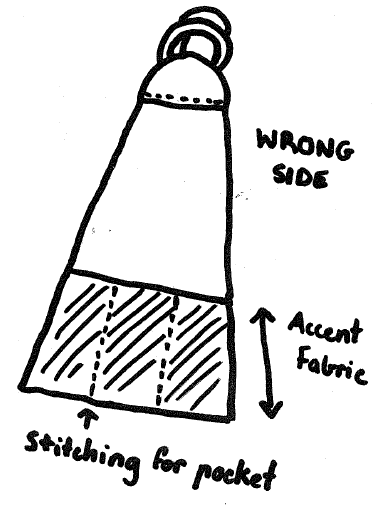
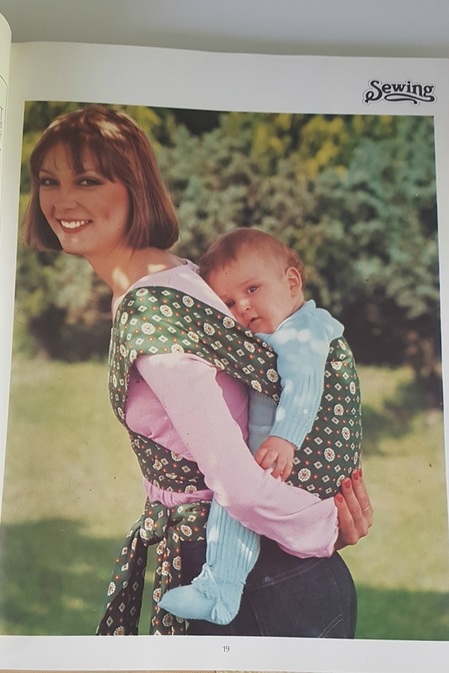
Some vintage baby carriers from the past 100 years or so. These baby carriers were not as common and not always as ergonomic as the carriers in use today but there were certainly quite a variety! There were rigid structured carriers , improvised carriers, tandem carriers, hip seats, and soft structured carriers. Structured carriersI came across lots of photos of carriers which look like little chairs and one which looks a little like a traditional cradleboard. Wearing baby on the back facing out seemed quite popular! Framed back packs were around too (at least from the 1960's). Baby carrier 1945 A man feeds a piece of a doughnut an infant in a baby carrier at the Hog Farm Collective commune, , New Mexico, October 1, 1969. Backpacks and Improvised CarriersSome caregivers didn't even use a baby carrier just improvised with what they had - for example just popping baby in their bag or back pack. Improvised baby carrier - 1926 Tandem CarriersSome carriers needed two people to use and some were not worn on the parent's body at all. Baby carrier for couples - Jack Milford - 1937 Welsh Family waiting for visiting King George V 1935 Hip SeatsHip carriers seemed to be popular with a few brands available although they don't look particularly comfortable with their narrow shoulder straps. DIY patterns are found for these carriers too. There was at least one pattern available through a popular commercial pattern company and I found another which was available through mail order. Cradleseat hip carrier (manufactured in London) Christmas shopping - December 1968 Hip seat pattern 1970's Bild-It-Yourself Club hip seat pattern. Soft CarriersThere were also soft carriers similar to the narrow based carriers still sometimes found today and some with a more ergonomic wider seat. The Snugli was also around (the earlier versions are actually more ergonomic than later designs with their wide seat, comfortably padded shoulder straps and waist belt). The nursing mother's association (now the Australian Breastfeeding Association) were producing their Meh Tai carrier from the 1960's. Narrow based carrier. The Snugli was invented by an American nurse, patented in 1969. It had padded adjustable shoulder straps, a waist band and an internal infant harness and could also be used for older babies without using the harness. There are some great detailed pictures in this link here https://www.etsy.com/au/listing/599372091/vintage-soft-blue-cotton-corduroy-snugli?show_sold_out_detail=1 Soft Carrier (possibly DIY) from the Selma to Montgomery March 1965 Nursing Mother's meh tai 1960's Do It YourselfSewing magazines and books also obsessionally offered DIY baby carrier patterns - some look quite comfortable like this meh dai like pattern from 1977. Some patterns however look less so like this hip carrier. (Creative Sewing Things to Make For Children Jeanne Argent Studio Vista1979) Do you have any vintage baby carrier photos to share. I would love to see! Sources for images in this article can be found here - https://www.pinterest.com.au/hipababy/babywearing-history/ How to add embelisments, accents and pockets to your ring sling . This article was originally published by me as a pdf. You can find the pdf and other DIY patterns on my DIY page. Don't have time to sew? Custom orders are available. Please contact me for details.  Your ring sling doesn't need to be boring. Adding bling to your ring sling is easy! Some of these ideas can be sewn straight on top of the tail or a plain ready made sling and others require you to sew the accent on before you sew in the rings. Ribbon TrimAdding ribbon, beaded trim, or braid is the simplest way to decorate your sling. You can create some great effects with ribbon or beaded trim. You can also sew a ribbon to the bottom or top of a fabric accent. Fabric Accent With Optional Hidden Pocket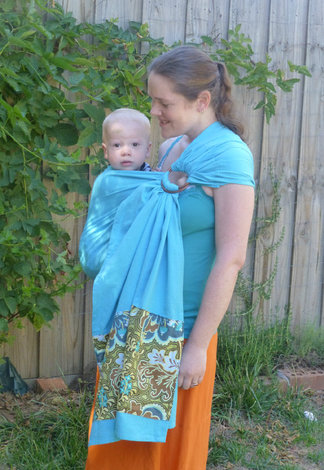 I generally don’t do accents longer than 42cm from the bottom edge of the tail so the accent won’t get caught in the rings if being shared by more than one wearer and the pocket (if you have one) is useable. The pocket will gape open if it is too close to the rings so take this into account when deciding what length of sling to make or the length of the accent. 30cm is a good accent height. You can leave a gap between the bottom of the accent and the bottom edge of the sling for a nice contrast or sew the accent right to the bottom edge. Fabric Needed: width of finished sling + 2.5cm x (length of accent + 4cm (for pressing and hemming). 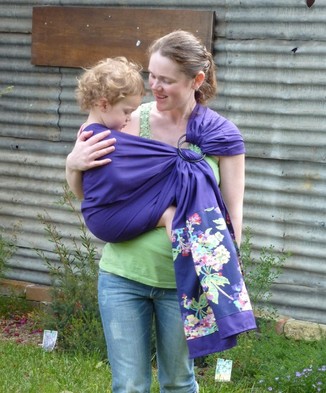 Sewing Instructions 1/ Hem the top edge of your accent then turn and press bottom edge under 12mm. The edge of the accent can be right on the bottom edge of the sling or you can place it 5-10cm from the edge. If you don’t want a pocket in your accent you don’t need to hem the top edge, simply press the top edge under by 12mm. 2/ Press the two short edges under by 12mm. 3/ Pin the accent on the wrong side of the sling (the side with the seam at the rings showing and the side of the tail with the neat side of the hem), so when the sling is threaded the accent will end up on the right side. Sew the sides and bottom edge of the accent to the sling. 4/ Sew the top closed to complete your accent or follow the directions below to make a hidden pocket. Adding a hidden pocket 5/ Divide the tail accent in three and mark with tailor’s chalk to the width of the accent. Sew three lines of stitching over your marks. 6/ With the right side of the tail (fashion fabric side) facing up, sew the top edges of two sections closed, leaving the middle section open to form a pocket. 7/ Cut one or two small pieces of Velcro about 3.5cm long. Sew one hook and one loop piece to the top of the pocket and the sling body to help keep it closed. Tip: When adding an accent to a reversible sling, when threading your machine, put your top colour of your sling through the needle and the bottom colour in the bobbin. The sewing lines will be hardly noticeable on the other side. Alternatively use the sewn in accent method. See the pocket section for some more examples of accent slings. Adding an accent to lengthen a too short sling/Double sided accentLength of material needed 74cm x 84cm (or double the width of accent you want plus 2.5cm seam allowance added). Sewing Instructions 1/ Put your sling on and decide where you would like the top of the accent to fall. No higher than around 18cm from the rings is a good guide, to prevent the accent being caught in the rings when making adjustments. 2/ Fold one long edge of the accent under 12mm. Pin on the edge of the sling or further up covering some of the tail (it depends on the finished length you would like, how you want the accent to sit and if you want to cut off any of the tail before sewing). Sew this edge to the sling. 3/ Fold the accent in half wrong sides together and pin the short edge on the tail, following your previous stitching line. Carefully pin the short sides together, then sew the two short edges from top to bottom. You can also topstitch along the bottom of the accent for a neater finish. Overhanging Lace AccentI think a very long lace overlay looks great on the tail of a sling but you can use a shorter length for a less dramatic effect. See information about accents above to decide on the length, just add some extra length if you want a tail overhang. For the sling below which has a very long accent you will need about a metre of fabric which will overlap the end by about 25 – 35cm. After you have made up your sling, cut your lace to size and hem the end and sides, then iron the top edge over by 12mm or if it has a neat selvedge you can just leave it. Pin the lace in place and sew to the sling along the top and sides.. Sewn in AccentThis method gives a neat finish on a double layer sling. Decide how long you would like the accent to be then subtract the same amount of length from the side you want the accent to show on. Don’t forget to add 12mm seam allowance to your solid colour and accent fabric. Begin with two the long pieces of your sling fabric. Sew the accent to your short solid colour piece, right sides together, turn right side out and iron. Sew the two sides of the sling using the reversible sling directions found in the Hipababy Ring Sling Pattern (see my DIY page). Find the turning hole and iron the seam allowance inwards. Topstitch. You are now ready to sew in the rings. Patch pocket with optional flap and velcro clousreThe flap of this pocket is handy to ensure nothing can fall out of your pocket and if you place the pocket on the sling edge you can fold the whole sling up and tuck it up into the pocket for handy storage. You can use these directions to make a simple patch pocket and it is easy to alter the size of the pocket to suit you. The dimensions given below are for a small pocket, with the finished size of 23cm x 23cm. I use a 6mm seam allowance for the pocket flap and 12mm for the rest of the pocket Cut your material to these dimensions – 25.5cm x 25.5cm Cut the pocket flap 25.5cm x 18cm 1/ Hem the top edge of the pocket and press the sides under. Sew a strip of Velcro to the top edge of the pocket (right side). You can sew Velcro along the whole top edge or put a small strip in the middle or two small strips on either side. For a pocket with no flap sew the Velcro to the wrong side of the pocket. Sew to pocket to the sling. Move the top of the pocket out of the way a little to sew the opposite strip of Velcro to the sling. 2/ Right sides together fold the flap in half and sew around all edges (6mm seam allowance), leaving a hole for turning. 3/ Turn the pocket flap right side out, press and then pin and sew three edges to the top of your patch pocket. The flap will overlap the top edge of the pocket - by how much is your choice. Patch pocket and border from a fat quarterUsing a fat quarter you can make a pocket and a border. You will need to piece the border together so choose a design which will lend itself to this.
For the pocket you will need: 32.5cm x30cm (finished size 30cm (wide) by 27cm tall) For the border on the opposite side you will need: 7cm x width of sling, plus 2.5cm seam allowance. To make the pocket: 1/ Hem the top edge with a 12mm rolled hem. 2/ Press under 12mm on the remaining sides. 3/ Sew two pieces of Velcro to the pocket top (on the wrong side). 4/ Lay the pocket on the sling where you would like to place it. Note where the opposite pieces of Velcro should go. Sew these to the sling. 5/ Sew the pocket to the sling making sure the Velcro pieces match up. 6/ Sew two strips of fabric (right sides together) with a 12mm seam to form a long strip, matching the design. Press the strip and then press all edges under by 6mm. Sew to the bottom of the sling. This pattern includes adjustable pouch with curved seam, non-adjustable pouch, ring sling with optional pocket in the tail and ideas for embellishments, and a mei tai/meh dai). Don't have time to make your own?Buckle doll carriers are available to purchase in my shop. Need any help or want to show off your creations? Join my Facebook chatter group here https://www.facebook.com/groups/1374361185941904/
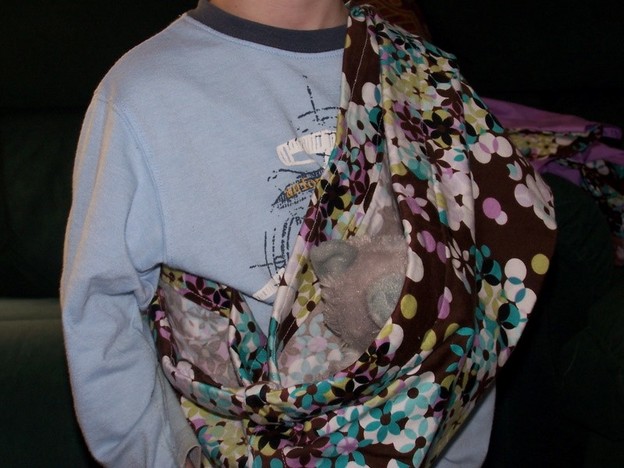
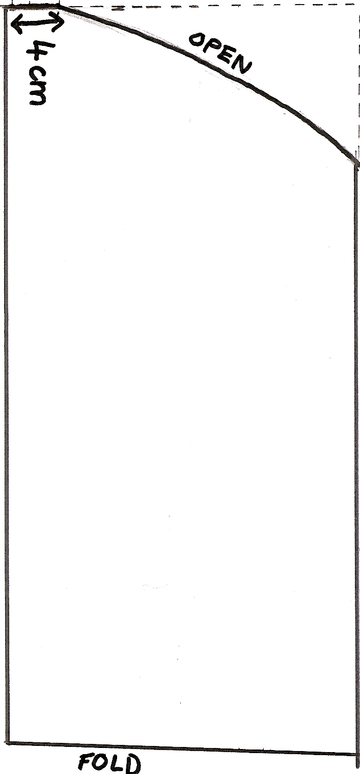
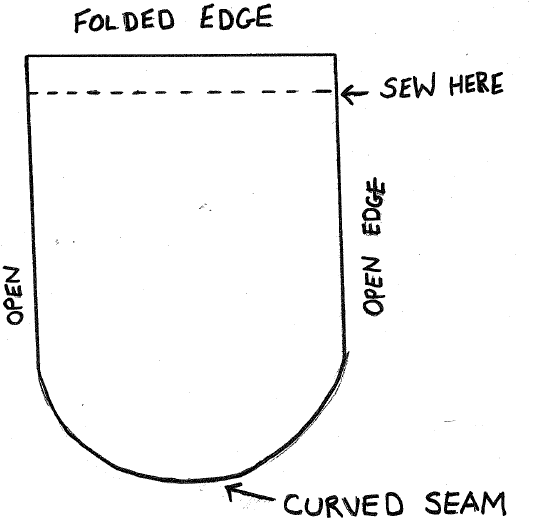
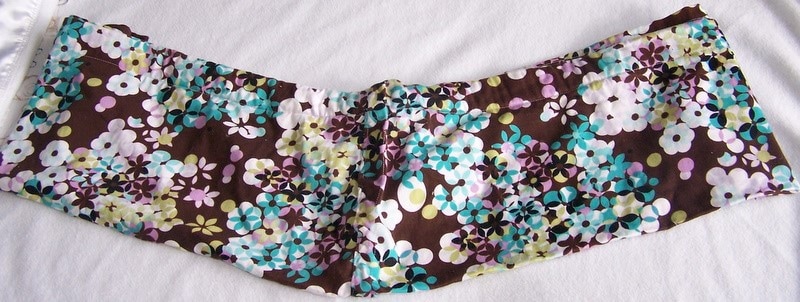
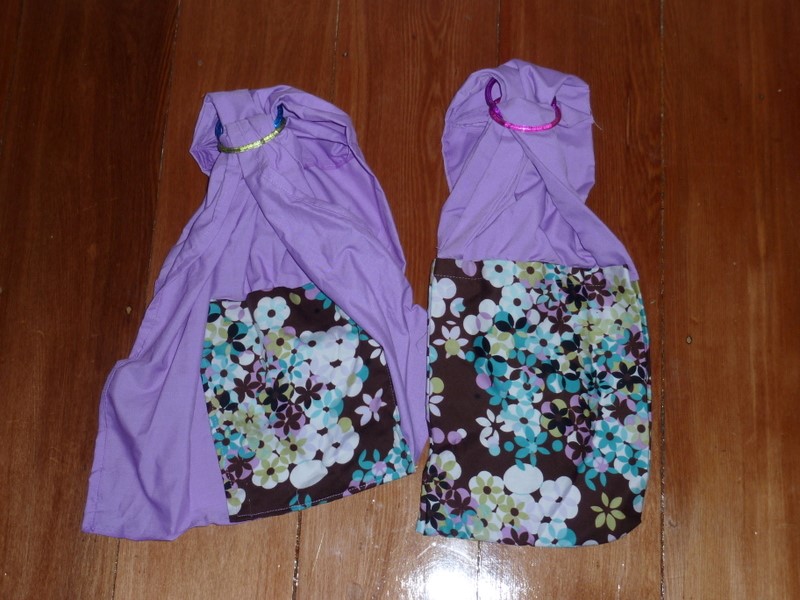
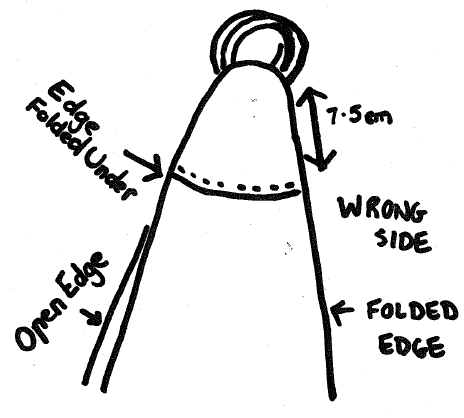
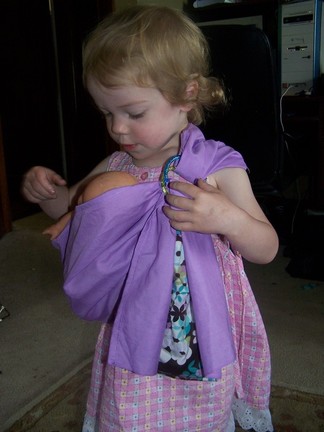
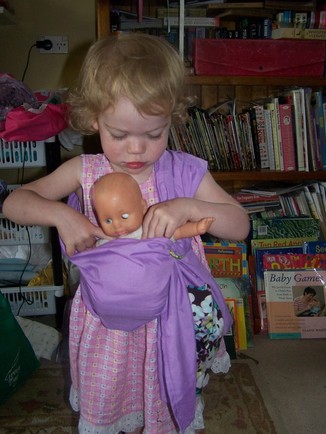
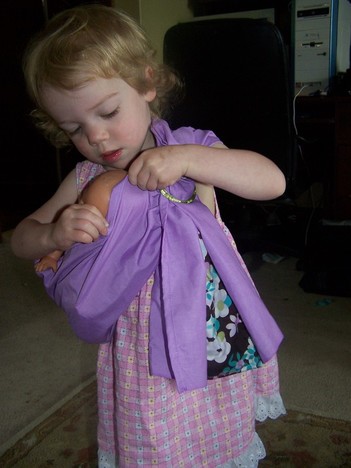
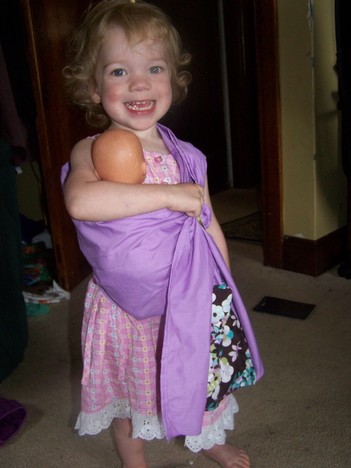
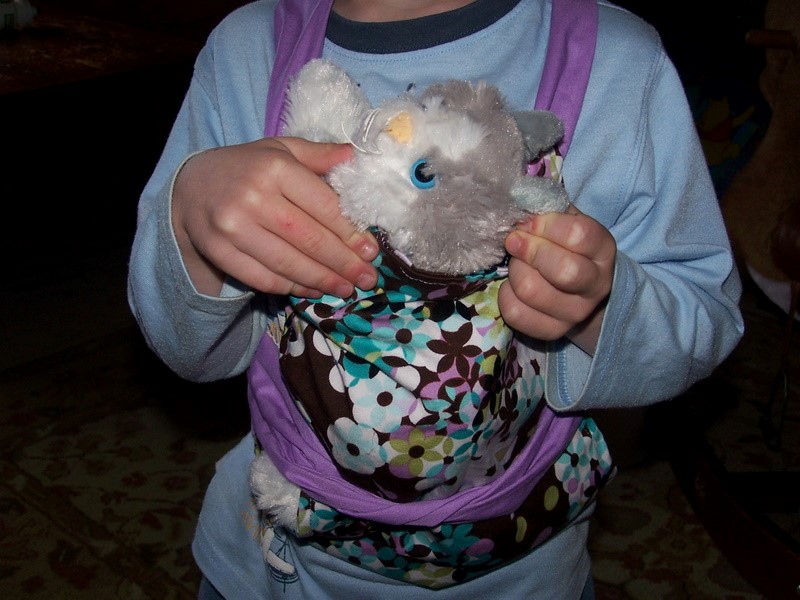
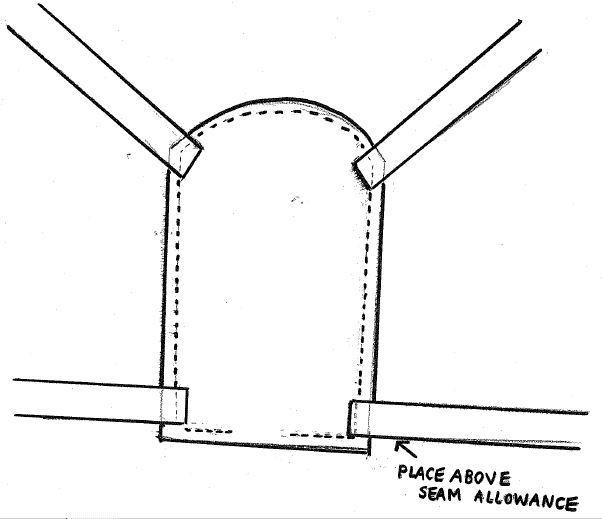
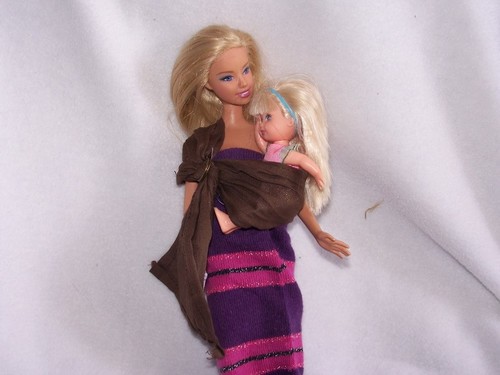
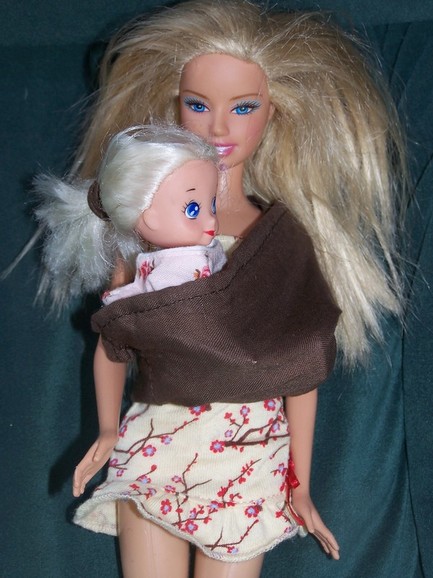
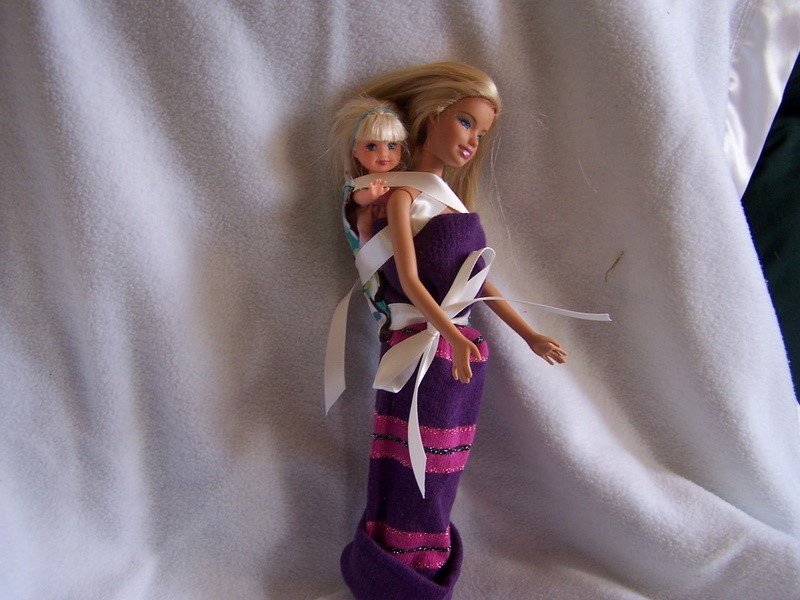
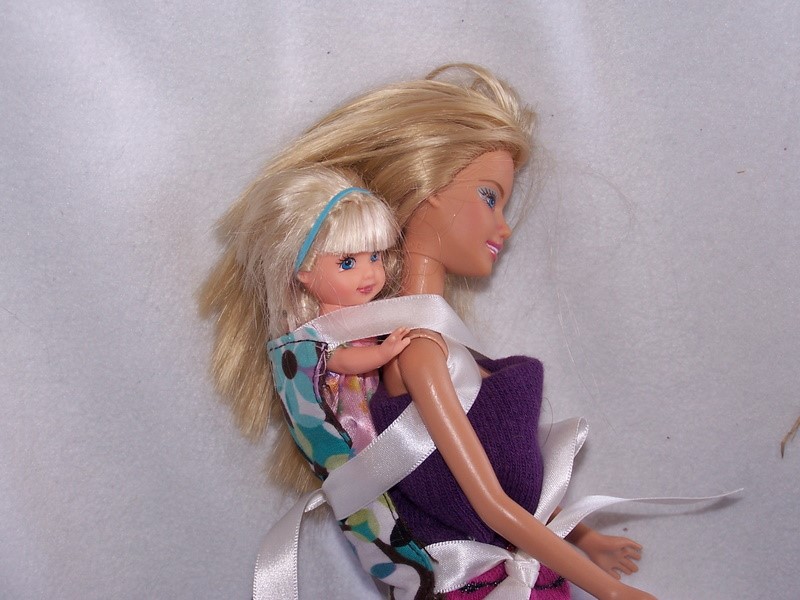
Child Sized Pouch With Curved SeamNon-adjustable Pouch Material needed –toddler 43cm x 89cm - preschooler 43cm x 101.5cm - primary schooler 43cm x 112cm For a narrower width pouch suitable for small dolls only - cut to a 35.5cm width For a pouch that will fit your child exactly, measure your child from the edge of their shoulder to the outside edge of their hip. Double this measurement and add 10cm. Add a few inches to this to allow for growth if desired. 1/ Fold material in half widthwise and lengthwise. Measure 5cm from the top end, then measure 4cm along the short open end – draw a gentle cure between these points. 2/ Open out the material. There should be a gentle curve or ‘smile’, on both ends. Right sides together sew the ‘smiles’ together. You can finish your sling now or sew a French seam (an enclosed seam) for a neater finish but it is not necessary unless you are making a reversible pouch. 3/ To make a French seam. After sewing the ‘smiles’ together, fold the seam over so the raw edge is enclosed and sew. This will leave an enclosed flap of material sticking out, sew this down to the sling carefully. 4/ Fold pouch in half lengthwise, creating a loop of fabric with one open side, this is where the doll will sit. You’re done! Adjustable Pouch This pouch will fit a child across all the size ranges given so you don’t need to make a new pouch as your child grows. If you wish to make it longer (i.e. to fit an older primary schooler) add more to the length and add more strips of Velcro spacing them as per the instructions below. You will need 45cm of 15mm wide Velcro for the basic pouch. Cut material to 43cm x 122cm, then follow steps 1-4 above. 1/ Cut across the top of the pouch where it is folded, opposite the curved seam. 2/ Turn the sling inside out and right sides together sew across each open end. Turn right side out. Your sling will look like this: 3/ You are now ready to add Velcro. Cut 3 strips, 15cm each. Sew the Velcro to the end of the sling 12mm from the top and 1.5 cm from the folded end. Sew the Velcro to one layer of the pouch only, open out the pouch as you sew. This will give you a neater finish. Sew the velcro strips to the sling 4cm apart. Repeat on the other edge of the sling making sure you sew on the correct side so the velcro will overlap when the sling is worn. Cutting down and unused adult sized pouch to fit a child 1/ Turn the edges of the pouch under 4 cm and sew 2/ Use the above measurements from the doll pouch pattern, or adjustable pouch pattern or measure your child as described. 3/ Open out the sling so there is two layers only with the wrong side facing out. Measure out the size needed and pin or tack the sling along the top flat folded edge. 4/ Try the sling on your child. If it is correct sew across the top edge. You can cut off the excess fabric or when you turn the sling right side out, tuck the flap or extra material created underneath (or sew it down). You can let out this seam as your child grows. The wider width sling is on the left. Both have pockets (the one on the right going across the whole width) and were made using child sized plastic bracelets for the rings. (note: the bracelets broke after a few years of light use so for a longer lasting sling you may want to use aluminum sling rings) Fabric needed: 35.5cm width for small dolls and 51cm for larger dolls. Length - 130cm for toddler - 141.5cm for preschooler - 152.5cm for older child or alternatively drape a tape measure completely around your child’s body (shoulder to hip and let the edge of the tape hand down to where you want the tail to end, and use this measurement). You can also make the sling a longer length than you think you will need, then try the sling on your child, then cut and hem to the correct length. (note: a tail longer than your child’s knees may be a tripping hazard). Sling Rings – Use child sized plastic bracelets (the ones I used were 5.5cm in diameter). You can also buy thin metal rings around this size from craft shops or alternatively you can purchase small size sling rings from slingrings.com which come in a great range of colours. 1/ Hem the long edges or your fabric. 2/ Fold and press one short edge down 12mm (not necessary for a reversible sling) 3/ Fold the sling in half lengthwise. This will create a pouch like pocket for the doll to lie in. The sling can be used on both shoulders but to switch shoulders you will need to rethread it so the open sides of the ‘pocket’ are towards your child’s neck. 4/ Measure and mark (15cm) across the top short edge. 5/ Gather the top edge in your hands and thread through the center of both rings. Pull the material through until you reach the measurement you marked earlier, then pin and sew along this line. 6/. You will now have a long piece of fabric with rings on the end. Thread the sling by gathering the short straight end, then threading it over one ring and under the other like a belt buckle. 7/ Try the sling on your child. Cut and hem to the desired length. Tip: One sling I made was too short so I sewed a contrasting fabric to the end of the sling (hemmed), using twice as much length as I needed. Then I folded it up and sewed the edges together, leaving the top open, to make a pocket. Decorating your Sling/Adding Pockets Some ideas:
|
|||||||||||||
| talk2.pdf | |
| File Size: | 219 kb |
| File Type: | |
| resources.pdf | |
| File Size: | 302 kb |
| File Type: | |
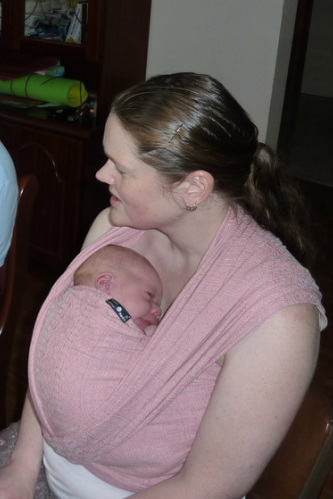
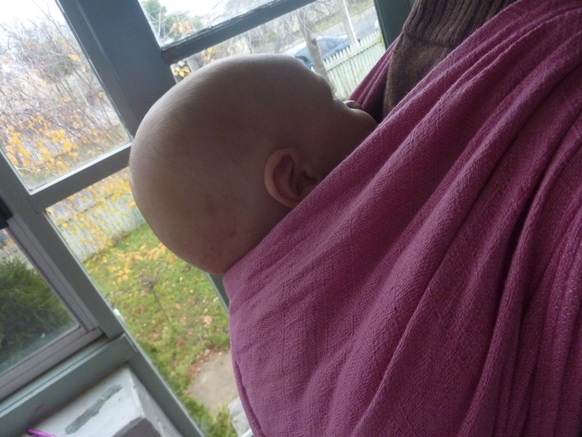
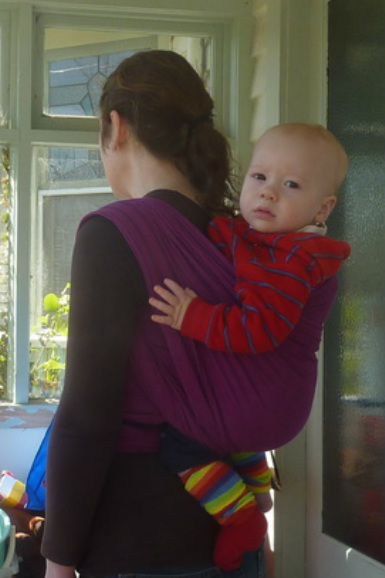
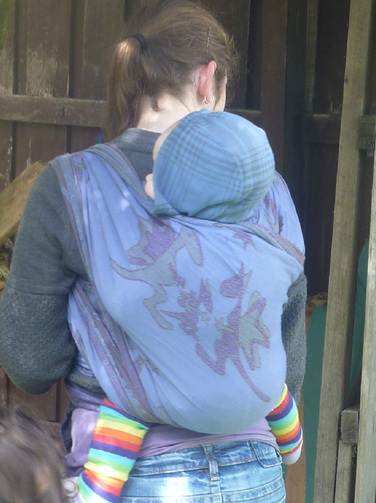
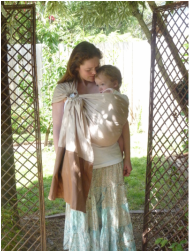
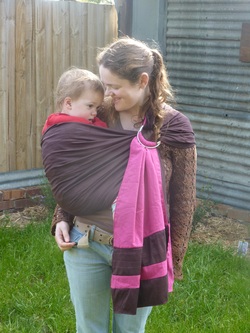
Cotton woven wrap conversions are excellent for all ages although a heavier gsm can provide more cushiness for a toddler.
Linen and silk are also great choices for both babies and toddlers, although linen can get a little diggy for heavy toddlers (but using a heavier weight of linen or a double layer of a thin linen works great).
Linen is stronger and tougher than cotton, owing to the parallel arrangement of its fibres. Silk is also a strong natural fibre and is simply beautiful. Linen and silk are especially good in a double layer or an extra wide width. I found single layer slings in linen or linen blend (regular width) supportive for my toddler until she was around two. If you choose this style you will get a lot of use out of it. A double layer of silk is probably one of the most supportive fabric combinations although some people find them hot at the height of summer.
Hot Weather?
Linen is highly recommended for hot weather babywearing. Linen both absorbs and loses moisture rapidly, and can absorb quite a bit of moisture initially without feeling damp. This helps to keep you and your baby cool.
Fabric Care?
All types of fabric I use are generally easily washable which is very important for anything around babies! Fabric care for cotton and linen blend slings is very easy. Simply wash on a gentle cycle on cold in a laundry bag and hang to dry. Linen and blends should only be washed with a liquid detergent. The addition of cotton to linen makes the fabric soft and they are not as prone to wrinkling as pure linen. Pure linen is great though. It wrinkles fairly easily but is a little more supportive which is a plus. To counter the wrinkles I iron my sling after every wash and hang on a hook when not in use - which keeps it fairly wrinkle free. Linen can feel a little stiffer/rougher when brand new but softens quickly with use and washing. The easiest way to care for silk is with spot cleaning (with a damp cloth) and occasional hand washing. Silk may also be dry cleaned. Machine washing on a gentle cycle is also possible but the silk will lose some of its sheen.
Wrap Conversions?
And lastly there are wrap conversions. This fabric is especially woven for babywearing, are generally thicker than other fabrics, and have just the right amount of give, so the fabric feels more cushy on your shoulder. Wrap conversions are fantastic for heavy babies and toddlers. There are many choices from cotton to cotton blends and more and are generally easy to care for.
If you would like any other information on the fabrics I use. Please feel free to ask.
Author
I love to sew. I have five curious and active kids who keep me busy!
Archives
May 2024
March 2024
October 2022
August 2022
July 2022
May 2022
May 2021
March 2020
August 2018
July 2018
June 2018
April 2018
February 2018
November 2017
September 2017
August 2017
July 2017
June 2017
April 2017
March 2017
February 2017
December 2016
September 2016
June 2016
June 2015
February 2015
May 2014
April 2014
March 2014
January 2014
December 2013
November 2013
October 2013
August 2013
June 2013
May 2013
March 2013
February 2013
January 2013
December 2012
November 2012
October 2012
September 2012
July 2012
June 2012
May 2012
April 2012
March 2012
January 2012
October 2011
August 2011
May 2011
April 2011
March 2011
February 2011
January 2011
December 2010
November 2010
October 2010
September 2010
August 2010
July 2010
June 2010
May 2010
April 2010




 RSS Feed